
Primeiros passos
Seu primeiro levantamento
Esta página percorre o ciclo completo, da instalação à exportação: abrir o aplicativo, baixar a área em que você vai trabalhar, escolher um protocolo de registro, inserir observações em campo, revisar o que foi coletado e extrair os dados. Cada etapa remete a uma página dedicada com todos os detalhes.
No account, no connection required. All data is stored in a single on-device database. Your records leave the device only when you export them or push them to a Drive folder yourself. The optional online features — weather, AI identification, GBIF, iNaturalist, place and taxon search, map tiles — send only what they need to work; see the privacy policy. The app works with the radio off once you have downloaded the map area you need.
Abrindo o aplicativo pela primeira vez
When you open EarthCape for the first time, no sign-up is required. The app creates a project for you automatically, named after your device, selects it, and assigns the Casual / incidental protocol. The project is empty — it contains no sample data, no demonstration observations, and no pre-loaded species lists. Use it as it is, or rename it before you begin.
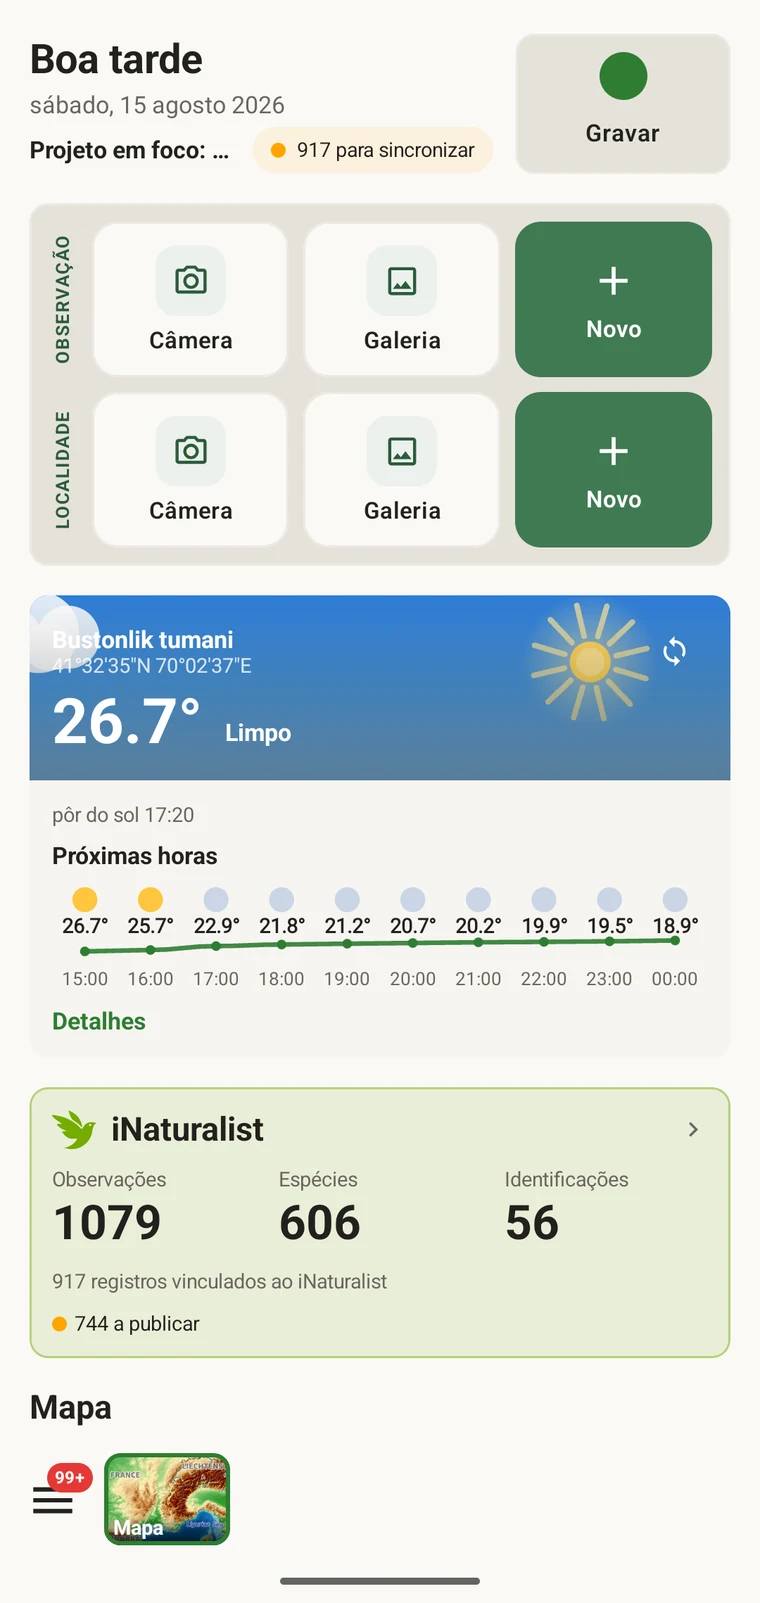
The home screen carries the Record button, quick actions for a new observation or locality (camera, gallery or blank form), and the weather card. Everything else — the map, your data lists, protocols, projects and Admin — is reached from the Menu button at the bottom left.
- Abra o aplicativo. A tela inicial carrega com o projeto criado automaticamente já selecionado.
- If you want to rename it, open Menu → Projects, tap the project and edit its name.
- Take note of the protocol shown — it is Casual / incidental by default. You can change it before you start recording; see Setting the protocol below.
Baixando a área do mapa
O mapa base cobre o planeta inteiro por meio de tiles vetoriais servidos pela nossa própria infraestrutura — sem chave de API, sem limite de uso. Antes de ir a campo, baixe a área em que vai trabalhar para que o mapa, o terreno e o relevo 3D funcionem com o rádio desligado. Veja Mapa e servidor de tiles e Mapas offline para todos os detalhes.
Baixando uma região
- Open the map (Menu → Map).
- Navegue até a sua área de estudo e enquadre na tela a área de que precisa.
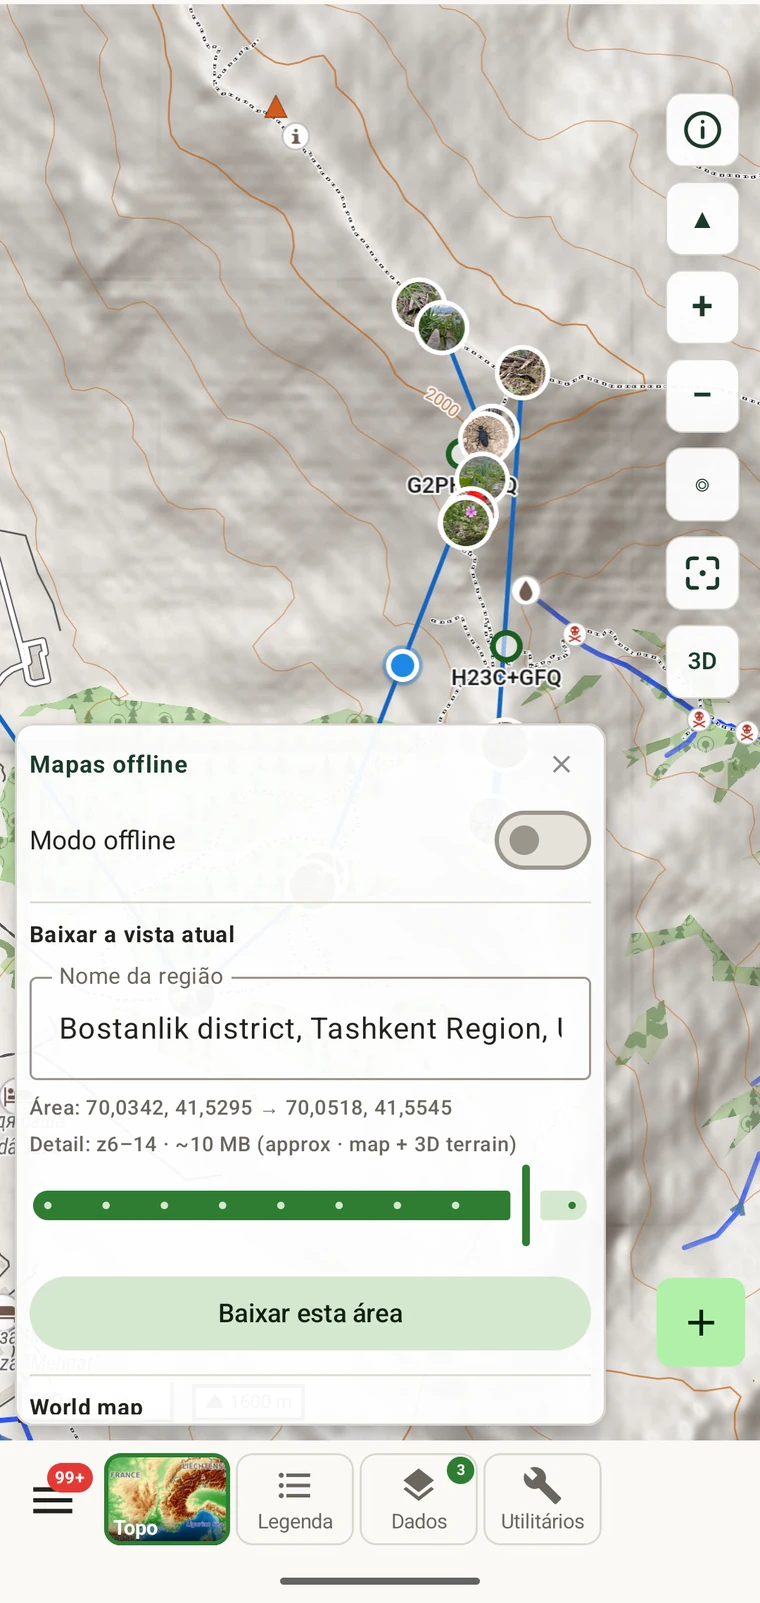
- Tap Tools in the toolbar at the bottom of the map screen, then tap Offline.
- The panel shows "Download current view". A region name is suggested automatically while you are online — for example, "Bostanlik district, Tashkent Region, Uzbekistan"; otherwise type one.
- Check the coordinates and size estimate. The estimate depends on the area and terrain — the district-sized example in the screenshot is about 11 MB at z6–14 — and includes the map and the 3D terrain model.
- Toque em "Baixar esta área" e espere o download terminar antes de ficar sem conexão.
Acrescentando a visão geral do mundo
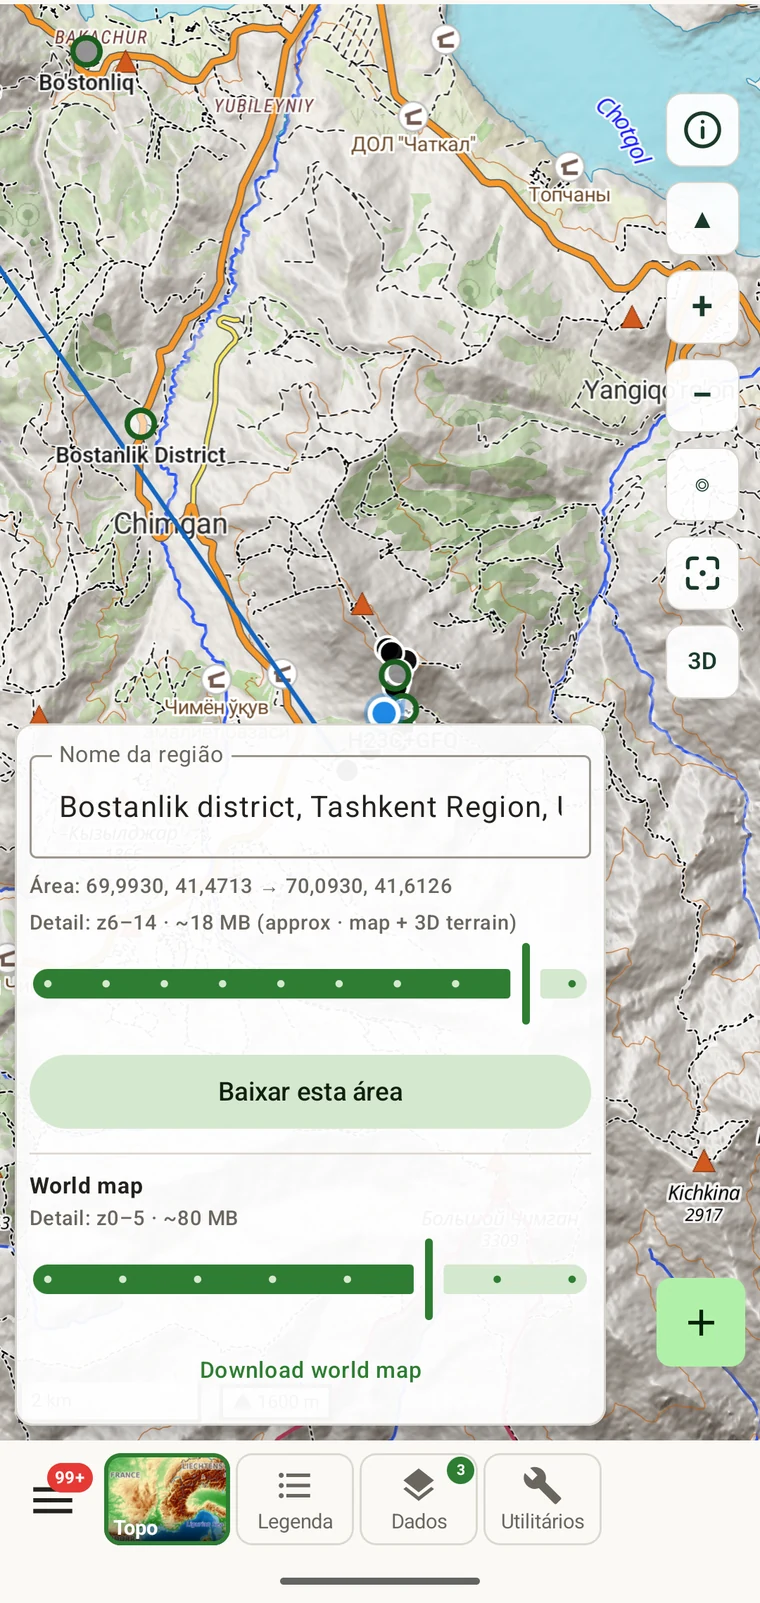
The world overview (z0–5, approximately 80 MB) gives you a rendered basemap at all zoom levels, so the map is never blank when you zoom out beyond your downloaded region. It only needs downloading once.
- In the same Offline panel, scroll down to World map. The detail line reads "Detail: z0–5 · ~80 MB"; the slider lets you change the depth (z0–7).
- Toque em "Baixar mapa mundial".
Definindo o protocolo e o formulário
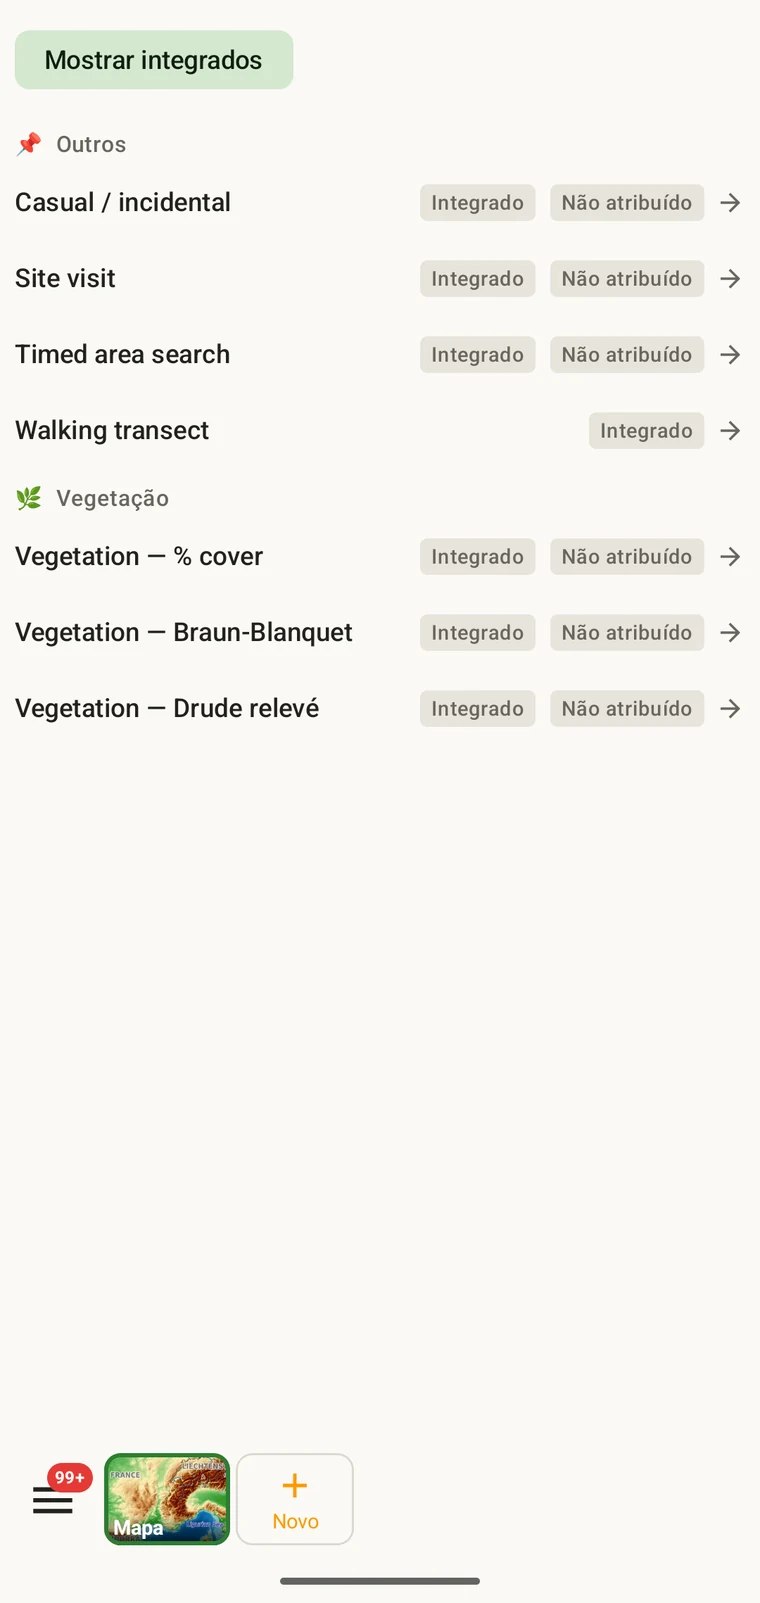
A survey protocol defines the structure of a recording session: what a visit is, which fields appear on the observation form, and how the data is organised for export. Every observation in a project is recorded under the project's active protocol. Seven protocols ship with the app, including Casual / incidental, which is assigned automatically to new projects. You can change the protocol, clone a built-in one to edit it, or write a new one in the Protocols Studio — all on the device.
The Form builder lets you control the field layout for each entity type: show or hide fields, reorder them, group them under headings, and add custom fields. Custom fields defined before the season starts travel with the project, so the whole team's form looks the same from the first day.
- Open Menu → Protocols. The list shows all seven built-in protocols and any you have created.
- Tap a protocol to view it. To assign it, open Menu → Projects, tap your project and under Survey protocol tap Assign a protocol (or Change).
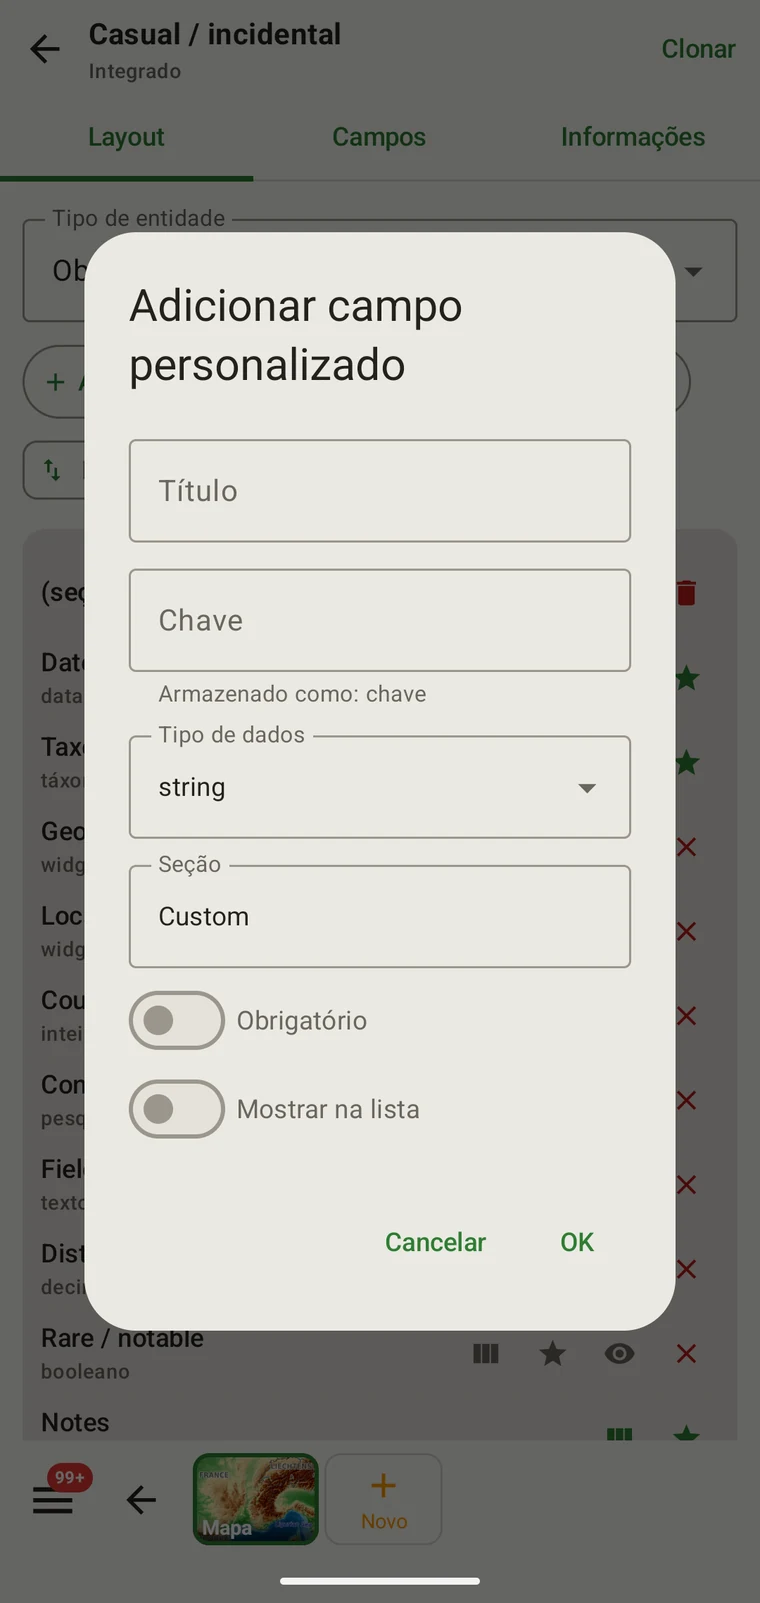
- To add a custom field, open the protocol in Protocols, switch to the Form builder tab, choose the Entity type (for example Observation) and tap Add custom field. Set the caption, key, data type and section, and whether the field is Required and Show in list.
- To share the configuration with colleagues, open the project under Menu → Projects and tap Share; the app writes a
.ecsurveysetup file with the project, protocol, forms, custom fields, sites and vocabulary. Colleagues open the file on their device, or use Import under Menu → Projects. To move the records as well, export a Frictionless Data Package from Menu → Admin → File Import & Export.
Registrando em campo
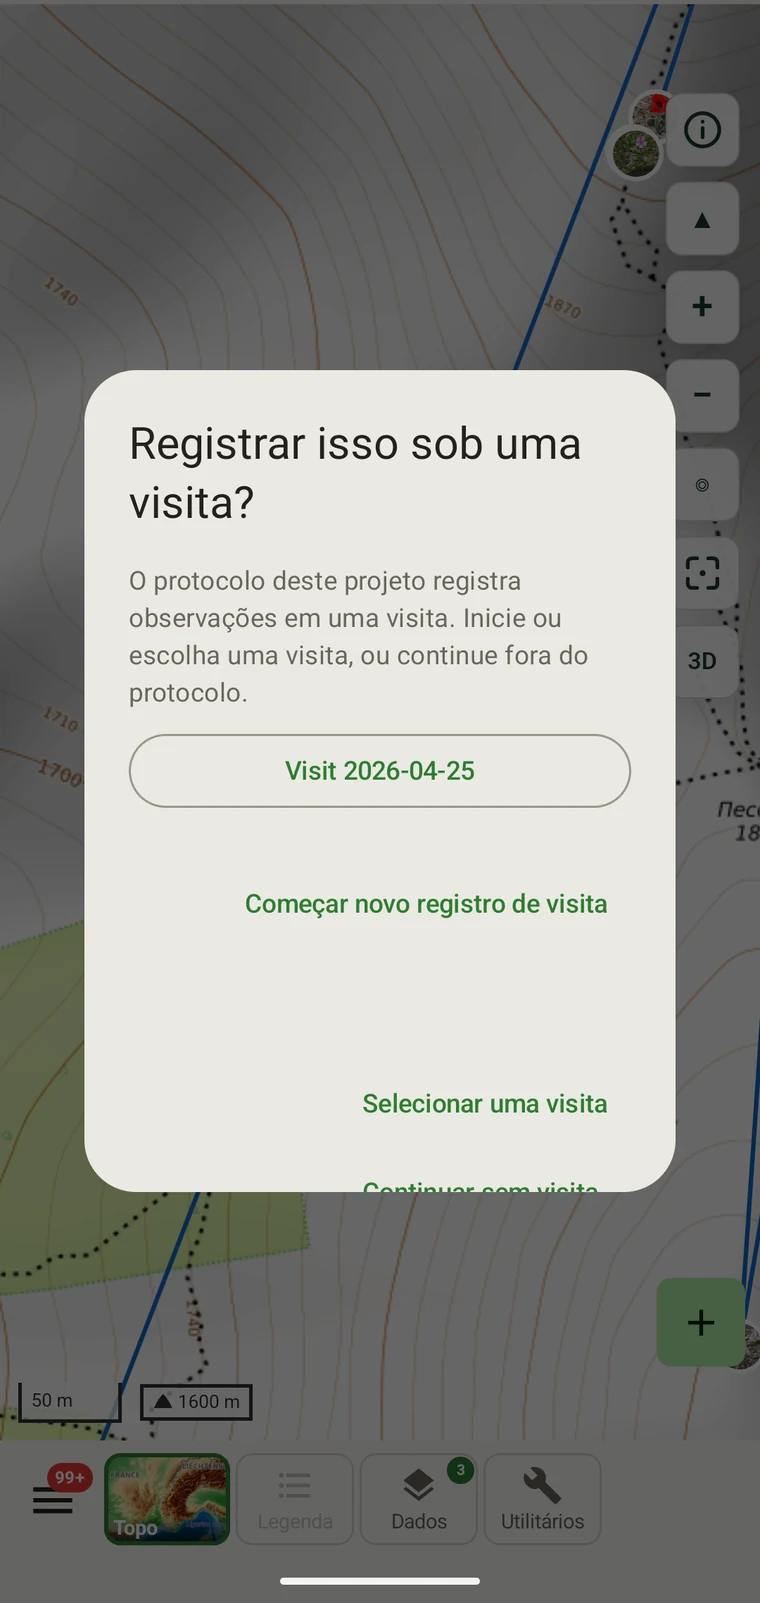
Recording a session means starting a GPS track, which creates a visit for the session, and entering observations as you work through the site. The Recording observations page covers all of this in detail.
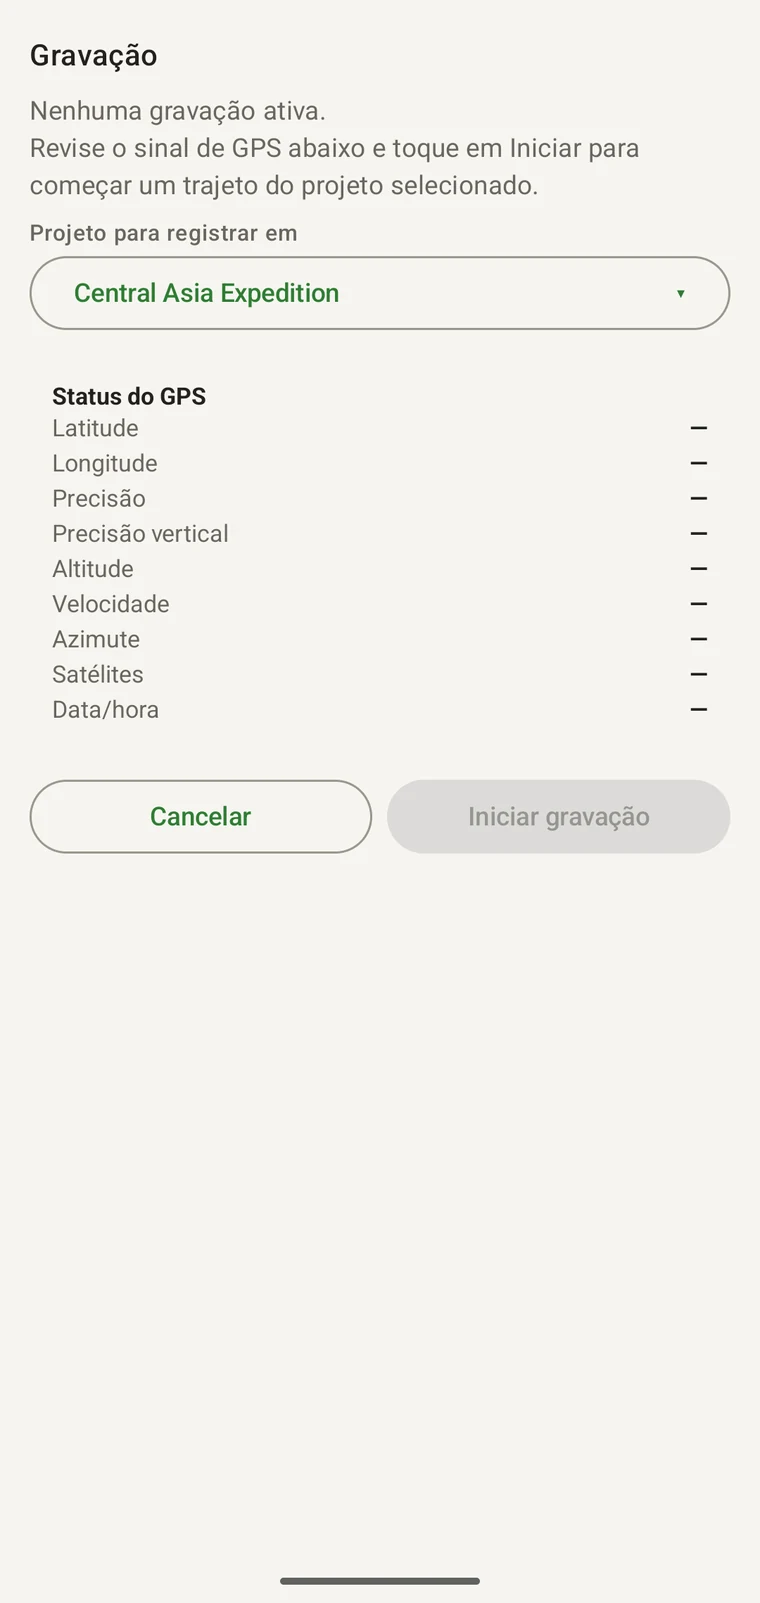
- Open Record from the home screen or the Record tile in the Menu.
- Check the GPS status fields before you start: Latitude, Longitude, Accuracy, V-Accuracy, Altitude, Speed, Bearing, Satellites and Timestamp are all shown. Wait until Accuracy reaches an acceptable value for your work — ±5 m or better is typical in open terrain.
- A tela mostra "Projeto em que registrar" com o nome do projeto ativo. Confirme que está correto.
- Tap Start recording. A visit is created for the session automatically, and observations you add while recording are linked to it.
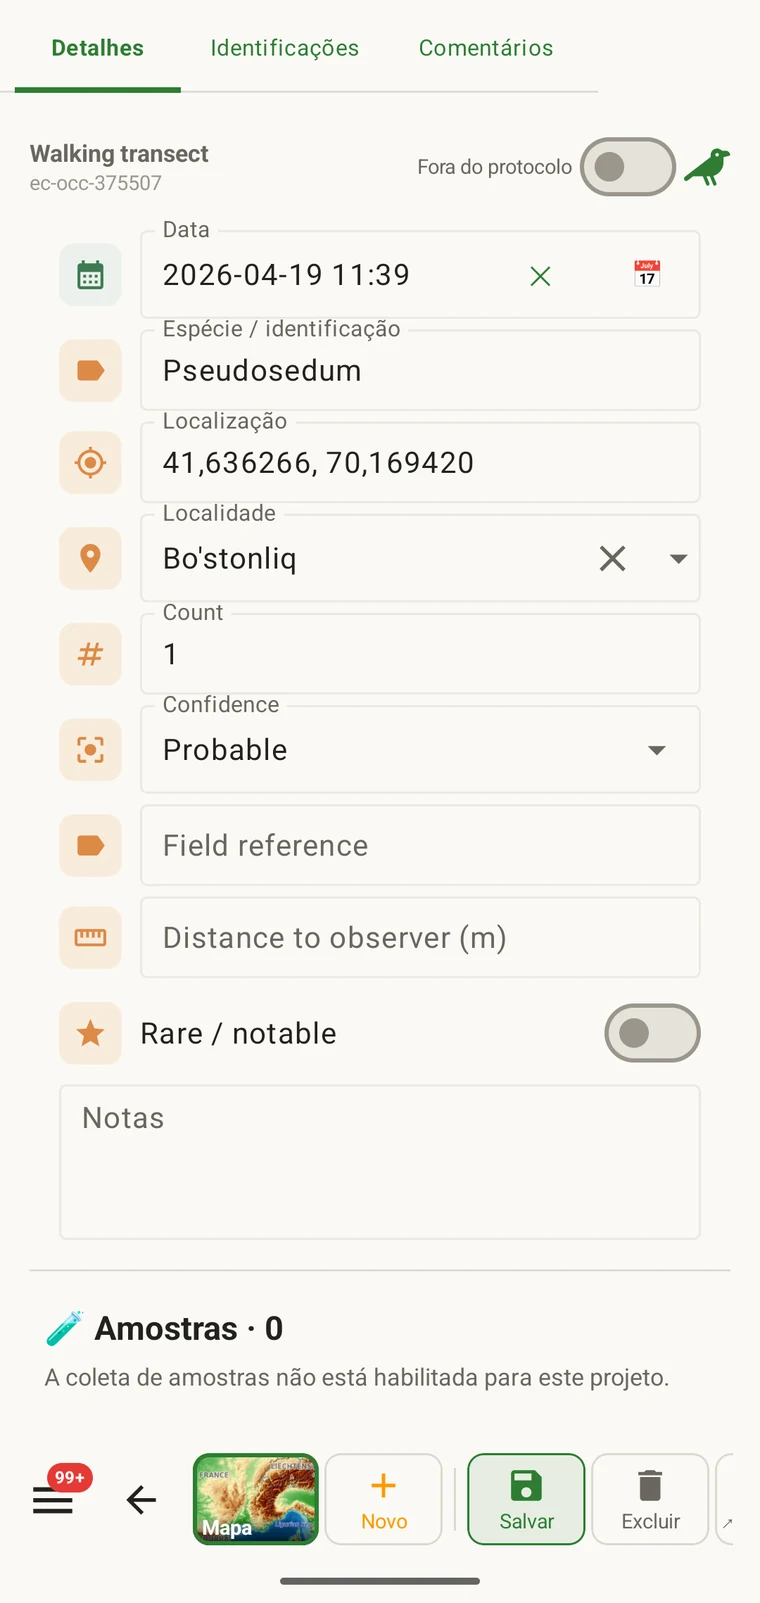
- Acrescente observações à medida que percorre a área. Cada observação abre o formulário do protocolo; preencha o táxon, os campos do protocolo e, se quiser, anexe uma foto.
- When the session is finished, tap Stop & save. The track and all observations are saved to the on-device database.
Conferindo o que você coletou
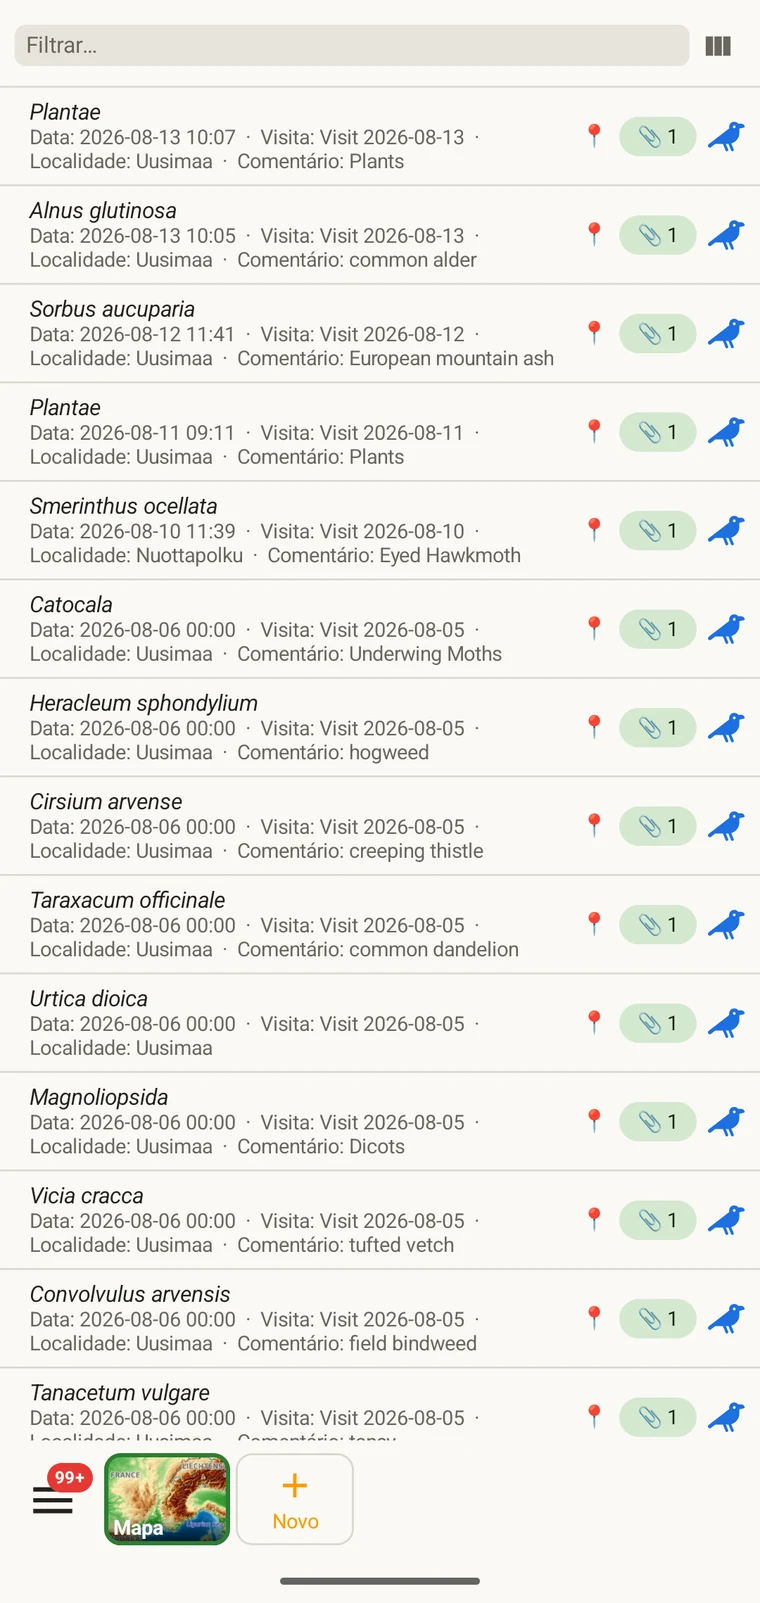
The data lists give you access to every record in the project as a filterable list. After a day in the field, use them to check completeness, find entry errors and open records for correction.
- Open Menu → Observations (or Visits, Localities, Taxa, or Files depending on what you want to review).
- The list opens with the default column set. Tap the columns icon (Choose columns) to add, remove or reorder columns — for example, add Accuracy or Altitude to check GPS quality.
- Type in the Filter… box to narrow the list; it matches text in any shown column. In the wide (tablet) grid each column has its own filter cell, and tapping a column header sorts by it.
- Toque em qualquer linha para abrir o registro completo e editá-lo.
Extraindo os dados
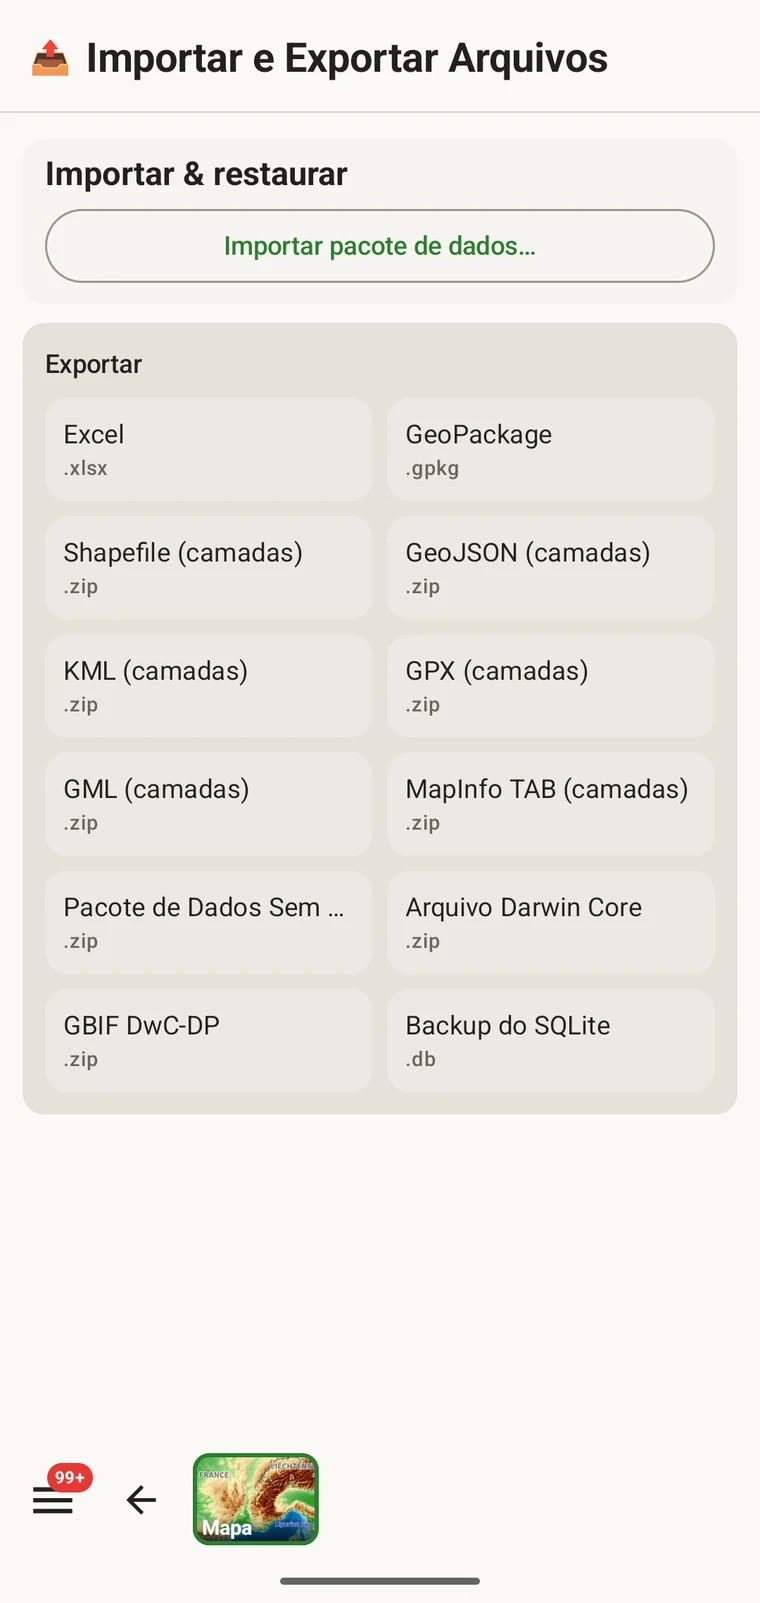
EarthCape exports to twelve formats. The right choice depends on your destination: Darwin Core Archive for a biodiversity repository, GeoPackage for a GIS, Excel for spreadsheet work. If several people are collecting data on the same survey, Google Drive lets you push each person's contribution to a shared folder and merge them — without an EarthCape account or a server (a Google account is needed for Drive). See Export formats and Google Drive collaboration for the full procedure.
- Open Menu → Admin → File Import & Export.
- Escolha o formato que corresponde ao seu destino. Os doze formatos estão listados na tela de exportação.
- Tap the format to generate the file. The filename is set automatically from the project name, its id and a timestamp.
- Compartilhe o arquivo pelo menu de compartilhamento do Android (Quick Share, Drive, Mensagens, Bluetooth, Gmail ou qualquer outro destino instalado), ou envie-o diretamente para um destino na nuvem já configurado.
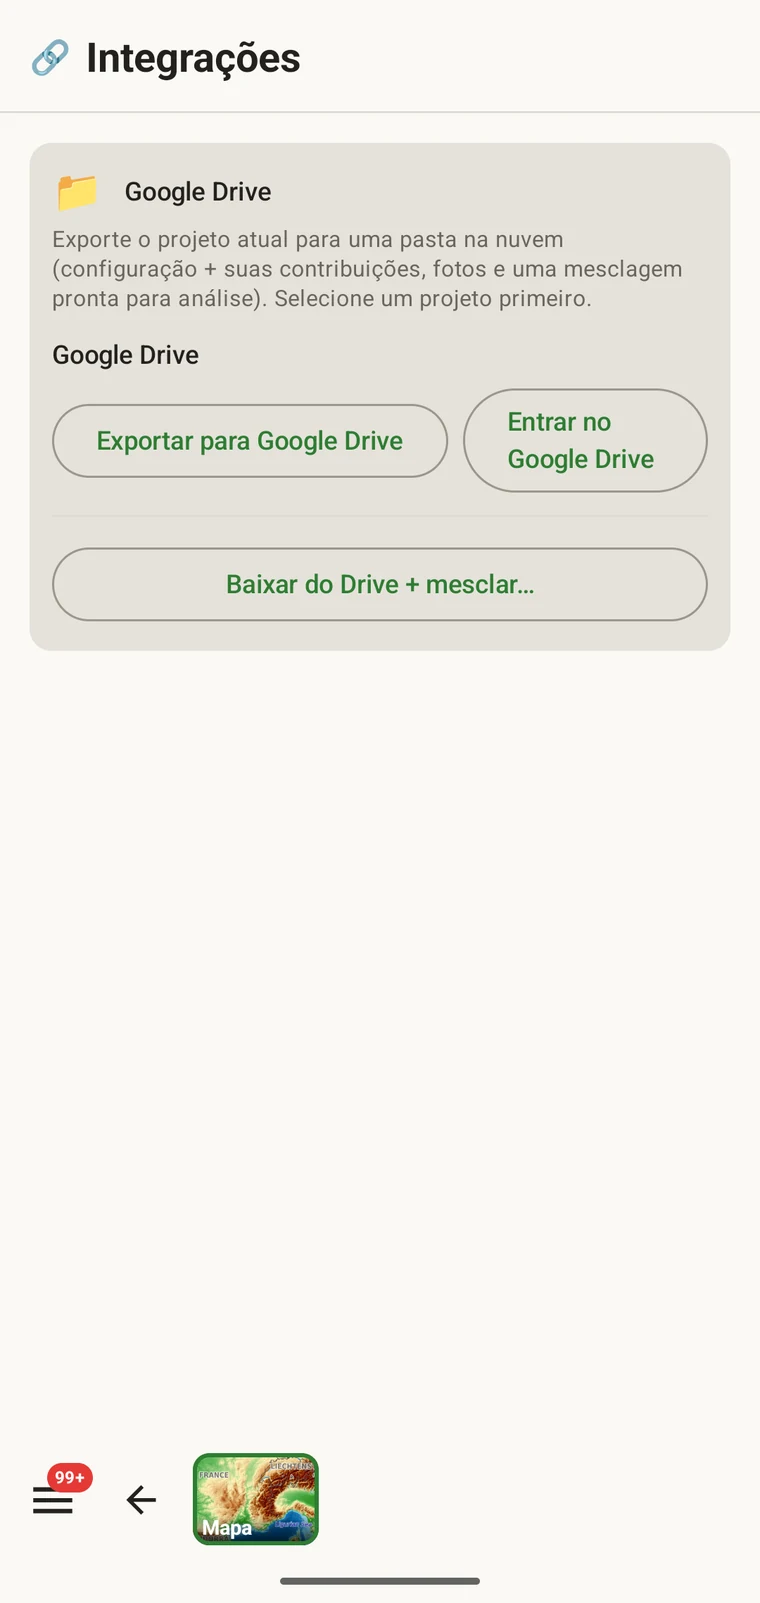
- Alternatively, open Menu → Admin → Integrations and tap Export to Google Drive to push the current project — setup, your contributions, photos and an analysis-ready merge — to a shared Drive folder.
O que ler em seguida
Cada tema tratado neste passo a passo tem uma página de referência dedicada com todos os detalhes.
| Se você quiser… | Vá para |
|---|---|
| Entender como o mapa base funciona e quanto custa | Mapa e servidor de tiles |
| Gerenciar áreas offline, conferir tamanhos, apagar downloads antigos | Mapas offline |
| Usar a medição no mapa, a aderência a trilhas e a pesquisa | Ferramentas do mapa |
| Aprender o fluxo completo de registro, visitas e localidades | Registro de observações |
| Configurar o layout do formulário e acrescentar campos personalizados | Formulários e campos personalizados |
| Ler ou escrever protocolos de levantamento | Protocolos de levantamento |
| Filtrar, ordenar e revisar os dados no dispositivo | Navegando pelos seus dados |
| Escolher o formato de exportação certo para o seu destino | Formatos de exportação |
| Compartilhar dados com colegas pelo Google Drive | Colaboração pelo Google Drive |