
Başlangıç
İlk arazi çalışmanız
Bu sayfa, kurulumdan dışa aktarmaya kadar tüm döngüyü adım adım anlatır: uygulamayı açma, çalışacağınız alanı indirme, bir kayıt protokolü seçme, arazide gözlem girme, topladıklarınızı gözden geçirme ve verileri dışarı alma. Her adım, tüm ayrıntıları içeren ayrı bir sayfaya bağlanır.
No account, no connection required. All data is stored in a single on-device database. Your records leave the device only when you export them or push them to a Drive folder yourself. The optional online features — weather, AI identification, GBIF, iNaturalist, place and taxon search, map tiles — send only what they need to work; see the privacy policy. The app works with the radio off once you have downloaded the map area you need.
Uygulamayı ilk kez açma
When you open EarthCape for the first time, no sign-up is required. The app creates a project for you automatically, named after your device, selects it, and assigns the Casual / incidental protocol. The project is empty — it contains no sample data, no demonstration observations, and no pre-loaded species lists. Use it as it is, or rename it before you begin.
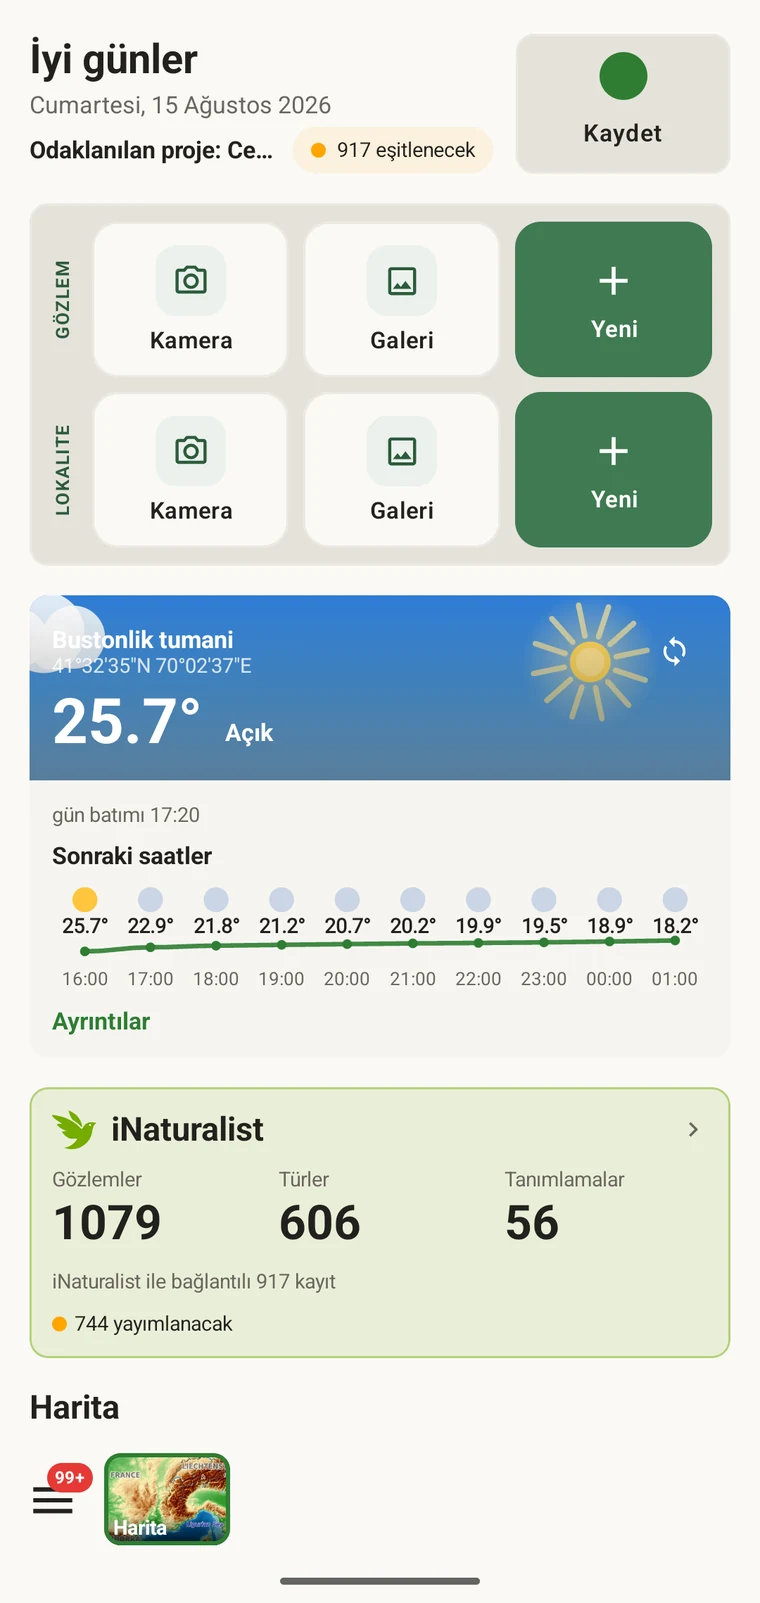
The home screen carries the Record button, quick actions for a new observation or locality (camera, gallery or blank form), and the weather card. Everything else — the map, your data lists, protocols, projects and Admin — is reached from the Menu button at the bottom left.
- Uygulamayı açın. Ana ekran, otomatik oluşturulan projeniz seçili olarak yüklenir.
- If you want to rename it, open Menu → Projects, tap the project and edit its name.
- Take note of the protocol shown — it is Casual / incidental by default. You can change it before you start recording; see Setting the protocol below.
Harita alanını indirme
Temel harita, kendi altyapımızdan sunulan vektör karolar aracılığıyla tüm gezegeni kapsar — API anahtarı yok, kullanım sınırı yok. Araziye çıkmadan önce çalışacağınız alanı indirin; böylece harita, arazi ve 3B kabartma telsiz kapalıyken de çalışır. Ayrıntının tamamı için Harita ve karo sunucusu ile Çevrimdışı haritalar sayfalarına bakın.
Bir bölgeyi indirme
- Open the map (Menu → Map).
- Arazi alanınıza gidin ve ihtiyaç duyduğunuz alanı görünüm penceresinde çerçeveleyin.
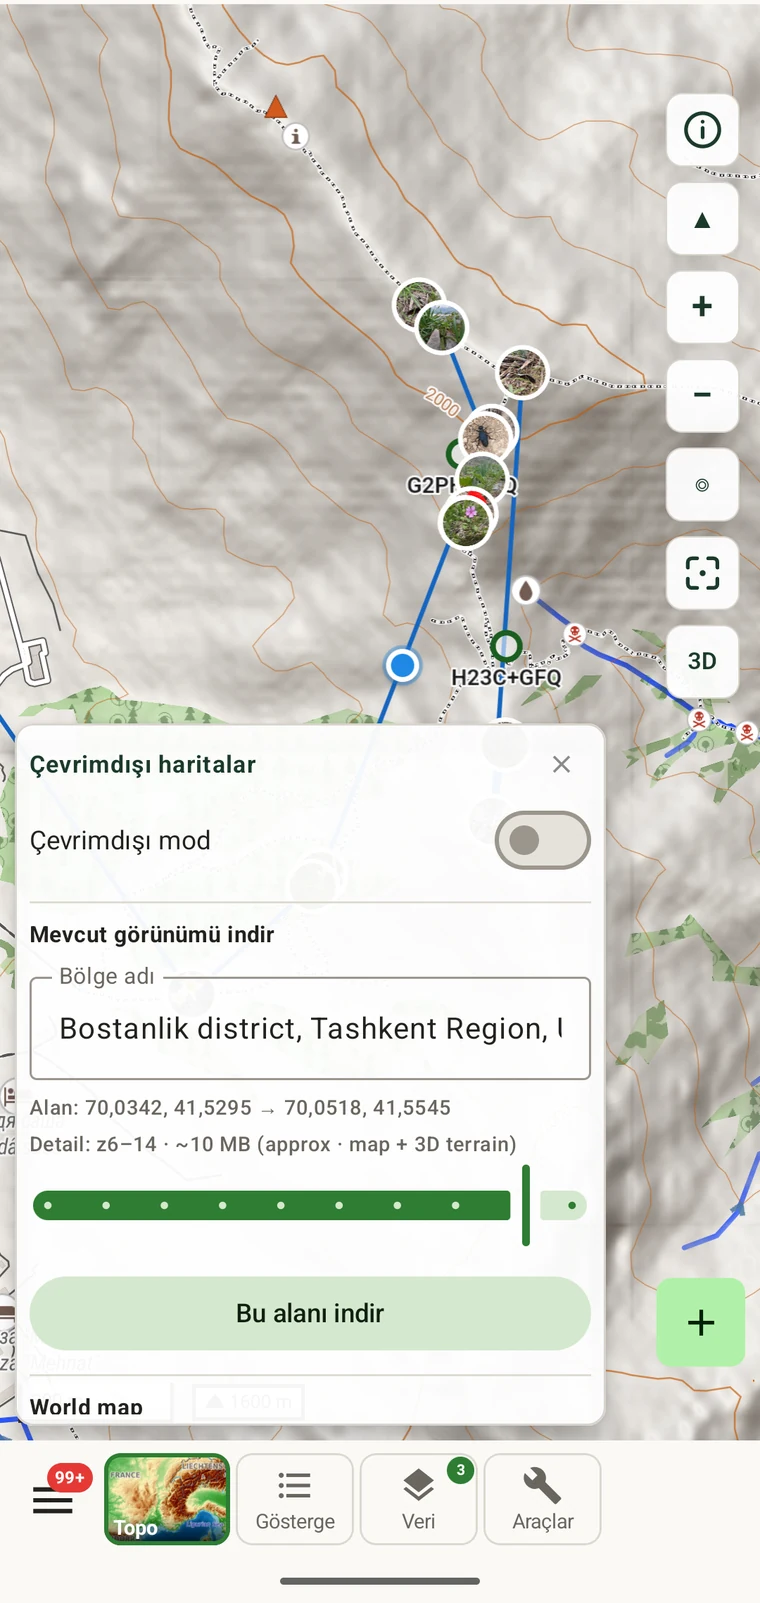
- Tap Tools in the toolbar at the bottom of the map screen, then tap Offline.
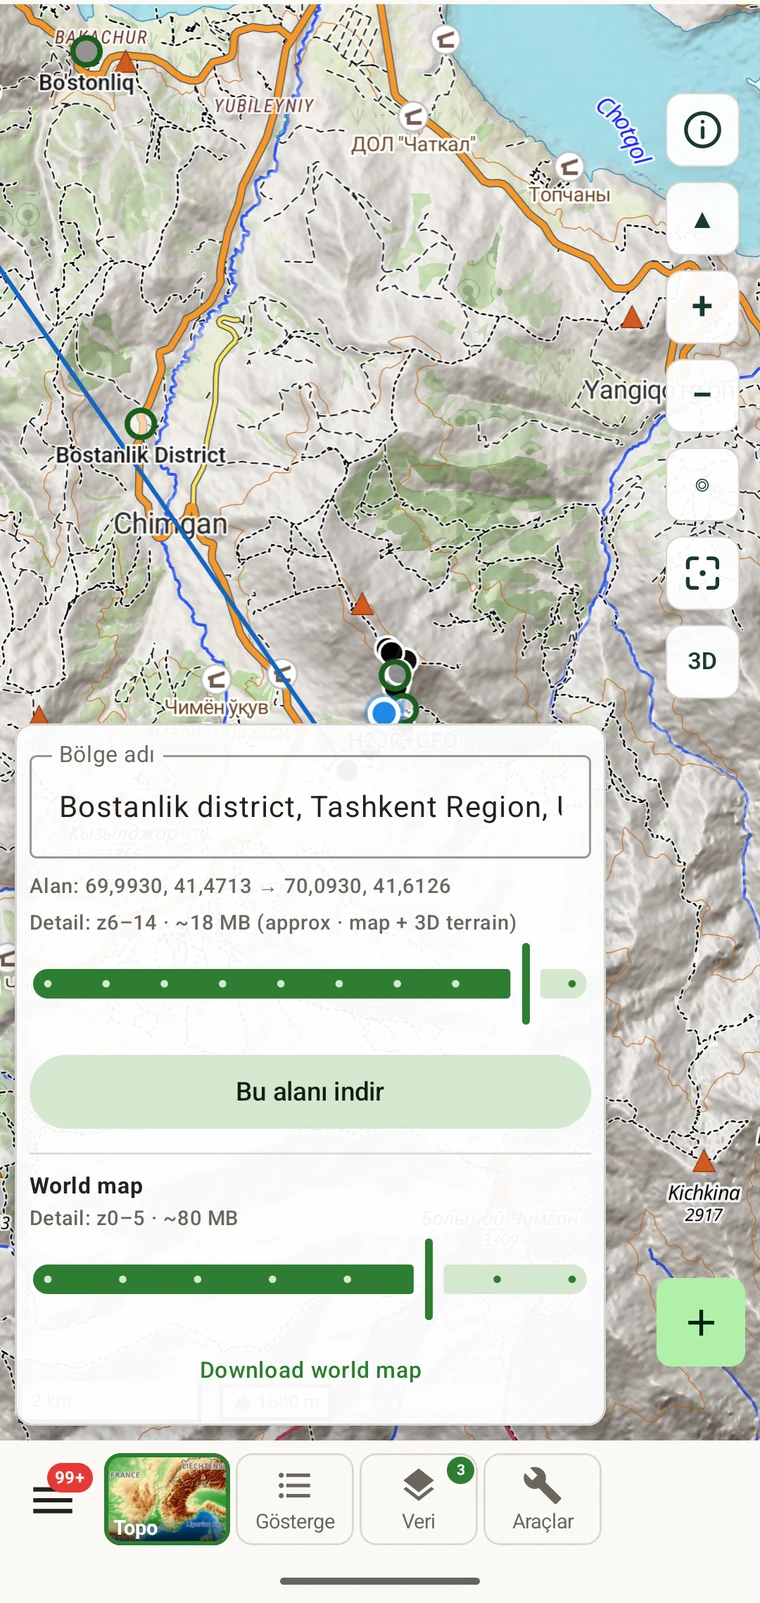
- The panel shows "Download current view". A region name is suggested automatically while you are online — for example, "Bostanlik district, Tashkent Region, Uzbekistan"; otherwise type one.
- Check the coordinates and size estimate. The estimate depends on the area and terrain — the district-sized example in the screenshot is about 11 MB at z6–14 — and includes the map and the 3D terrain model.
- "Bu alanı indir" öğesine dokunun ve bağlantıdan ayrılmadan önce indirmenin bitmesini bekleyin.
Dünya genel görünümünü ekleme
The world overview (z0–5, approximately 80 MB) gives you a rendered basemap at all zoom levels, so the map is never blank when you zoom out beyond your downloaded region. It only needs downloading once.
- In the same Offline panel, scroll down to World map. The detail line reads "Detail: z0–5 · ~80 MB"; the slider lets you change the depth (z0–7).
- "Dünya haritasını indir" öğesine dokunun.
Protokolü ve formu ayarlama
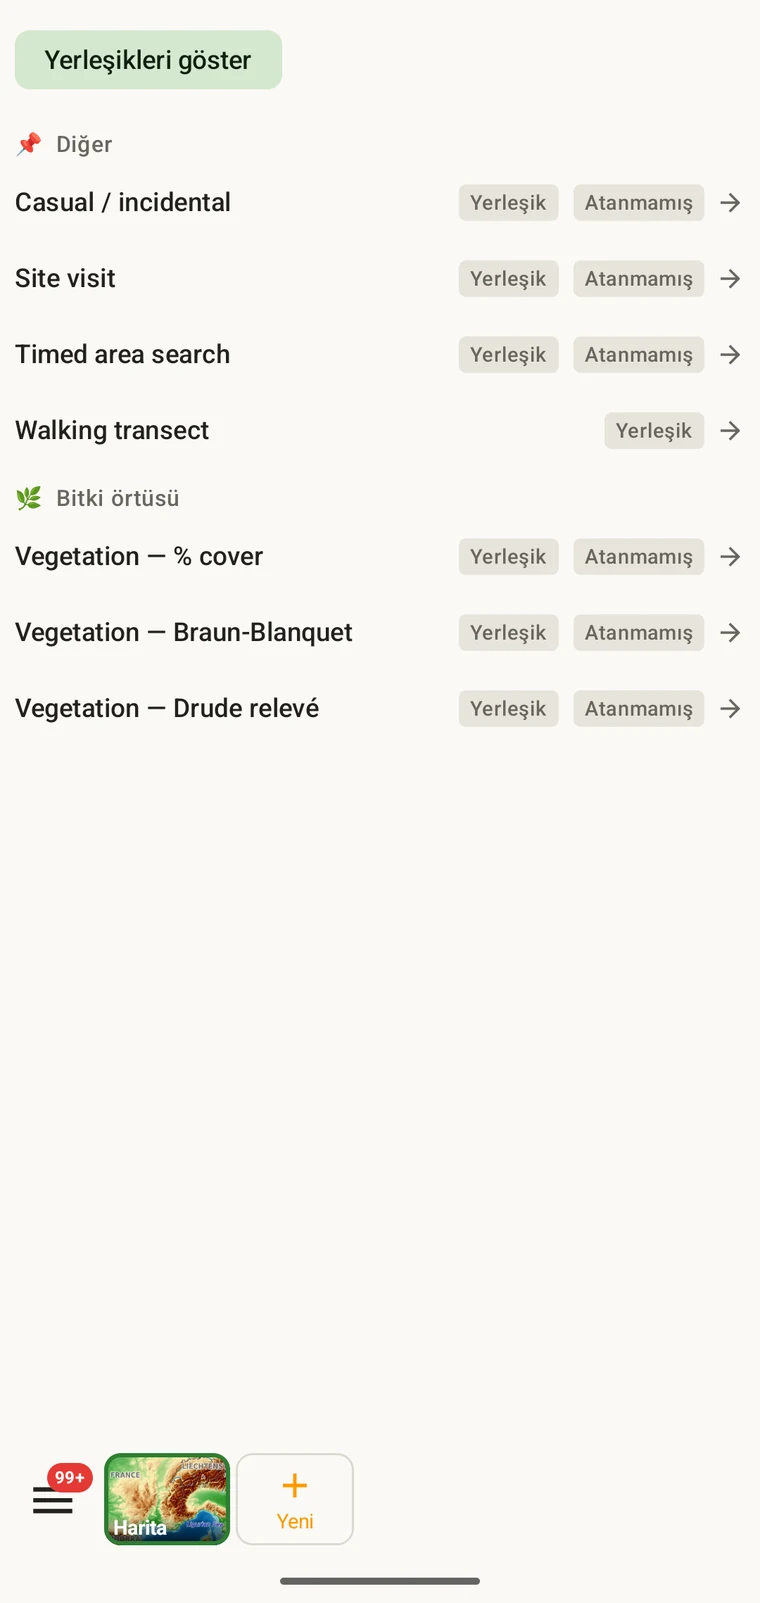
A survey protocol defines the structure of a recording session: what a visit is, which fields appear on the observation form, and how the data is organised for export. Every observation in a project is recorded under the project's active protocol. Seven protocols ship with the app, including Casual / incidental, which is assigned automatically to new projects. You can change the protocol, clone a built-in one to edit it, or write a new one in the Protocols Studio — all on the device.
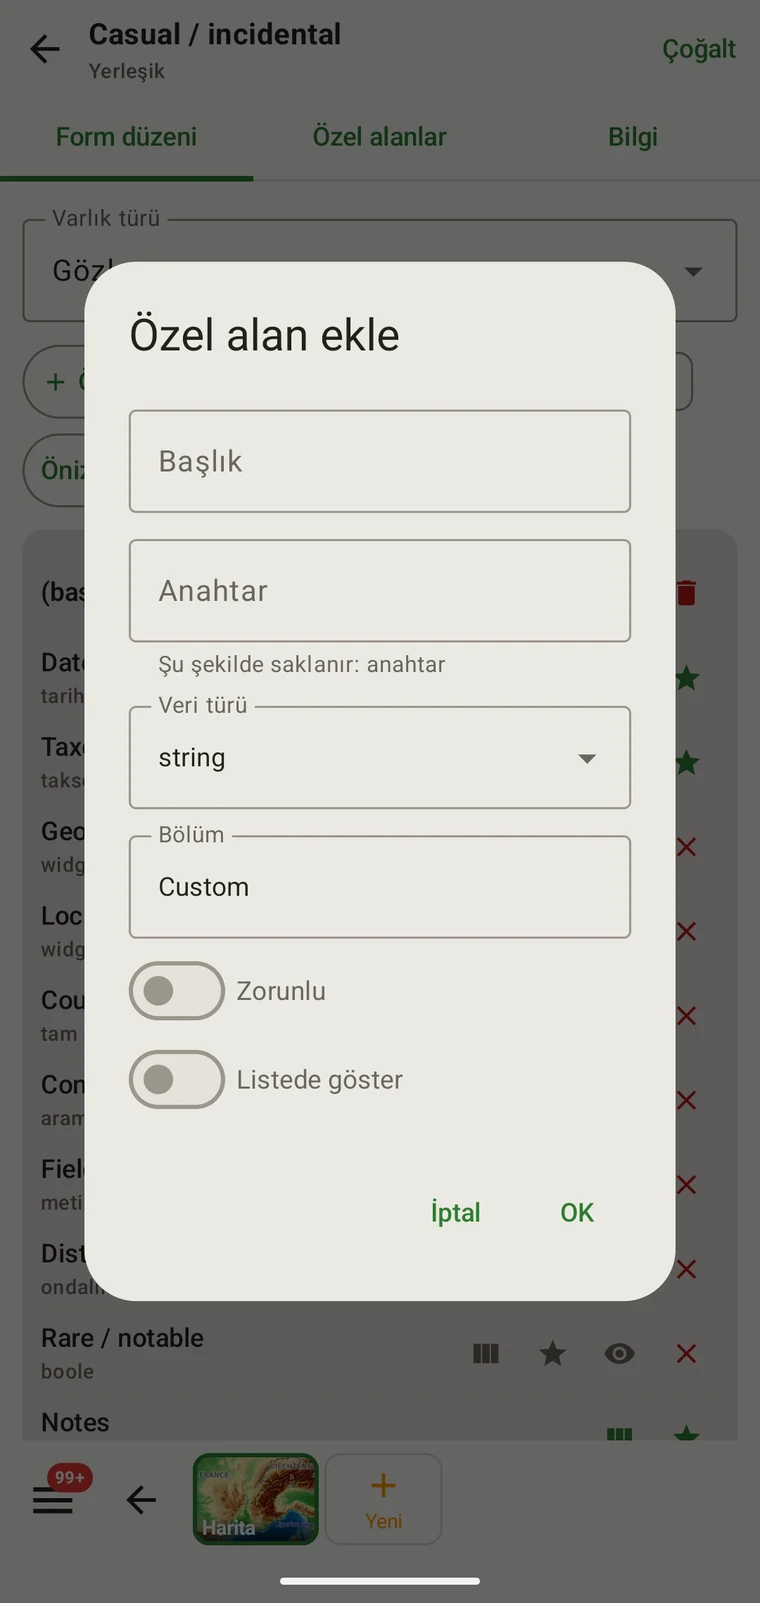
The Form builder lets you control the field layout for each entity type: show or hide fields, reorder them, group them under headings, and add custom fields. Custom fields defined before the season starts travel with the project, so the whole team's form looks the same from the first day.
- Open Menu → Protocols. The list shows all seven built-in protocols and any you have created.
- Tap a protocol to view it. To assign it, open Menu → Projects, tap your project and under Survey protocol tap Assign a protocol (or Change).
- To add a custom field, open the protocol in Protocols, switch to the Form builder tab, choose the Entity type (for example Observation) and tap Add custom field. Set the caption, key, data type and section, and whether the field is Required and Show in list.
- To share the configuration with colleagues, open the project under Menu → Projects and tap Share; the app writes a
.ecsurveysetup file with the project, protocol, forms, custom fields, sites and vocabulary. Colleagues open the file on their device, or use Import under Menu → Projects. To move the records as well, export a Frictionless Data Package from Menu → Admin → File Import & Export.
Arazide kayıt
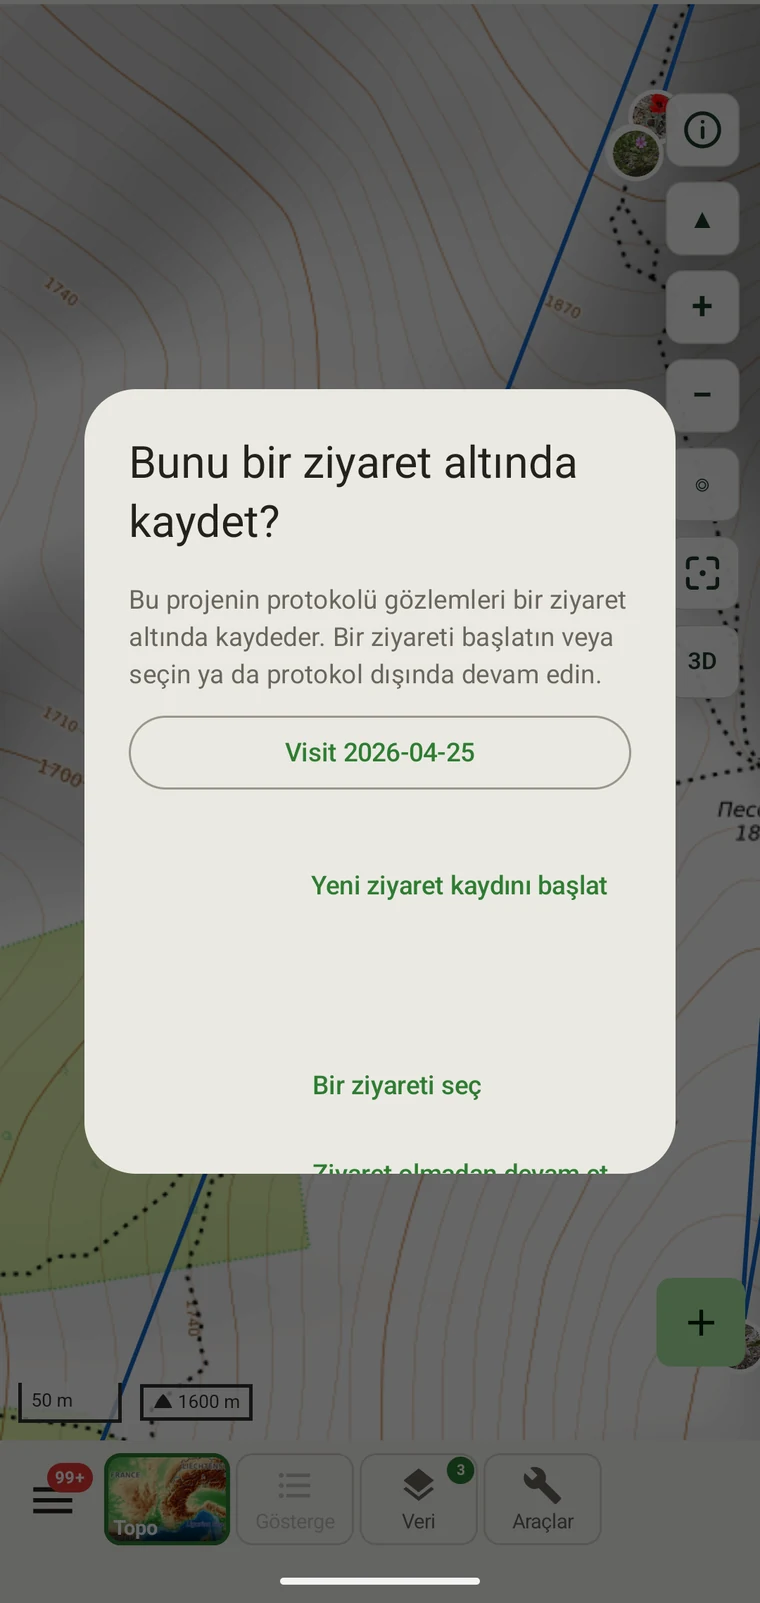
Recording a session means starting a GPS track, which creates a visit for the session, and entering observations as you work through the site. The Recording observations page covers all of this in detail.
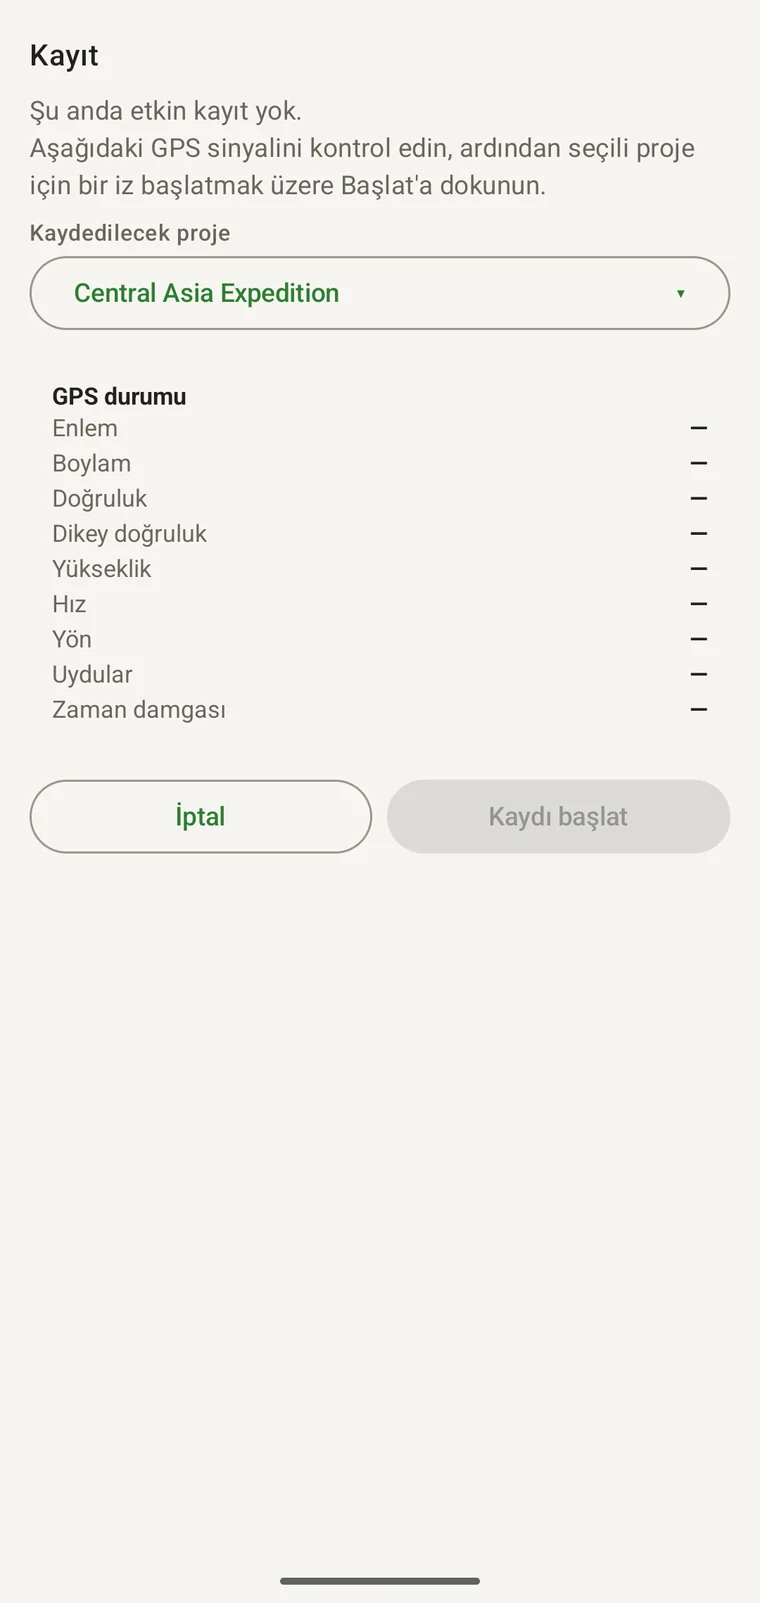
- Open Record from the home screen or the Record tile in the Menu.
- Check the GPS status fields before you start: Latitude, Longitude, Accuracy, V-Accuracy, Altitude, Speed, Bearing, Satellites and Timestamp are all shown. Wait until Accuracy reaches an acceptable value for your work — ±5 m or better is typical in open terrain.
- Ekran, etkin proje adıyla birlikte "Kaydın yapılacağı proje" bilgisini gösterir. Doğru olduğunu onaylayın.
- Tap Start recording. A visit is created for the session automatically, and observations you add while recording are linked to it.
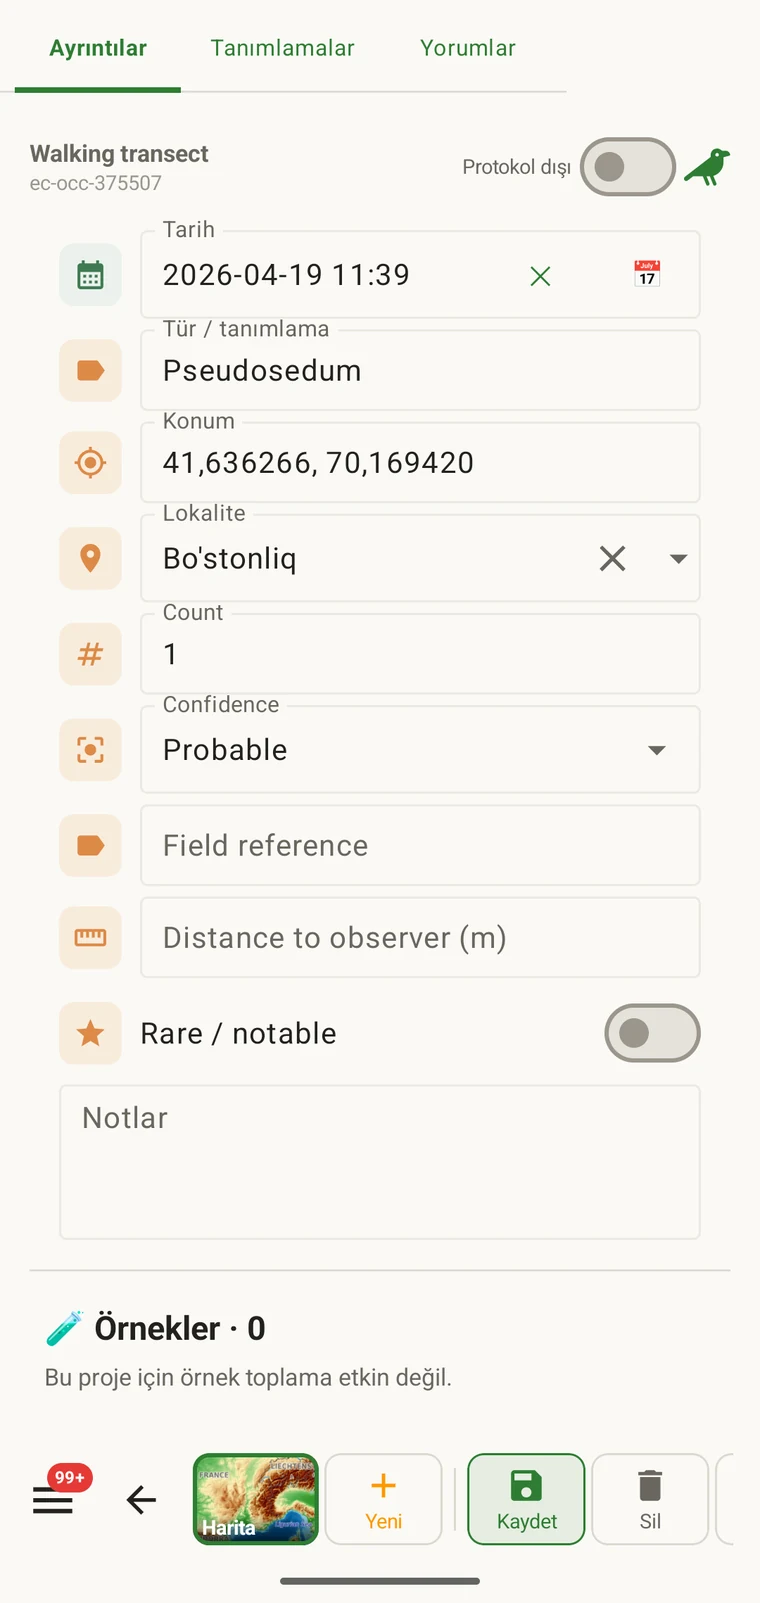
- Alanda ilerledikçe gözlem ekleyin. Her gözlem, protokolün formunu açar; taksonu ve varsa protokol alanlarını doldurun, isterseniz bir fotoğraf ekleyin.
- When the session is finished, tap Stop & save. The track and all observations are saved to the on-device database.
Topladıklarınızı denetleme
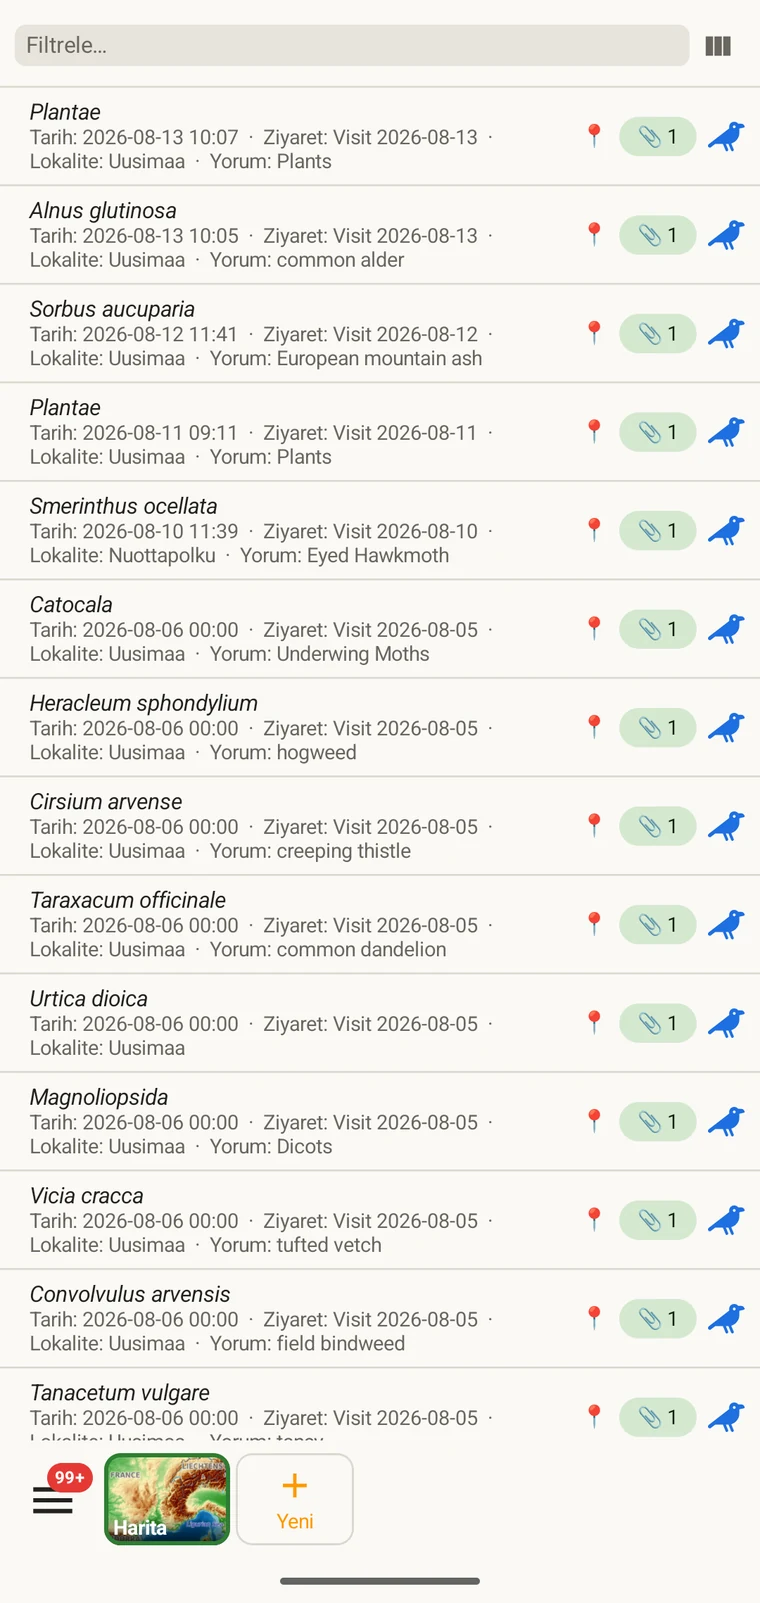
The data lists give you access to every record in the project as a filterable list. After a day in the field, use them to check completeness, find entry errors and open records for correction.
- Open Menu → Observations (or Visits, Localities, Taxa, or Files depending on what you want to review).
- The list opens with the default column set. Tap the columns icon (Choose columns) to add, remove or reorder columns — for example, add Accuracy or Altitude to check GPS quality.
- Type in the Filter… box to narrow the list; it matches text in any shown column. In the wide (tablet) grid each column has its own filter cell, and tapping a column header sorts by it.
- Kaydın tamamını açıp düzenlemek için herhangi bir satıra dokunun.
Veriyi dışarı çıkarma
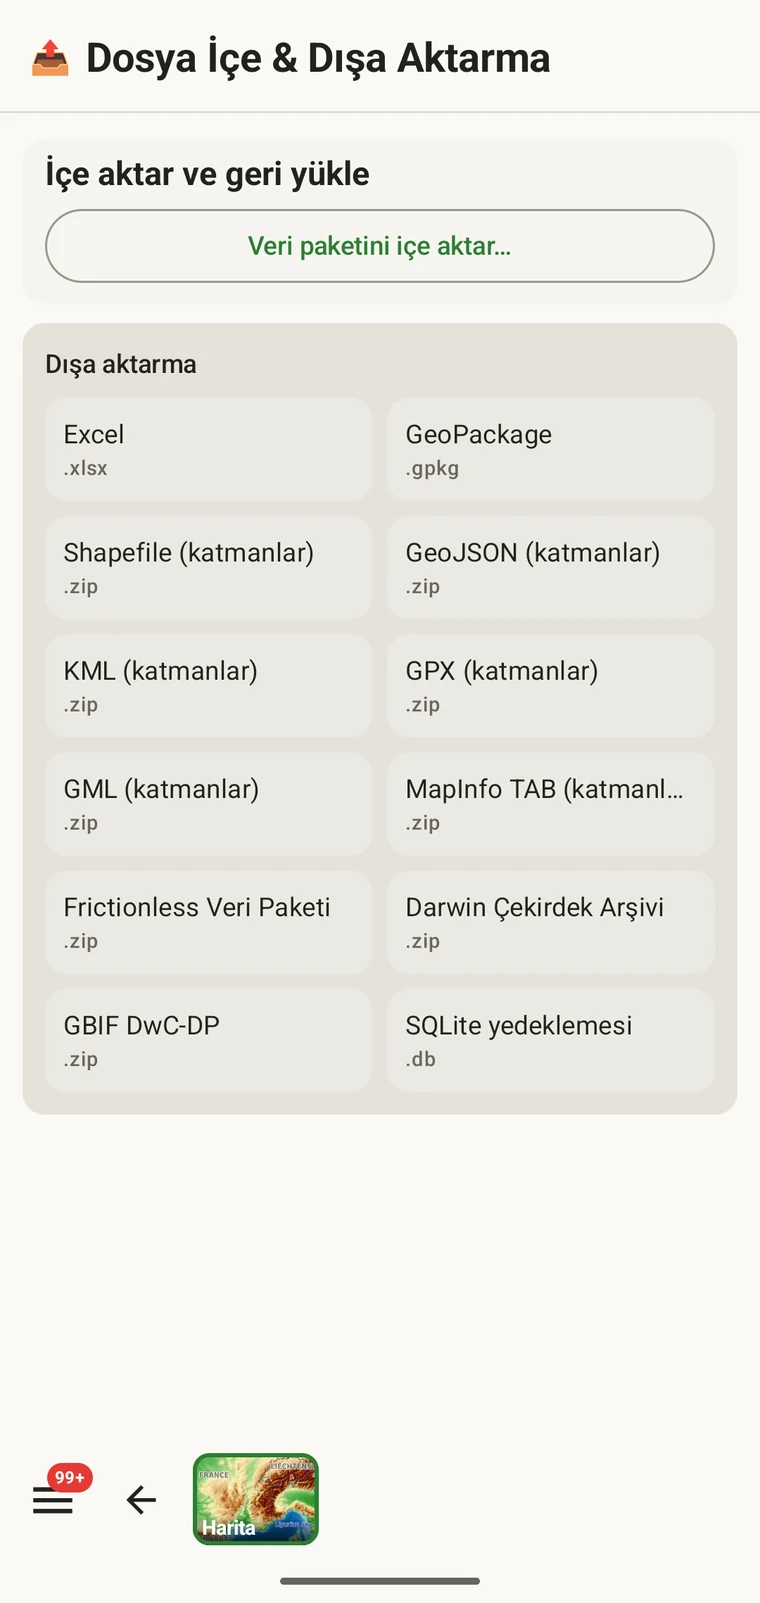
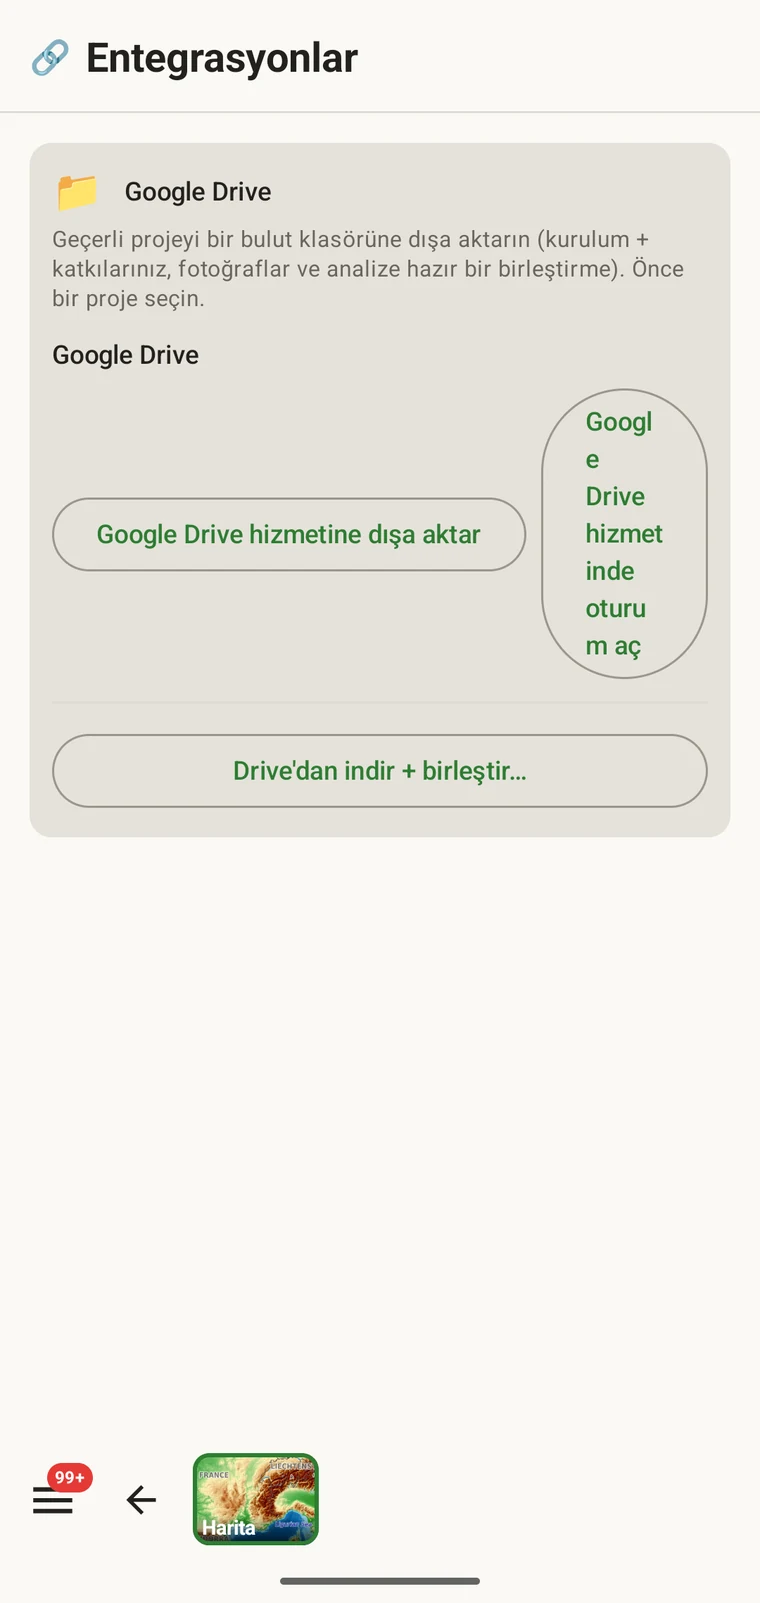
EarthCape exports to twelve formats. The right choice depends on your destination: Darwin Core Archive for a biodiversity repository, GeoPackage for a GIS, Excel for spreadsheet work. If several people are collecting data on the same survey, Google Drive lets you push each person's contribution to a shared folder and merge them — without an EarthCape account or a server (a Google account is needed for Drive). See Export formats and Google Drive collaboration for the full procedure.
- Open Menu → Admin → File Import & Export.
- Hedefinize uyan biçimi seçin. On iki biçim dışa aktarma ekranında listelenir.
- Tap the format to generate the file. The filename is set automatically from the project name, its id and a timestamp.
- Dosyayı Android paylaşım sayfası üzerinden paylaşın (Quick Share, Drive, Mesajlar, Bluetooth, Gmail veya kurulu başka herhangi bir hedef) ya da doğrudan yapılandırılmış bir bulut hedefine gönderin.
- Alternatively, open Menu → Admin → Integrations and tap Export to Google Drive to push the current project — setup, your contributions, photos and an analysis-ready merge — to a shared Drive folder.
Sonra ne okumalı
Bu anlatımda ele alınan her konunun, ayrıntının tamamını içeren kendi başvuru sayfası vardır.
| Şunu yapmak isterseniz… | Şuraya gidin |
|---|---|
| Temel haritanın nasıl çalıştığını ve maliyetini anlamak | Harita ve karo sunucusu |
| Çevrimdışı alanları yönetmek, boyutları denetlemek, eski indirmeleri silmek | Çevrimdışı haritalar |
| Harita ölçümünü, patikaya oturtmayı ve aramayı kullanmak | Harita araçları |
| Kayıt iş akışının tamamını, ziyaretleri ve lokaliteleri öğrenmek | Gözlem kaydetme |
| Form düzenini yapılandırmak ve özel alanlar eklemek | Formlar ve özel alanlar |
| Arazi protokollerini okumak veya yazmak | Arazi protokolleri |
| Cihazdaki veriyi filtrelemek, sıralamak ve gözden geçirmek | Verilerinize göz atma |
| Hedefiniz için doğru dışa aktarma biçimini seçmek | Dışa aktarma biçimleri |
| Verileri meslektaşlarınızla Google Drive üzerinden paylaşmak | Google Drive iş birliği |