
Начало работы
Ваше первое обследование
Эта страница проходит весь цикл от установки до экспорта: открытие приложения, загрузка территории, на которой вы будете работать, выбор протокола записи, ввод наблюдений в поле, просмотр собранного и выгрузка данных. Каждый шаг ссылается на отдельную страницу с полным описанием.
No account, no connection required. All data is stored in a single on-device database. Your records leave the device only when you export them or push them to a Drive folder yourself. The optional online features — weather, AI identification, GBIF, iNaturalist, place and taxon search, map tiles — send only what they need to work; see the privacy policy. The app works with the radio off once you have downloaded the map area you need.
Первый запуск приложения
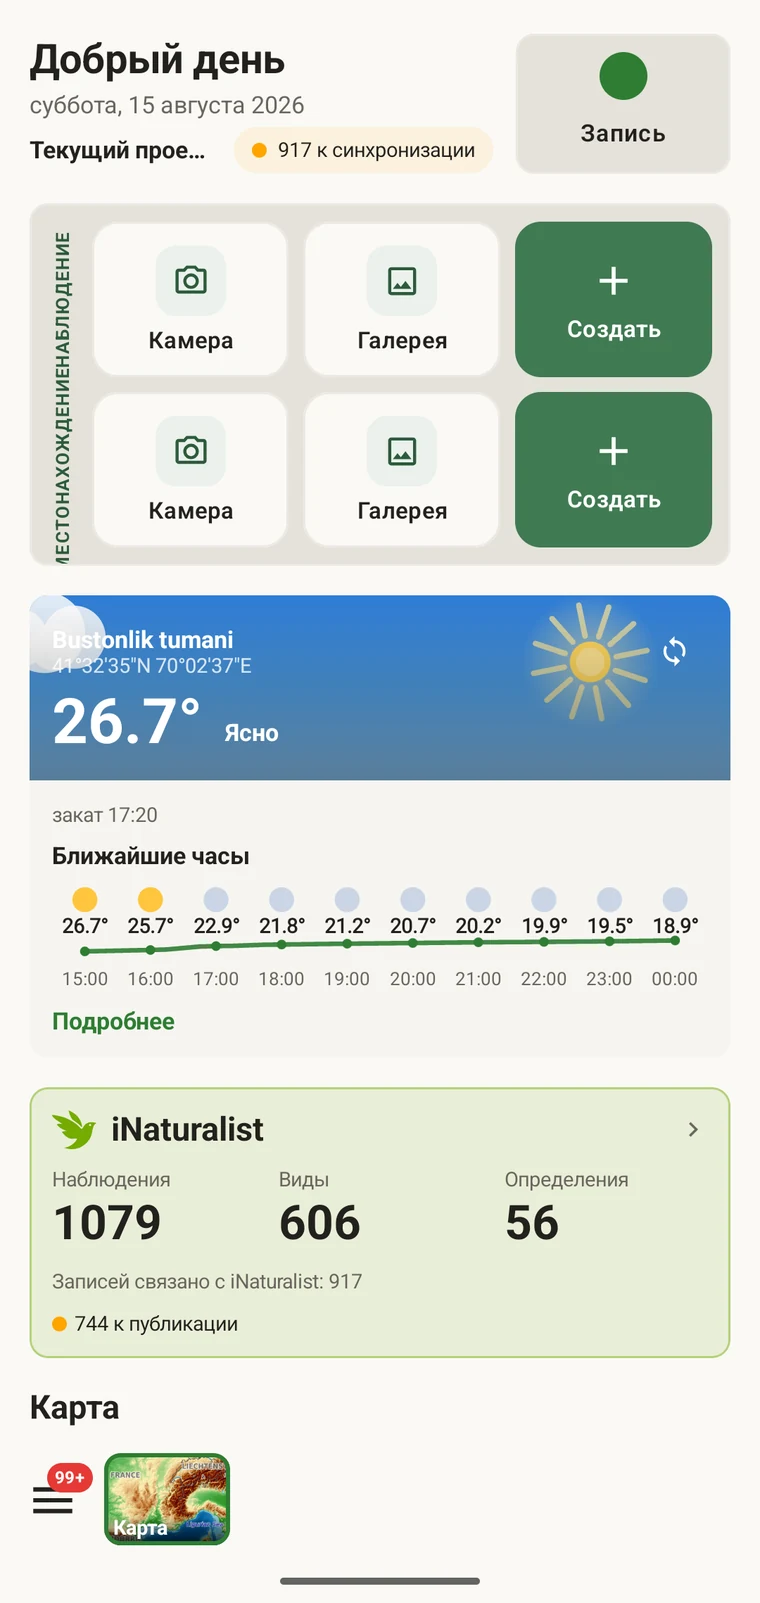
When you open EarthCape for the first time, no sign-up is required. The app creates a project for you automatically, named after your device, selects it, and assigns the Casual / incidental protocol. The project is empty — it contains no sample data, no demonstration observations, and no pre-loaded species lists. Use it as it is, or rename it before you begin.
The home screen carries the Record button, quick actions for a new observation or locality (camera, gallery or blank form), and the weather card. Everything else — the map, your data lists, protocols, projects and Admin — is reached from the Menu button at the bottom left.
- Откройте приложение. Главный экран загрузится с автоматически созданным и выбранным проектом.
- If you want to rename it, open Menu → Projects, tap the project and edit its name.
- Take note of the protocol shown — it is Casual / incidental by default. You can change it before you start recording; see Setting the protocol below.
Загрузка области карты
Базовая карта покрывает всю планету векторными тайлами, которые раздаются с нашей собственной инфраструктуры: без API-ключа и без ограничений на использование. Перед выходом в поле загрузите территорию, на которой будете работать, чтобы карта, рельеф и 3D работали с выключенным радиомодулем. Подробности — в разделах Карта и тайловый сервер и Офлайн-карты.
Загрузка региона
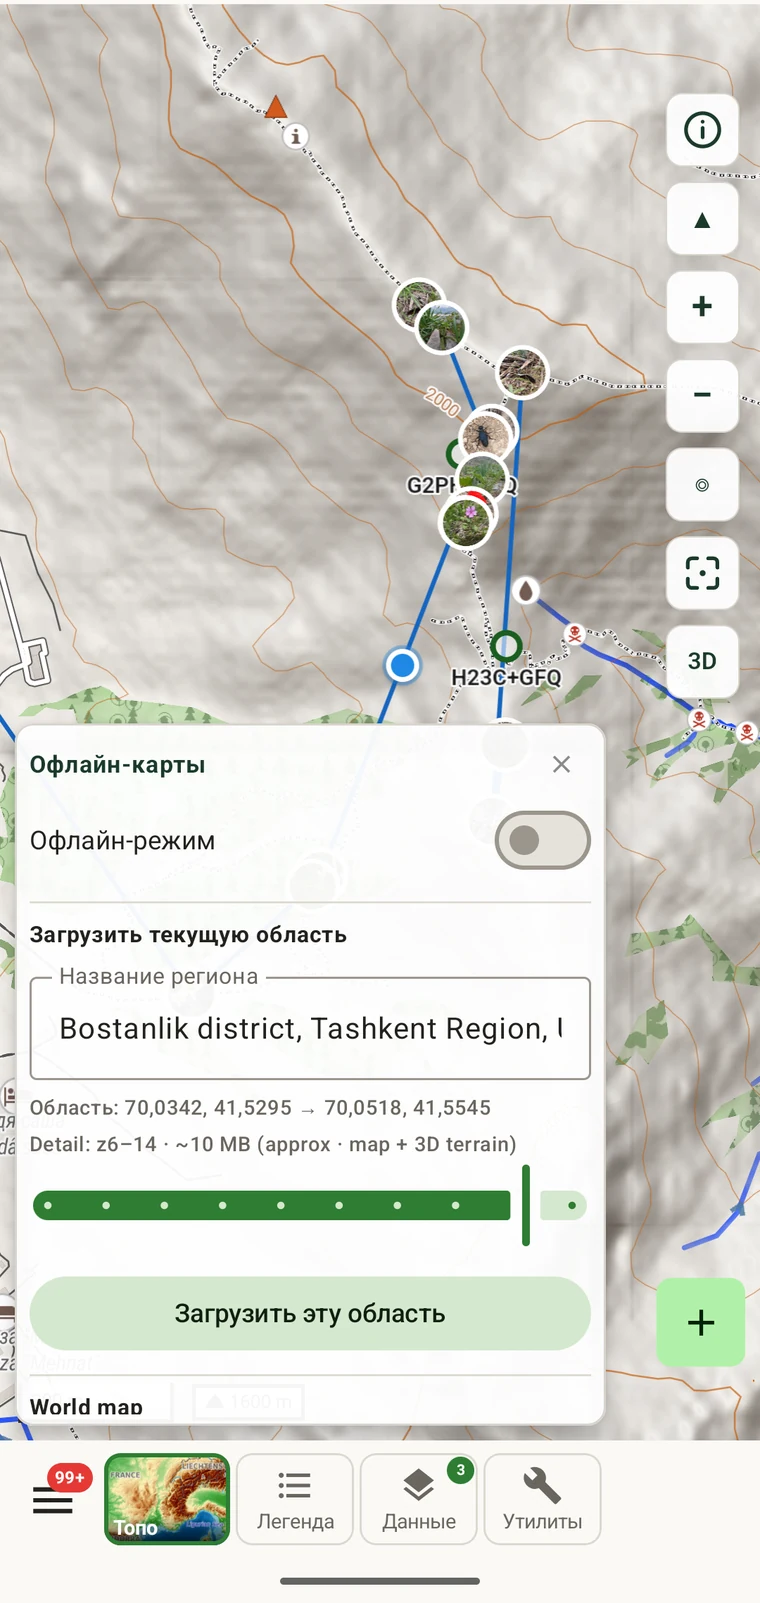
- Open the map (Menu → Map).
- Перейдите к своему полевому участку и уместите нужную область в окне карты.
- Tap Tools in the toolbar at the bottom of the map screen, then tap Offline.
- The panel shows "Download current view". A region name is suggested automatically while you are online — for example, "Bostanlik district, Tashkent Region, Uzbekistan"; otherwise type one.
- Check the coordinates and size estimate. The estimate depends on the area and terrain — the district-sized example in the screenshot is about 11 MB at z6–14 — and includes the map and the 3D terrain model.
- Нажмите «Загрузить эту область» и дождитесь окончания загрузки, пока связь ещё есть.
Добавление обзора мира
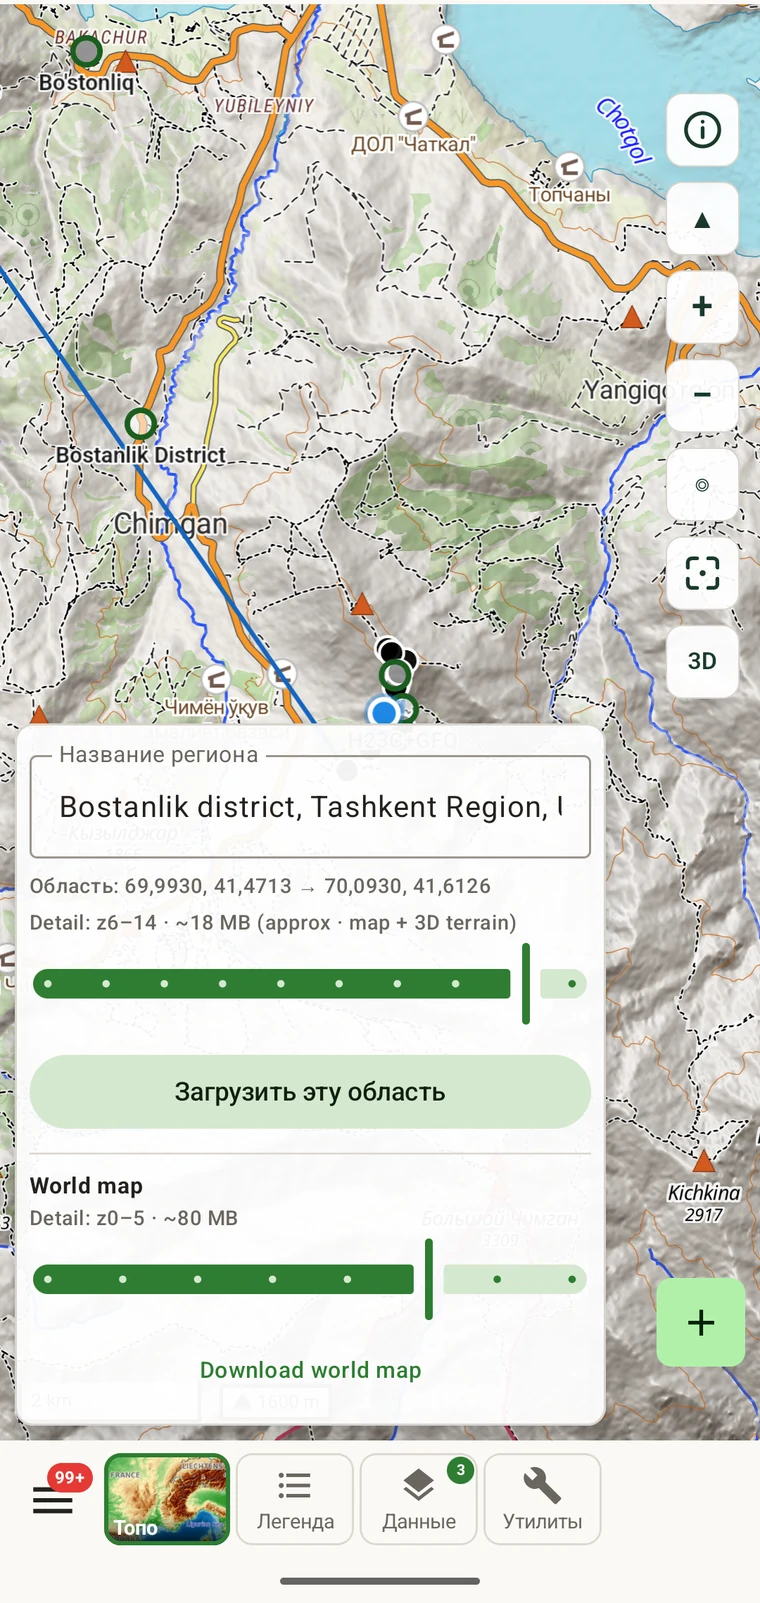
The world overview (z0–5, approximately 80 MB) gives you a rendered basemap at all zoom levels, so the map is never blank when you zoom out beyond your downloaded region. It only needs downloading once.
- In the same Offline panel, scroll down to World map. The detail line reads "Detail: z0–5 · ~80 MB"; the slider lets you change the depth (z0–7).
- Нажмите «Загрузить карту мира».
Настройка протокола и формы
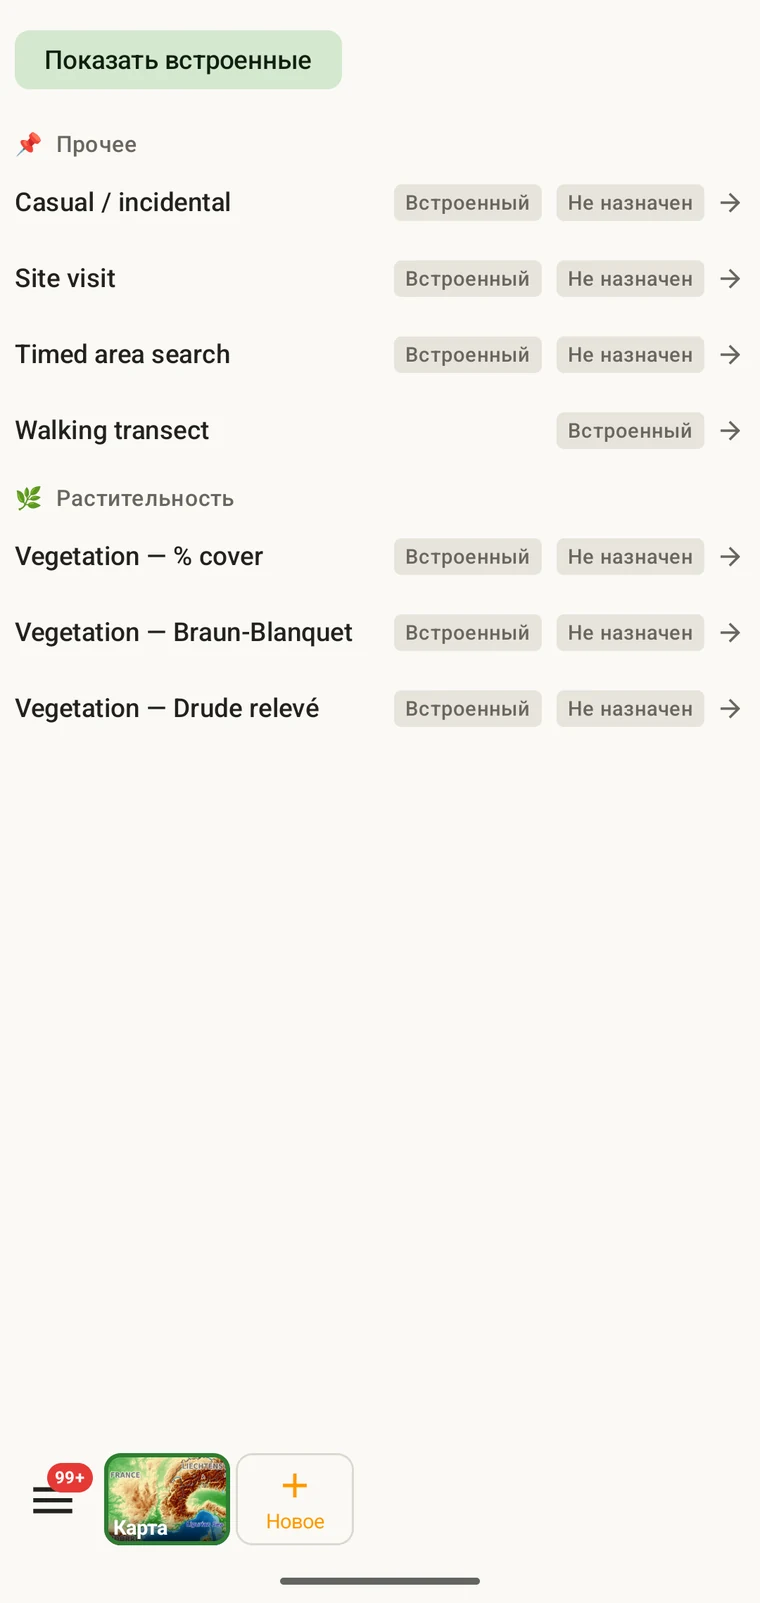
A survey protocol defines the structure of a recording session: what a visit is, which fields appear on the observation form, and how the data is organised for export. Every observation in a project is recorded under the project's active protocol. Seven protocols ship with the app, including Casual / incidental, which is assigned automatically to new projects. You can change the protocol, clone a built-in one to edit it, or write a new one in the Protocols Studio — all on the device.
The Form builder lets you control the field layout for each entity type: show or hide fields, reorder them, group them under headings, and add custom fields. Custom fields defined before the season starts travel with the project, so the whole team's form looks the same from the first day.
- Open Menu → Protocols. The list shows all seven built-in protocols and any you have created.
- Tap a protocol to view it. To assign it, open Menu → Projects, tap your project and under Survey protocol tap Assign a protocol (or Change).
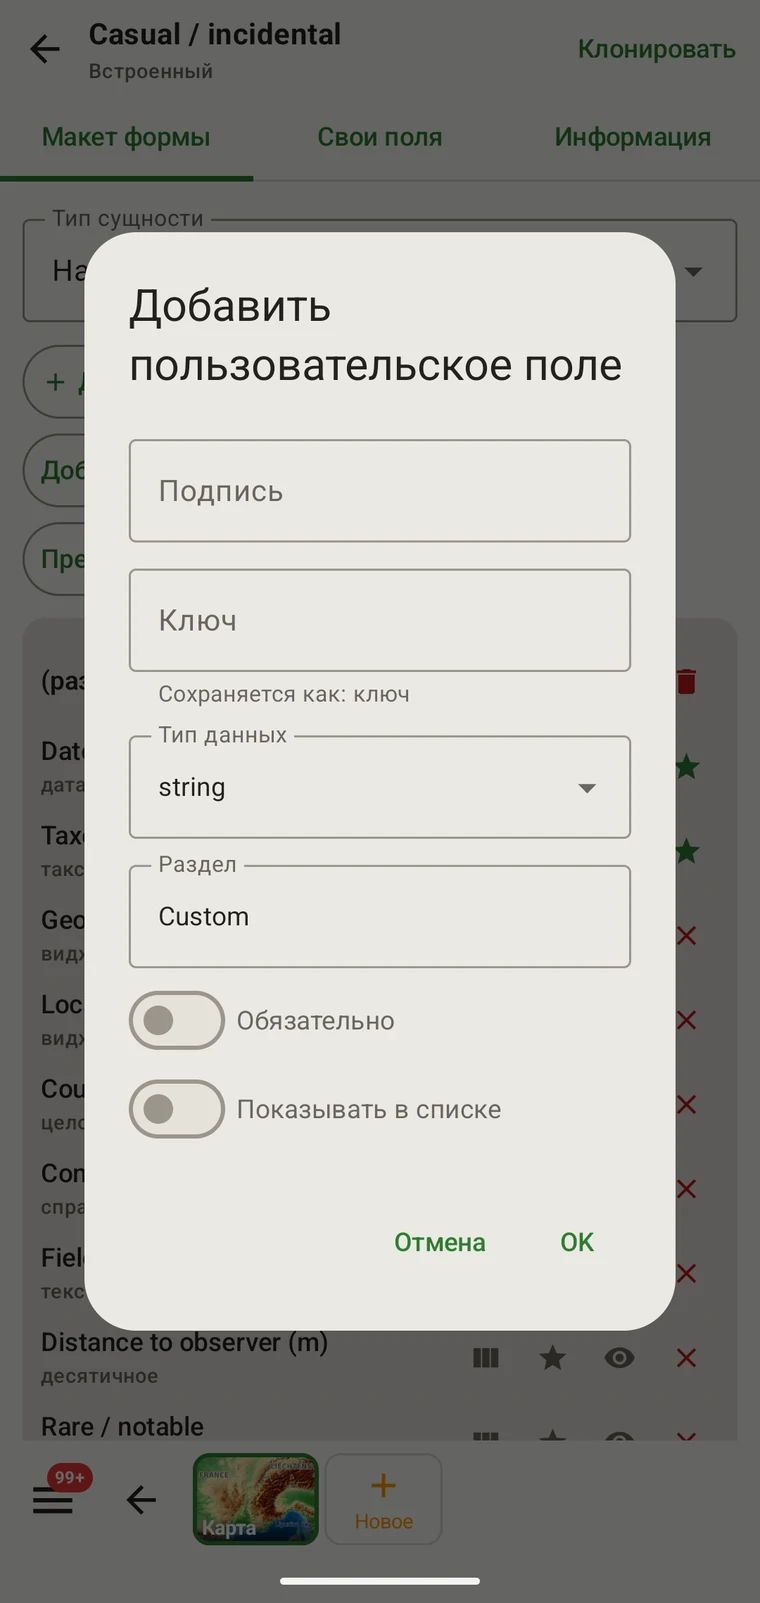
- To add a custom field, open the protocol in Protocols, switch to the Form builder tab, choose the Entity type (for example Observation) and tap Add custom field. Set the caption, key, data type and section, and whether the field is Required and Show in list.
- To share the configuration with colleagues, open the project under Menu → Projects and tap Share; the app writes a
.ecsurveysetup file with the project, protocol, forms, custom fields, sites and vocabulary. Colleagues open the file on their device, or use Import under Menu → Projects. To move the records as well, export a Frictionless Data Package from Menu → Admin → File Import & Export.
Запись в поле
Recording a session means starting a GPS track, which creates a visit for the session, and entering observations as you work through the site. The Recording observations page covers all of this in detail.
- Open Record from the home screen or the Record tile in the Menu.
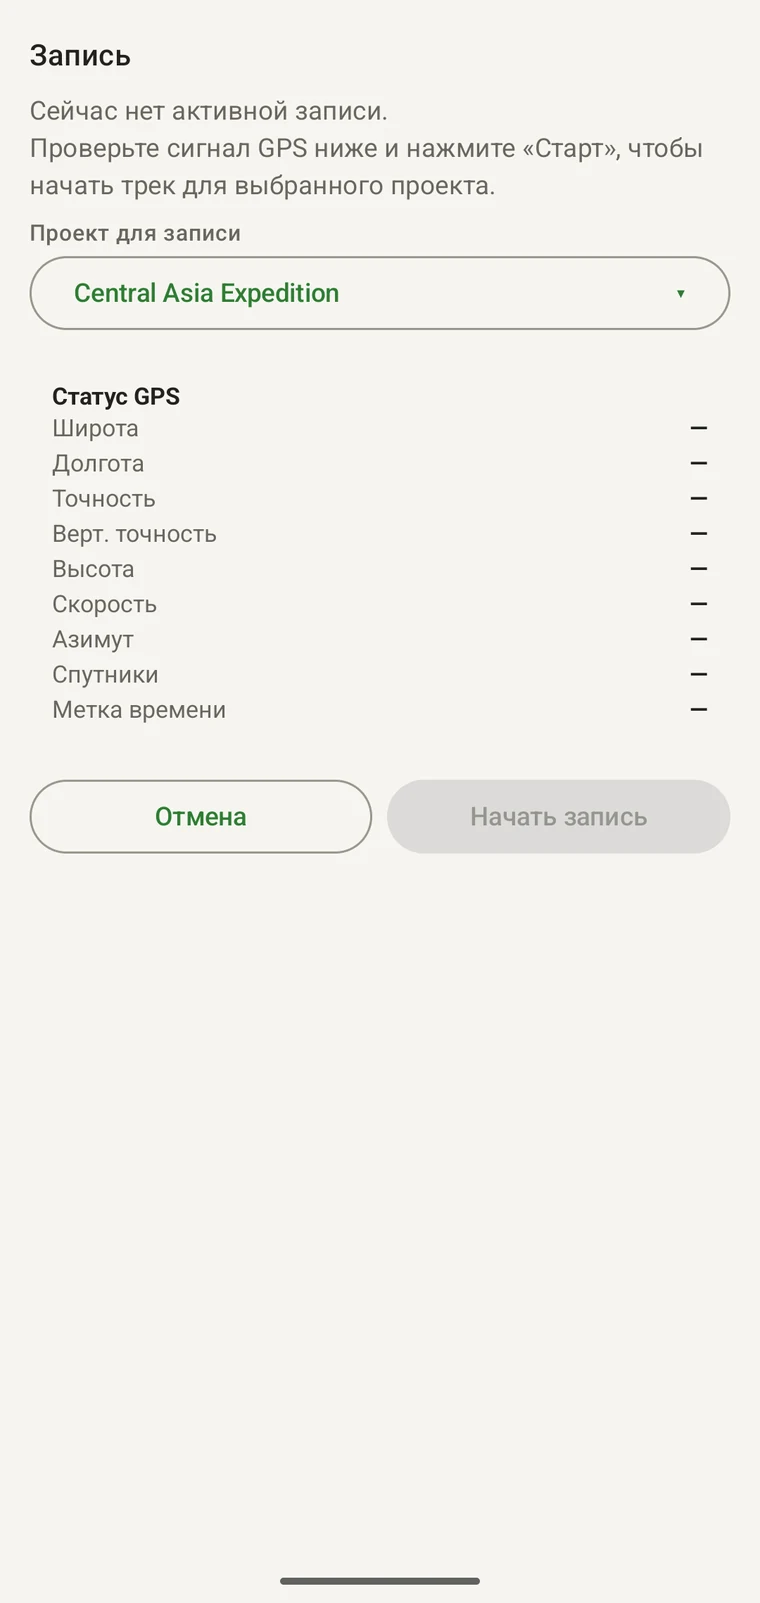
- Check the GPS status fields before you start: Latitude, Longitude, Accuracy, V-Accuracy, Altitude, Speed, Bearing, Satellites and Timestamp are all shown. Wait until Accuracy reaches an acceptable value for your work — ±5 m or better is typical in open terrain.
- На экране отображается «Проект для записи» с названием активного проекта. Убедитесь, что он верный.
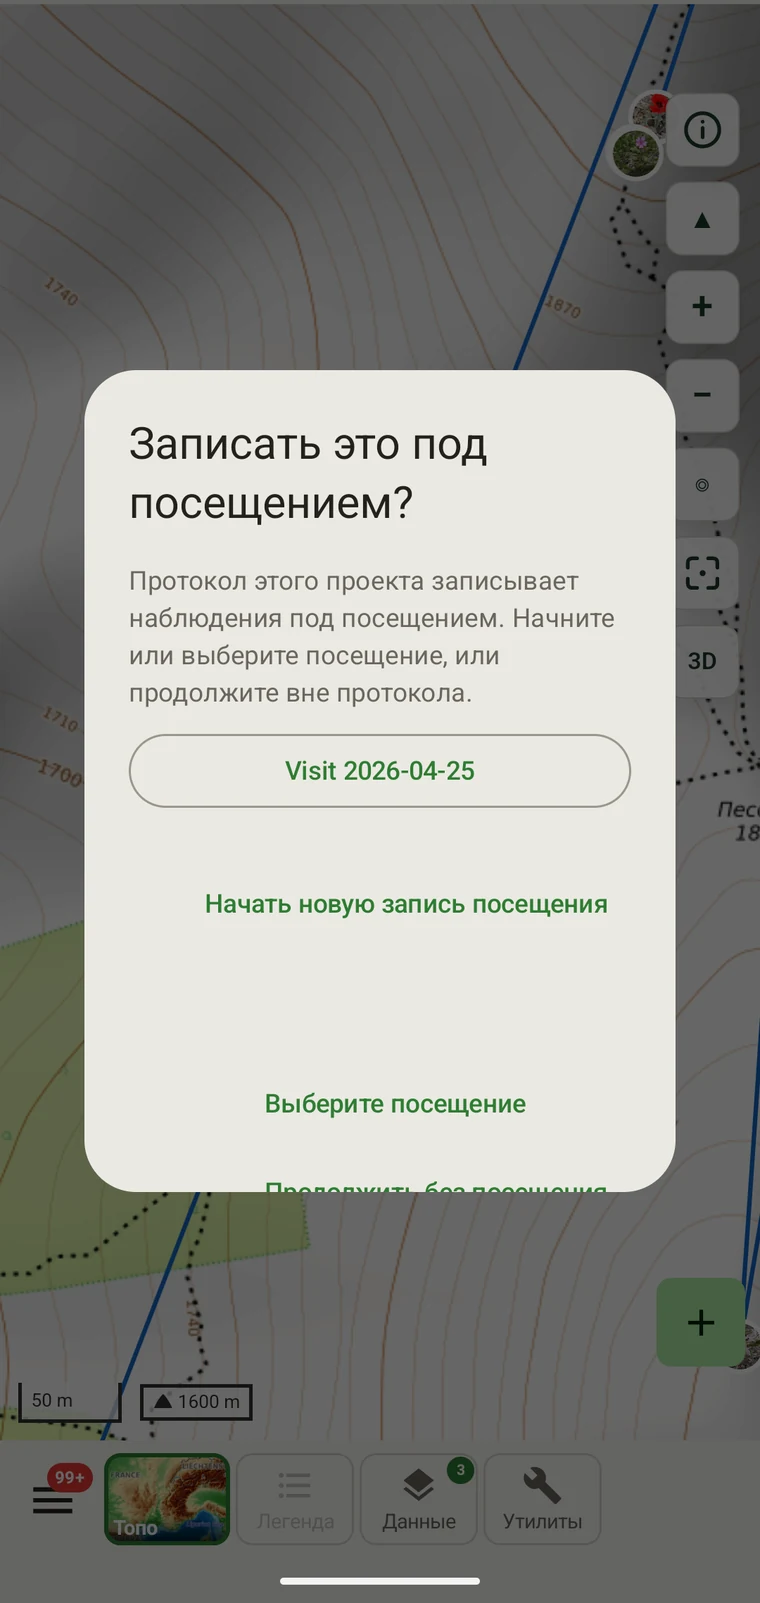
- Tap Start recording. A visit is created for the session automatically, and observations you add while recording are linked to it.
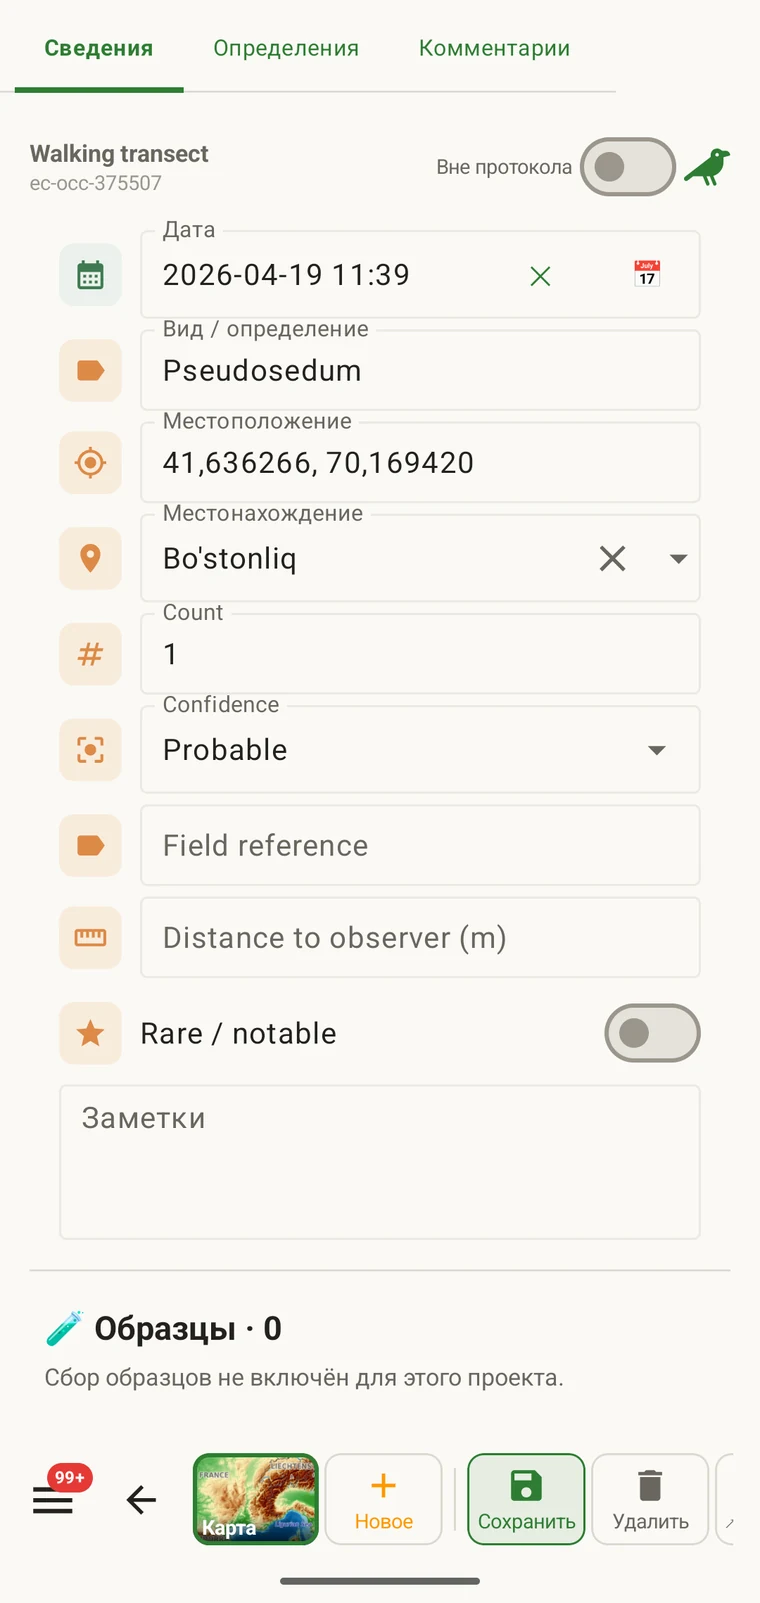
- Добавляйте наблюдения по мере продвижения по участку. Каждое наблюдение открывает форму протокола; заполните таксон, поля протокола и при необходимости прикрепите фото.
- When the session is finished, tap Stop & save. The track and all observations are saved to the on-device database.
Проверка собранного
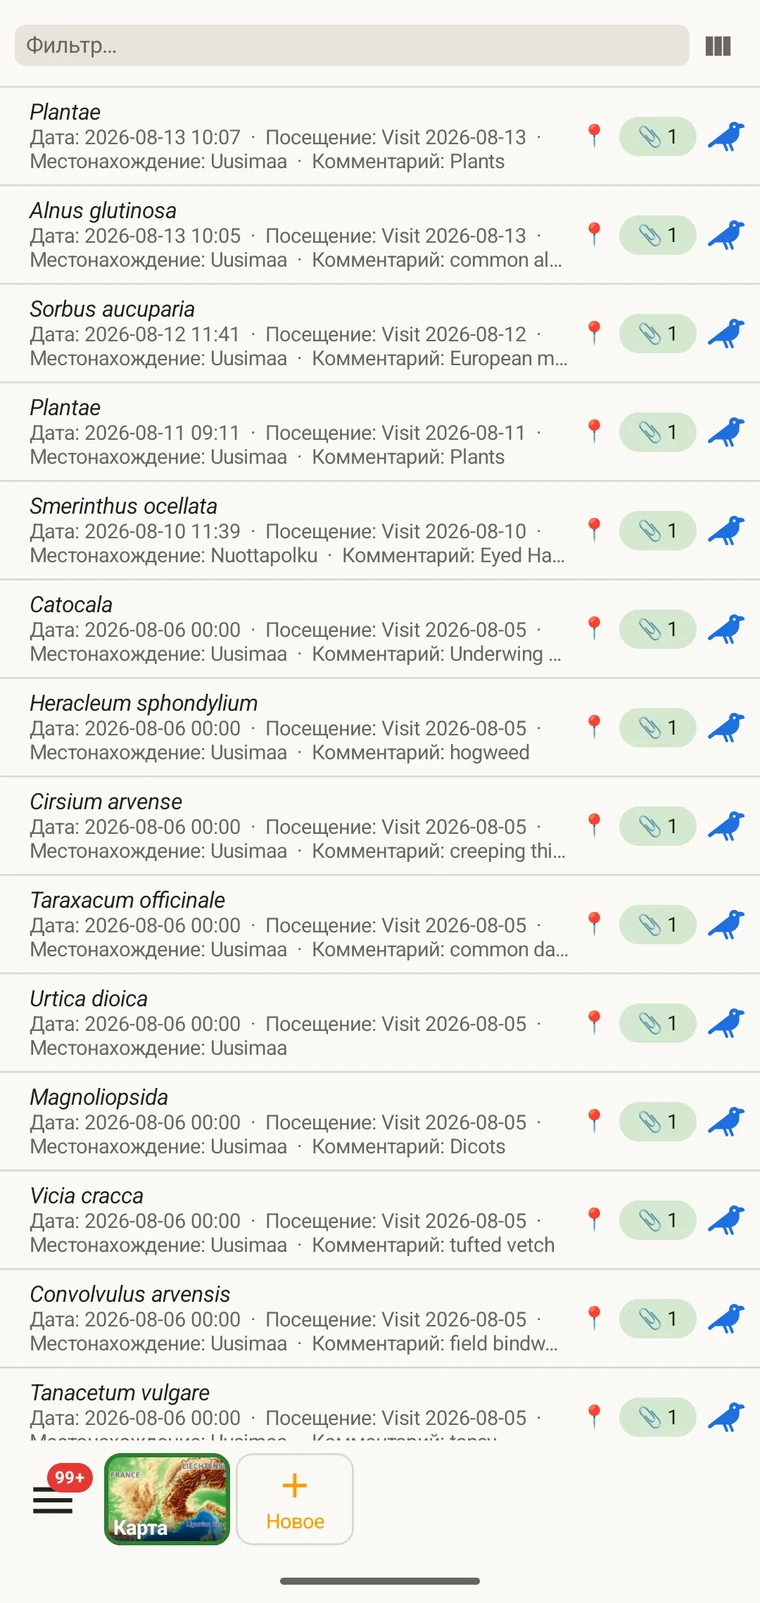
The data lists give you access to every record in the project as a filterable list. After a day in the field, use them to check completeness, find entry errors and open records for correction.
- Open Menu → Observations (or Visits, Localities, Taxa, or Files depending on what you want to review).
- The list opens with the default column set. Tap the columns icon (Choose columns) to add, remove or reorder columns — for example, add Accuracy or Altitude to check GPS quality.
- Type in the Filter… box to narrow the list; it matches text in any shown column. In the wide (tablet) grid each column has its own filter cell, and tapping a column header sorts by it.
- Нажмите на любую строку, чтобы открыть запись целиком и отредактировать её.
Выгрузка данных
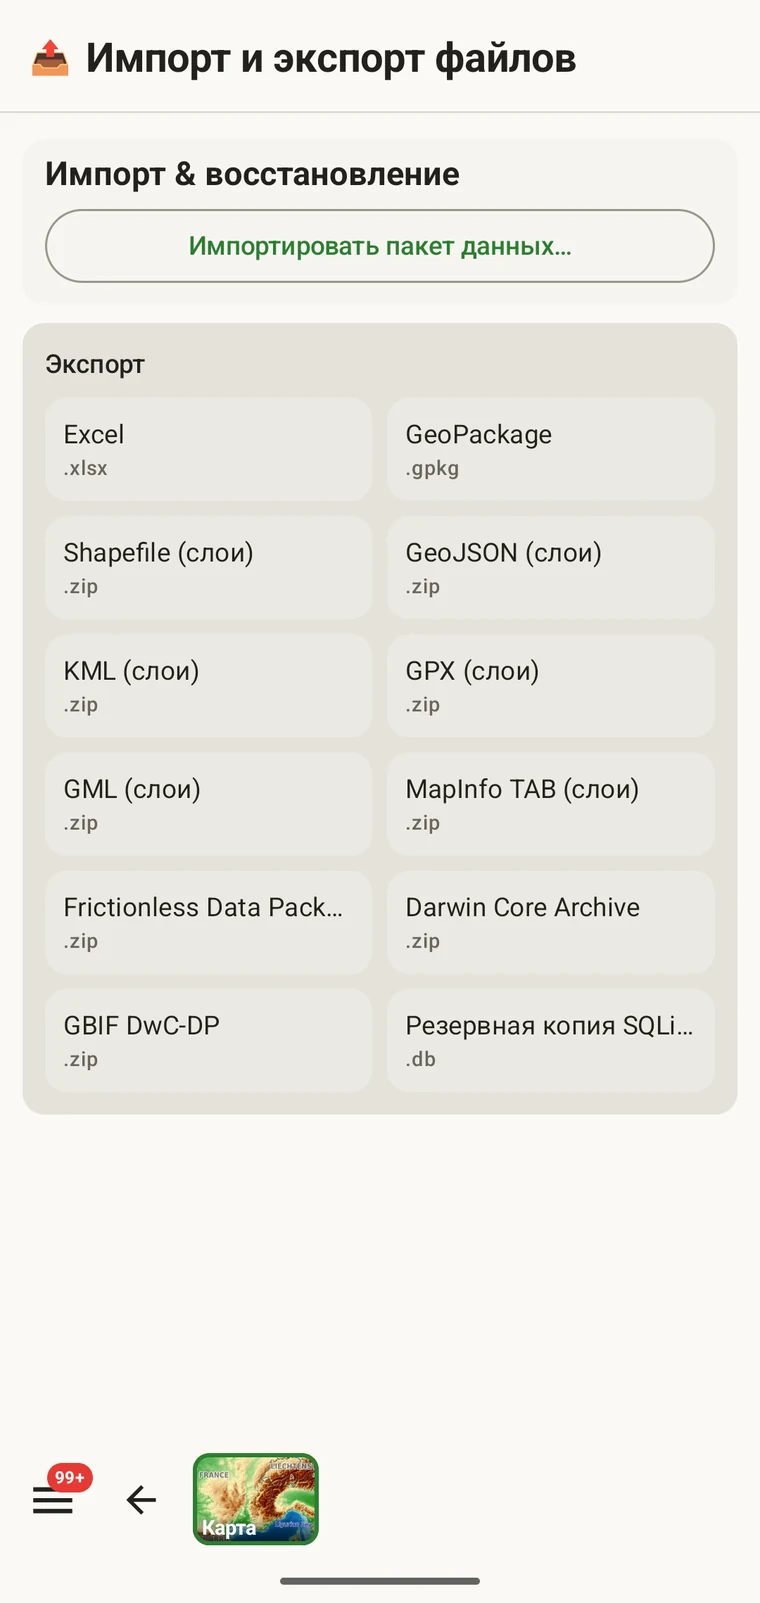
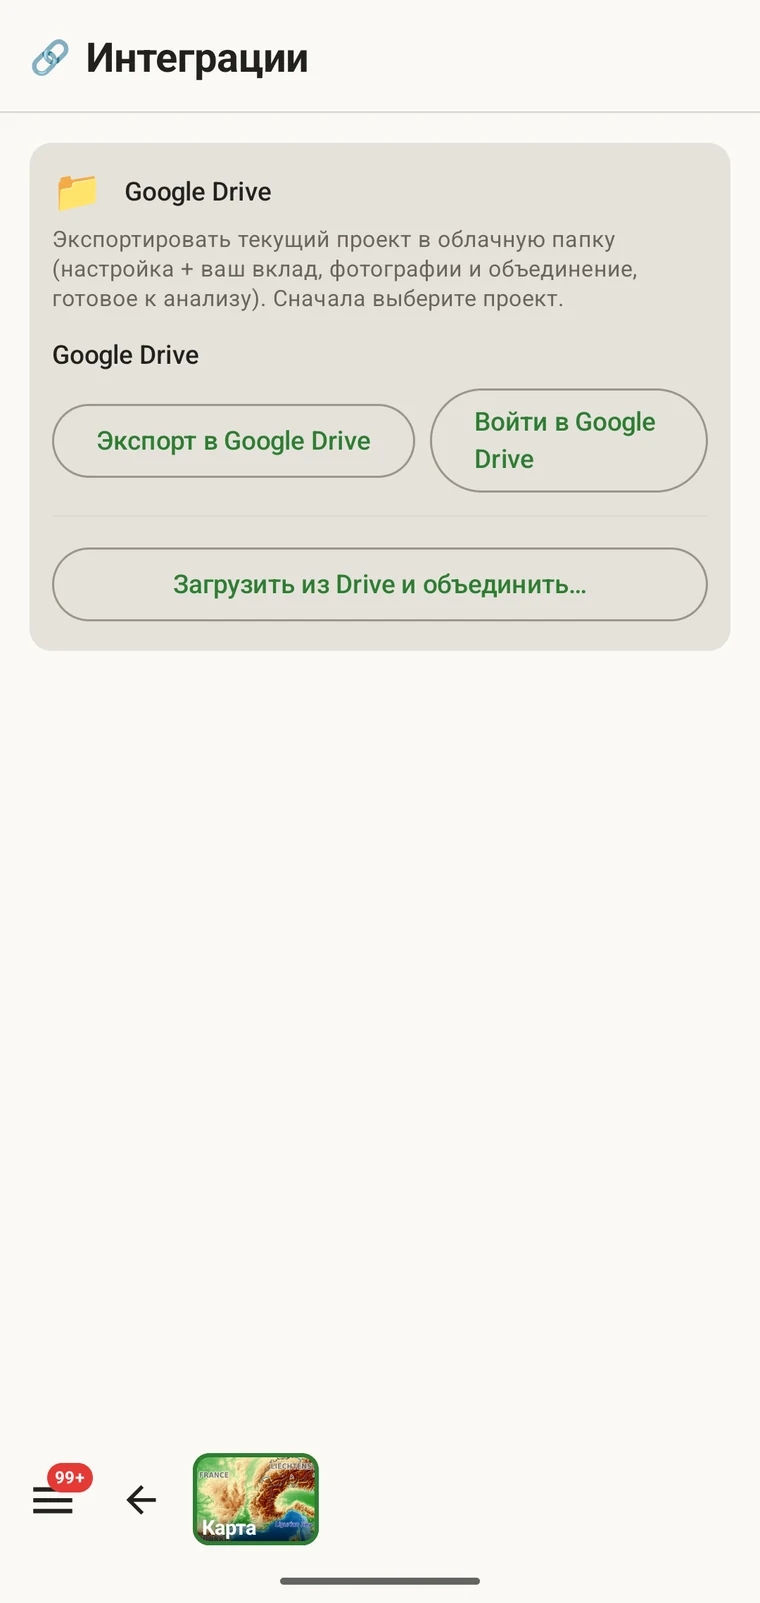
EarthCape exports to twelve formats. The right choice depends on your destination: Darwin Core Archive for a biodiversity repository, GeoPackage for a GIS, Excel for spreadsheet work. If several people are collecting data on the same survey, Google Drive lets you push each person's contribution to a shared folder and merge them — without an EarthCape account or a server (a Google account is needed for Drive). See Export formats and Google Drive collaboration for the full procedure.
- Open Menu → Admin → File Import & Export.
- Выберите формат, подходящий вашему получателю. Все двенадцать форматов перечислены на экране экспорта.
- Tap the format to generate the file. The filename is set automatically from the project name, its id and a timestamp.
- Отправьте файл через системное меню «Поделиться» в Android (Quick Share, Drive, сообщения, Bluetooth, Gmail или любое другое установленное приложение) либо сразу в настроенное облачное хранилище.
- Alternatively, open Menu → Admin → Integrations and tap Export to Google Drive to push the current project — setup, your contributions, photos and an analysis-ready merge — to a shared Drive folder.
Что читать дальше
У каждой темы этого руководства есть отдельная справочная страница со всеми подробностями.
| Если вы хотите… | Перейдите к |
|---|---|
| Понять, как устроена базовая карта и во что она обходится | Карта и тайловый сервер |
| Управлять офлайн-областями, смотреть размеры, удалять старые загрузки | Офлайн-карты |
| Пользоваться измерениями на карте, притяжением к тропам и поиском | Инструменты карты |
| Освоить полный процесс записи, выезды и локации | Запись наблюдений |
| Настроить раскладку формы и добавить пользовательские поля | Формы и пользовательские поля |
| Прочитать или написать протоколы обследований | Протоколы обследований |
| Фильтровать, сортировать и просматривать данные на устройстве | Просмотр ваших данных |
| Выбрать подходящий формат экспорта | Форматы экспорта |
| Поделиться данными с коллегами через Google Drive | Совместная работа через Google Drive |