
Recording
Recording observations
An observation records a position, a taxon, a time and any further fields the active protocol requires. Each field is written to the on-device database when you save, so the record does not depend on a network connection.
Records are written as you enter them. EarthCape writes each record to the on-device database as you go. There is no upload to fail, and closing the app at any point does not discard work in progress.
The recording screen
Before you start a track, the app shows you the current GPS fix. This lets you check signal quality before committing a record, rather than finding a poor fix later in an export.
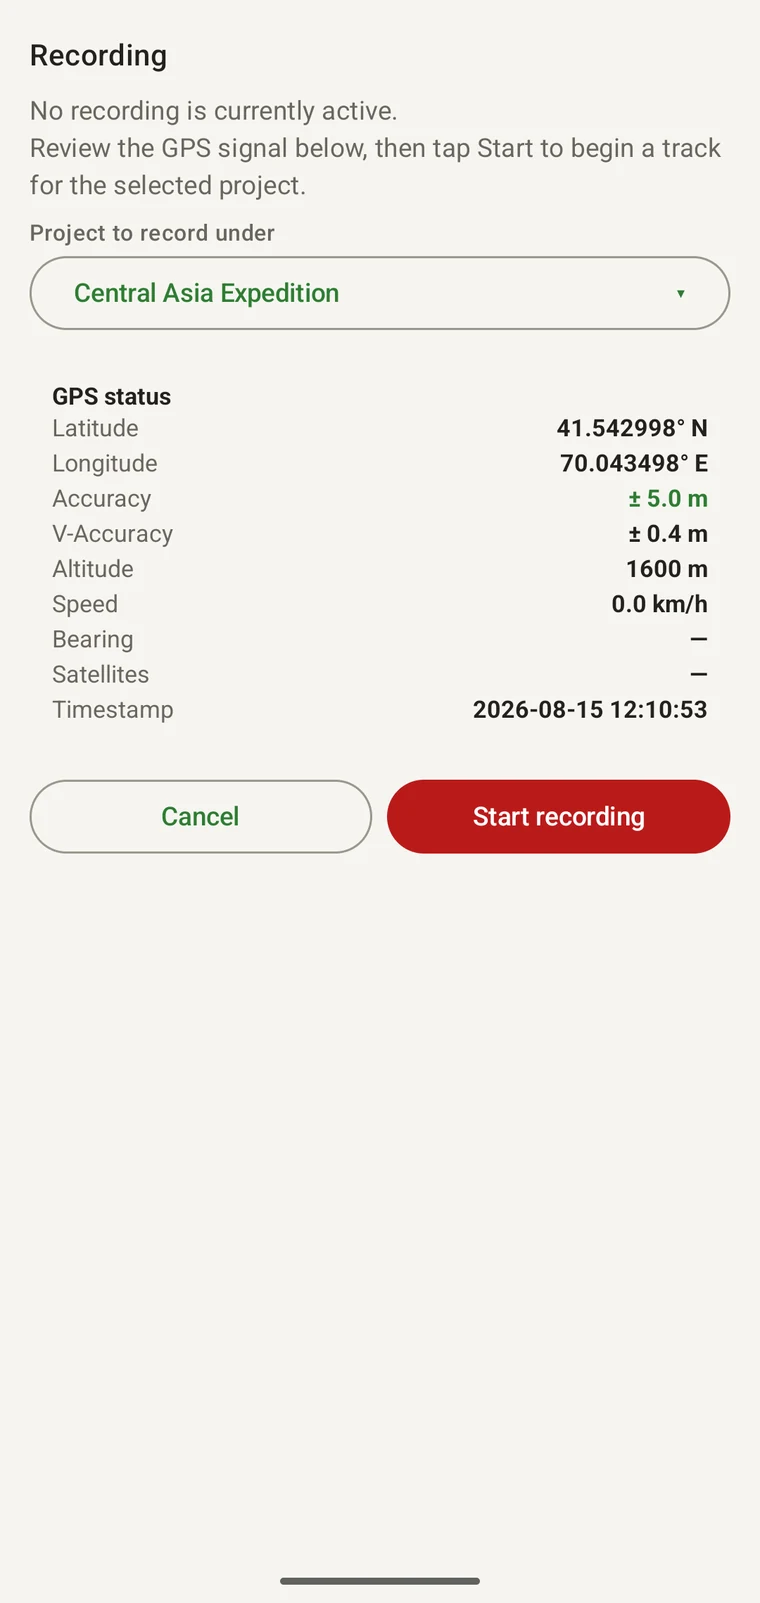
The screen opens with the message "No recording is currently active. Review the GPS signal below, then tap Start to begin a track for the selected project." Below it, the project the session will be attributed to is confirmed — for example, "Project to record under: Central Asia Expedition". The GPS status table then shows all fields the receiver is reporting.
| GPS field | What it tells you |
|---|---|
| Latitude | Current position in decimal degrees, e.g. 41.542998° N. Written into each observation you create. |
| Longitude | Current position in decimal degrees, e.g. 70.043498° E. |
| Accuracy | The receiver's estimated horizontal error radius, e.g. ±5.0 m. This is the figure to check before committing a record: under 10 m is generally sufficient for point observations; under 5 m is good for vegetation plots where position precision matters. |
| Altitude | Elevation as reported by the receiver — above the WGS84 ellipsoid on Android, above mean sea level on iOS — e.g. 1600 m at a mountain site. Useful for altitude-banded surveys, but note that GPS altimetry is less accurate than horizontal position. |
| Speed | Ground speed in km/h. At rest it shows a dash. |
| Bearing | Direction of travel in degrees from north. Relevant where the protocol records the observer's heading. |
| Satellites | Number of satellites in the solution. More satellites generally means a more stable fix. |
| Timestamp | Time of the current fix in the device's local time. Each record you save carries its own timestamp. |
Once you are satisfied with the fix, tap Start recording. Tap Cancel to return to the map without starting a session. All GPS fields update live, so you can watch the accuracy figure improve as the receiver settles.
Track recording
Tapping Start recording begins a track under the selected project. The track runs in the background for the duration of your session: you can enter observations, switch to the map, or search for taxa, and the track continues to log your route without any further interaction.
A track is a timestamped sequence of position fixes. It records where you walked and when, rather than only that you surveyed the area. This has several uses after the session: you can calculate the exact length of a walked transect, verify that a transect was completed and at what pace, show survey effort spatially when analysing detection rates, and defend the completeness of a repeat visit at a fixed-route site. Tracks are exported in all formats that carry geometry, including GPX, KML and GeoPackage.
The active track is visible on the map as a line drawn over the basemap. Tracks from previous sessions are drawn with the Visit layer and are shown or hidden with it in the Data layers panel (see Map and tile server).
Visits
When you create a record, the app may present a visit chooser so you can attach it to a named event. During an active recording session the record is linked automatically to that session's visit, so the chooser does not appear.
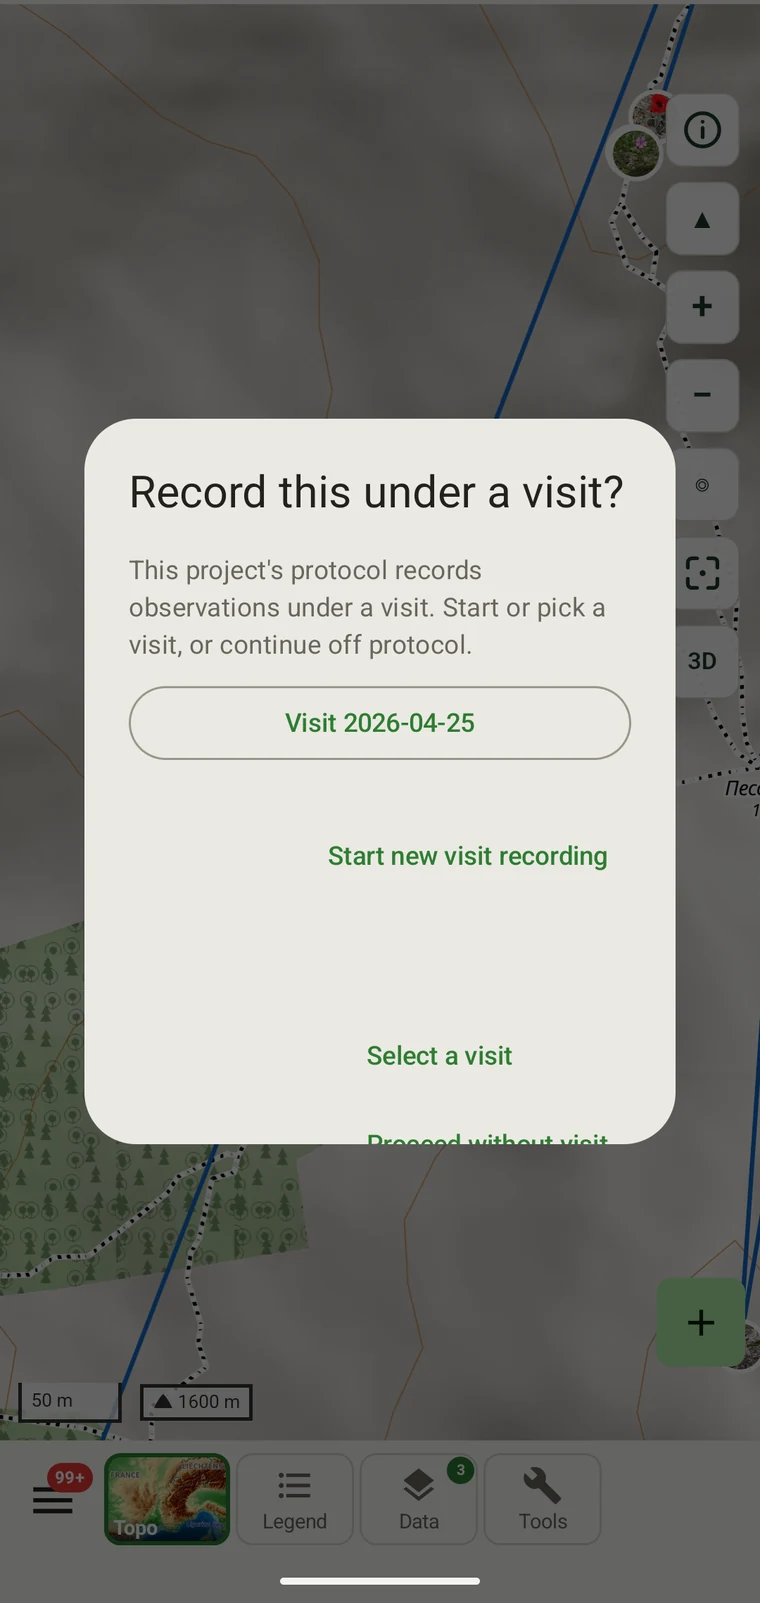
A visit groups a session's records under a named event at a site. Use a visit when you are conducting a repeat survey at a fixed site — a permanent plot, a bird census point, a vegetation monitoring quadrat — where the identity of the event matters for the analysis. Attaching records to a visit lets you later filter, compare and export by visit rather than by date alone.
Choose Proceed without visit for incidental recording, opportunistic transects or any session where the session boundary is not itself meaningful data. There is no requirement to use visits, and many workflows never need them.
The full list of visits for the current project is available in the data browser at Browsing your data.
Entering an observation
The observation form is generated from the project's active protocol, so the fields presented are the ones that method requires. The protocol itself is described in Survey protocols; form layout and custom fields are covered in Forms and custom fields.
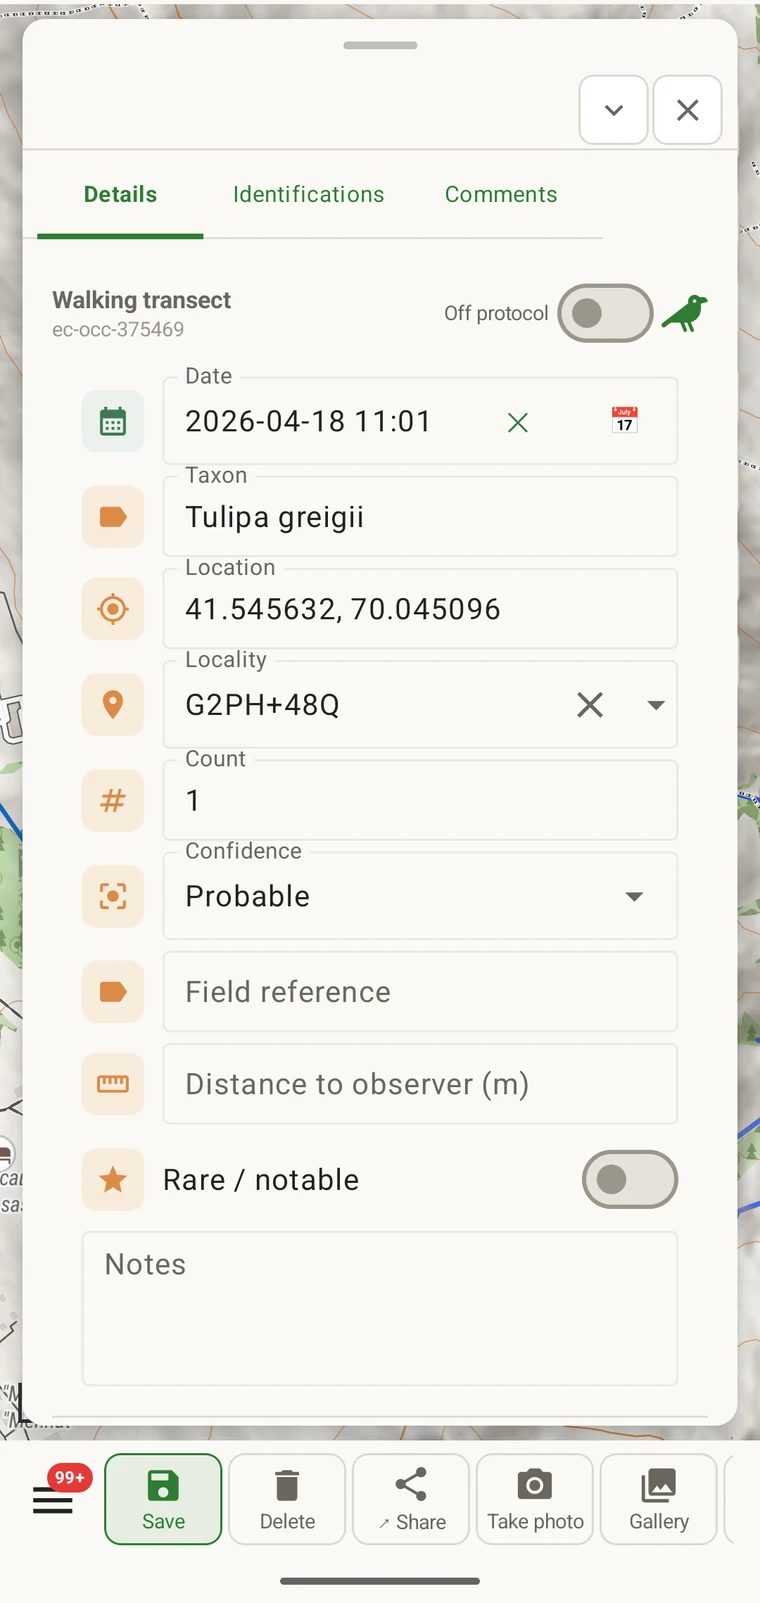
To enter an observation during a recording session:
- With a recording active, tap the record button on the map or in the recording toolbar. The visit prompt appears; choose a visit or continue without one.
- The observation form opens. The GPS position is captured at the moment you open the form and shown at the top. If the fix is poor, you can retake it before saving.
- Enter the taxon in the taxon field. See Finding the taxon below.
- Fill in the remaining protocol fields. Required fields are marked; the form will not save until they are complete.
- Attach photos if needed. See Photos below.
- Assign a locality if the site is a named fixed point. See Localities below.
- Tap Save. The record is written to the database immediately and the map marker appears.
Required fields are enforced at the time of entry rather than flagged later at export. An observation missing a required field is incomplete by your protocol's definition, and correcting it in the field is easier than correcting it afterwards.
Finding the taxon
Names come from the Catalogue of Life, the taxonomic backbone EarthCape is built on. The names already on the device — the ones you downloaded for your groups and area, plus everything you have recorded before — are searched offline, so the picker keeps working with no connection. If nothing matches, you can type the name as you have it and the record is saved with that verbatim name.
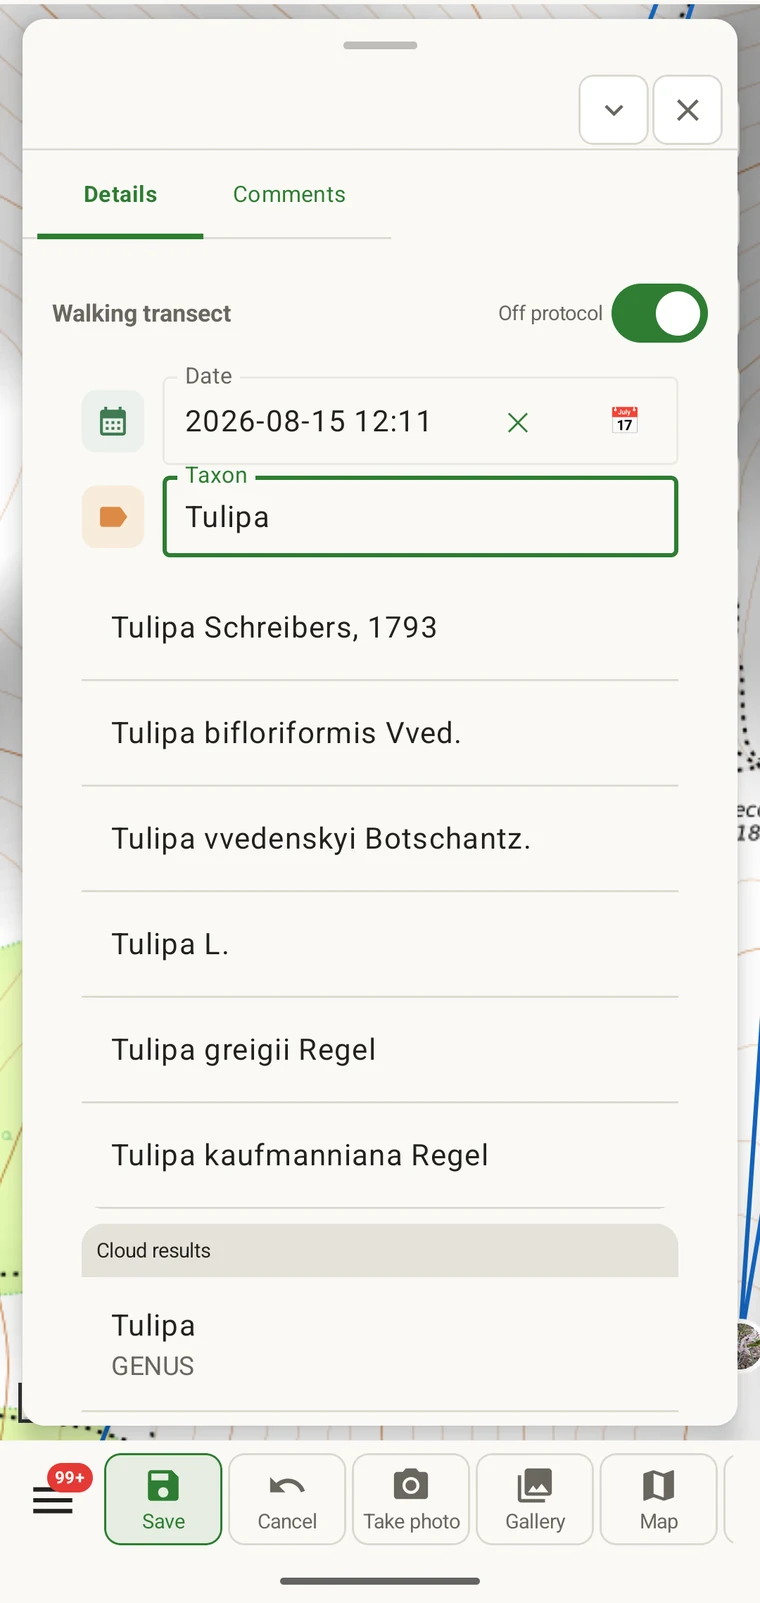
Type any part of the scientific name in the taxon field. The search returns matching names from the full taxonomic database as you type. Partial strings, genus-only searches and infraspecific epithets all work. Common names are searchable where the database includes them, but scientific name search is more reliable across the taxonomy's full depth.
Species already recorded in the current project are listed separately under Taxa in the data browser (see Browsing your data). Checking that list before going into the field gives you a quick reminder of what the project already holds and can help with consistent name use across observers in a shared project.
Photos
Photographs are attached at the observation level. You can take a photo within the app using the device camera, or pick existing images from the gallery. Both routes attach the image to the current record.
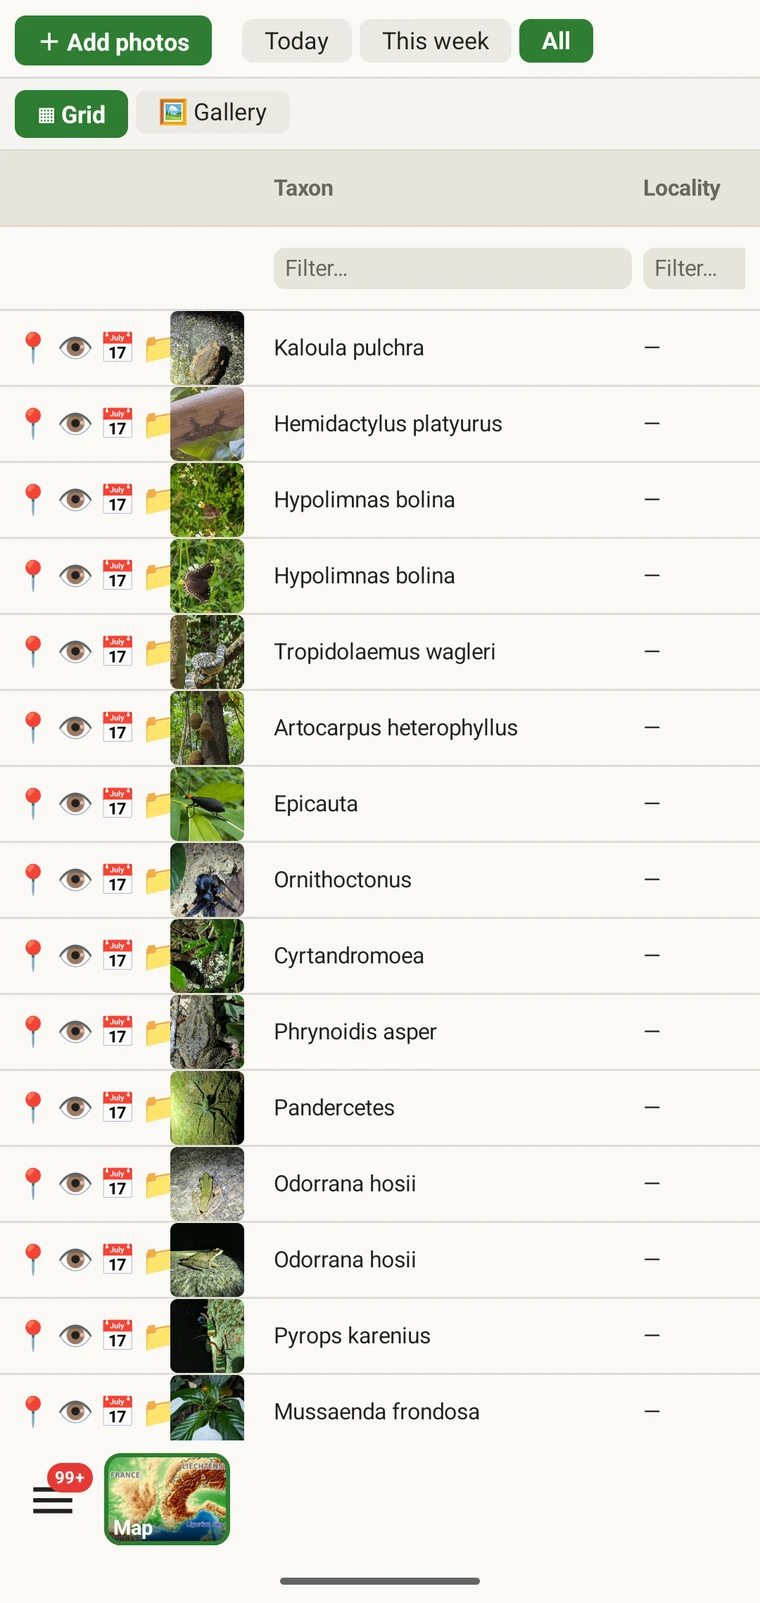
Photos taken within the app are geotagged with the current GPS position and timestamped. Photos imported from the gallery retain whatever EXIF metadata they already carry, including any position the camera recorded. The EXIF data is preserved in all export formats that support it.
Every image attached to the project is browsable in the project photo gallery, accessible from the data browser at Browsing your data. The gallery view shows all project images regardless of which observation they belong to, and is useful for a quick visual review of a day's material.
Localities
A locality is a named point that you record an observation against. It is useful for fixed sites you return to: a permanent plot, a census point, a trap location, a vegetation quadrat with a long-term history. Assigning a locality to a record means subsequent visits can be filtered and compared by site name rather than by coordinates.
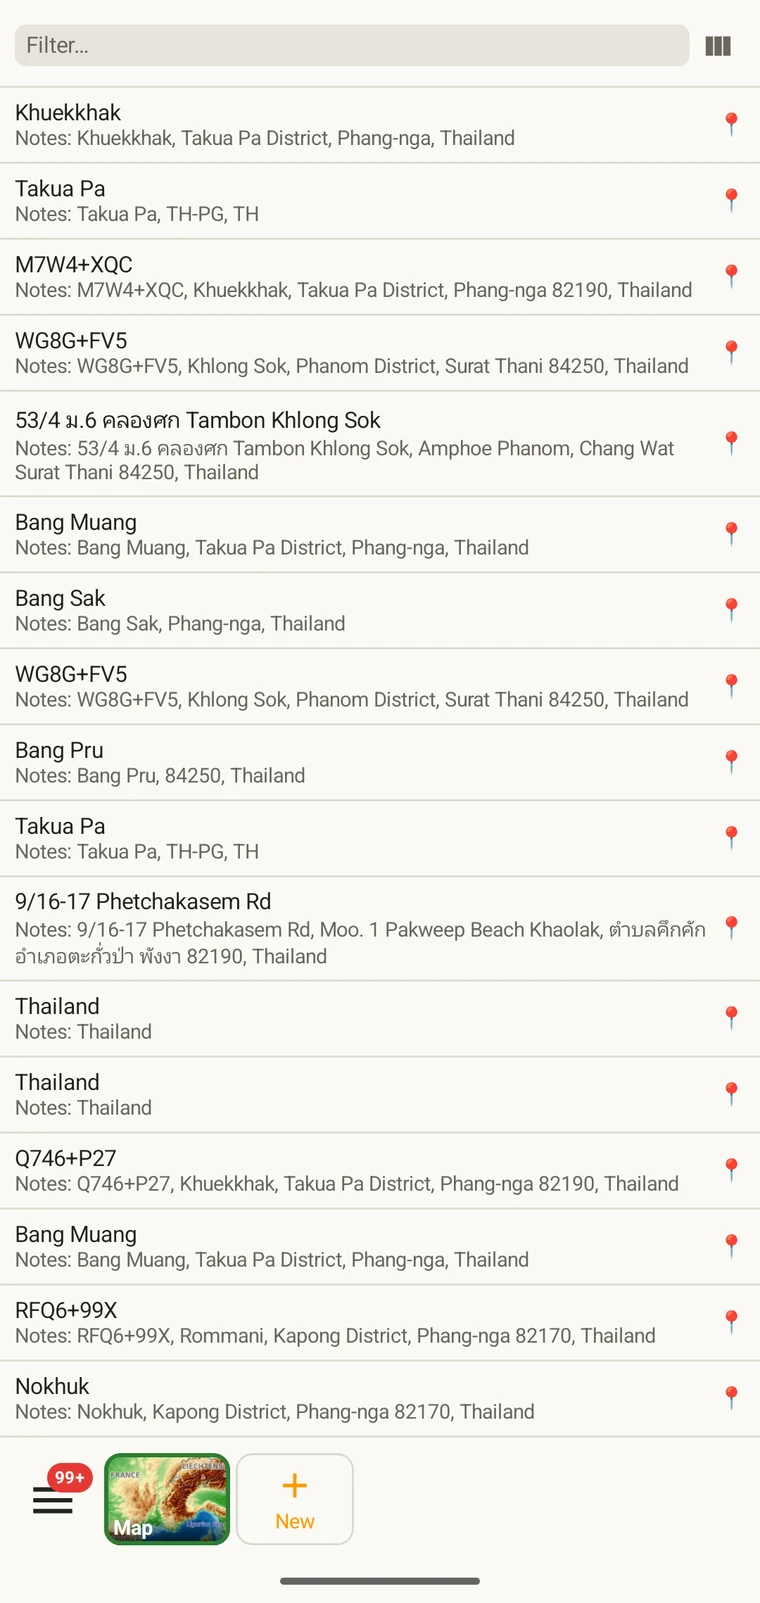
Localities are created either from the localities list in the data browser or directly from the observation form. When creating a locality from the form, the current GPS position is used as the point unless you move the pin on the map. You can name the locality and add notes before saving it; it then appears in the locality picker for future observations.
Correcting a record
Records are editable on the device at any time. There is no lock applied once a recording session ends. Open the observations list at Browsing your data, find the record, and open it to edit any field. The same form that was used to create the record is used to edit it, so all the same validation applies.
Position can be corrected by entering new coordinates directly or, where the protocol form exposes a map picker, by moving the pin. If you took a photo with the correct position in the EXIF metadata, that position is available as a reference when correcting the record in the office.
Edits are written immediately to the local database. If the project is shared via Google Drive, the corrected record will be included in the next export; see Google Drive collaboration for how that merge works.