
開始使用
您的第一次調查
本頁完整走過從安裝到匯出的流程:開啟應用程式、下載您將作業的區域、選擇記錄用的調查方法、在野外輸入觀察記錄、檢視您收集到的內容,以及把資料取出。每個步驟都連結到一個載有完整細節的專屬頁面。
No account, no connection required. All data is stored in a single on-device database. Your records leave the device only when you export them or push them to a Drive folder yourself. The optional online features — weather, AI identification, GBIF, iNaturalist, place and taxon search, map tiles — send only what they need to work; see the privacy policy. The app works with the radio off once you have downloaded the map area you need.
第一次開啟應用程式
When you open EarthCape for the first time, no sign-up is required. The app creates a project for you automatically, named after your device, selects it, and assigns the Casual / incidental protocol. The project is empty — it contains no sample data, no demonstration observations, and no pre-loaded species lists. Use it as it is, or rename it before you begin.
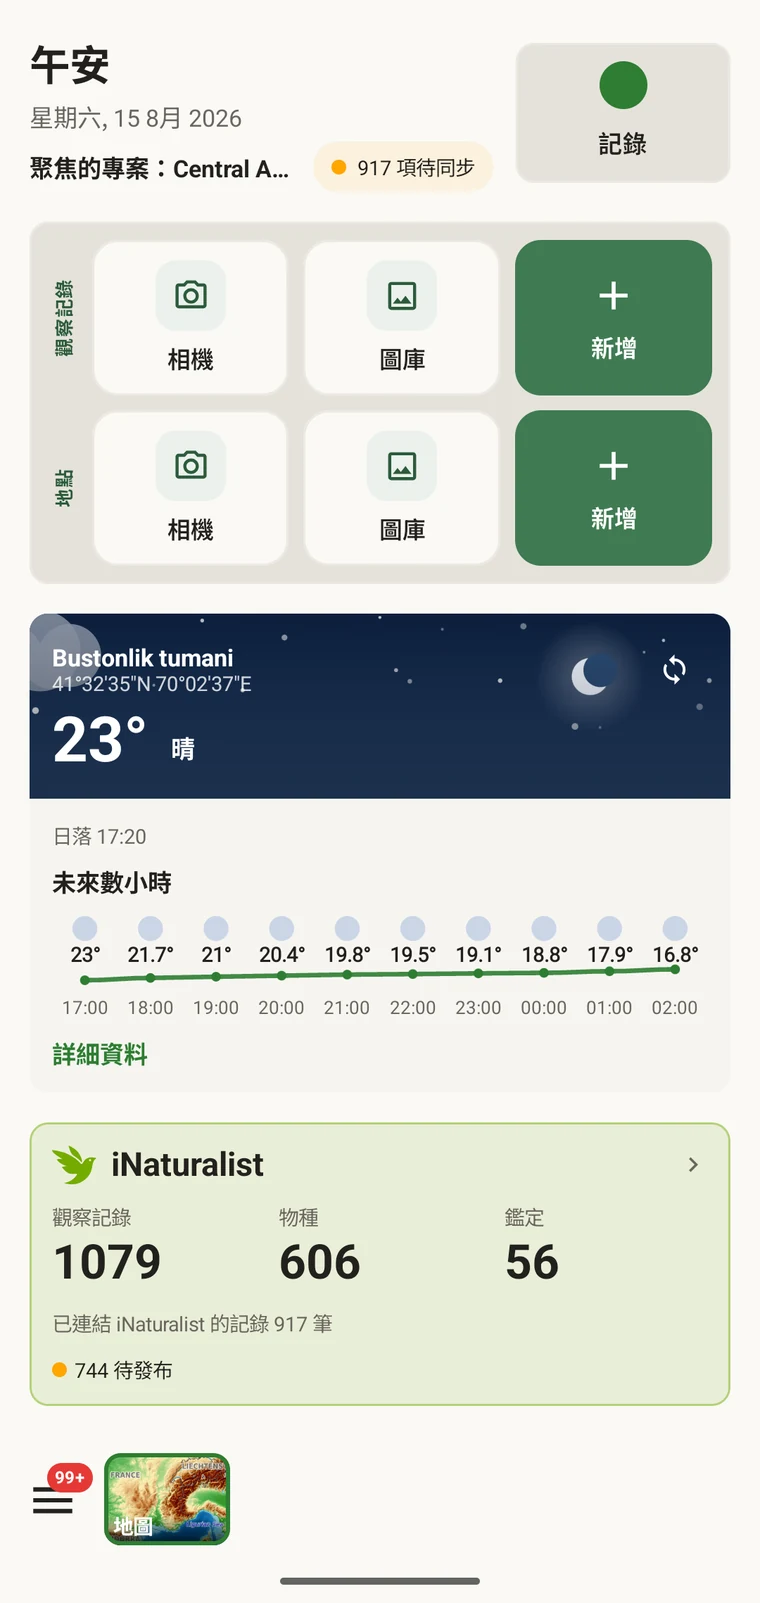
The home screen carries the Record button, quick actions for a new observation or locality (camera, gallery or blank form), and the weather card. Everything else — the map, your data lists, protocols, projects and Admin — is reached from the Menu button at the bottom left.
- 開啟應用程式。主畫面載入後,會選取自動建立的專案。
- If you want to rename it, open Menu → Projects, tap the project and edit its name.
- Take note of the protocol shown — it is Casual / incidental by default. You can change it before you start recording; see Setting the protocol below.
下載地圖區域
底圖以我們自有基礎設施供應的向量圖磚涵蓋全球,不需 API 金鑰,也沒有用量上限。進入野外之前,請先下載您要工作的區域,讓地圖、地形與 3D 起伏在關閉無線通訊時都能運作。完整細節請見地圖與圖磚伺服器與離線地圖。
下載一個區域
- Open the map (Menu → Map).
- 移動到您的野外樣區,並在檢視範圍中框出所需的區域。
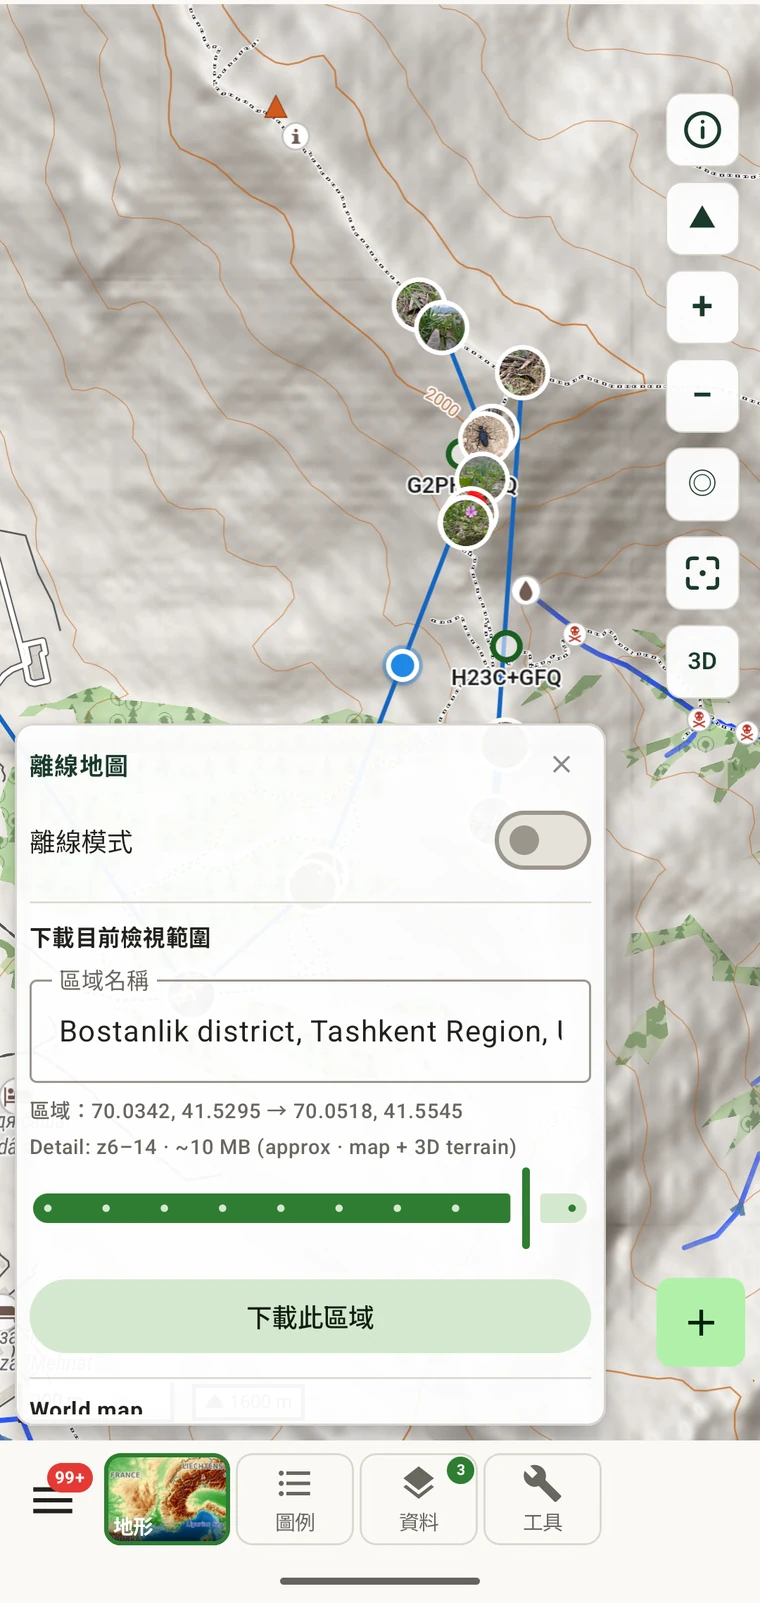
- Tap Tools in the toolbar at the bottom of the map screen, then tap Offline.
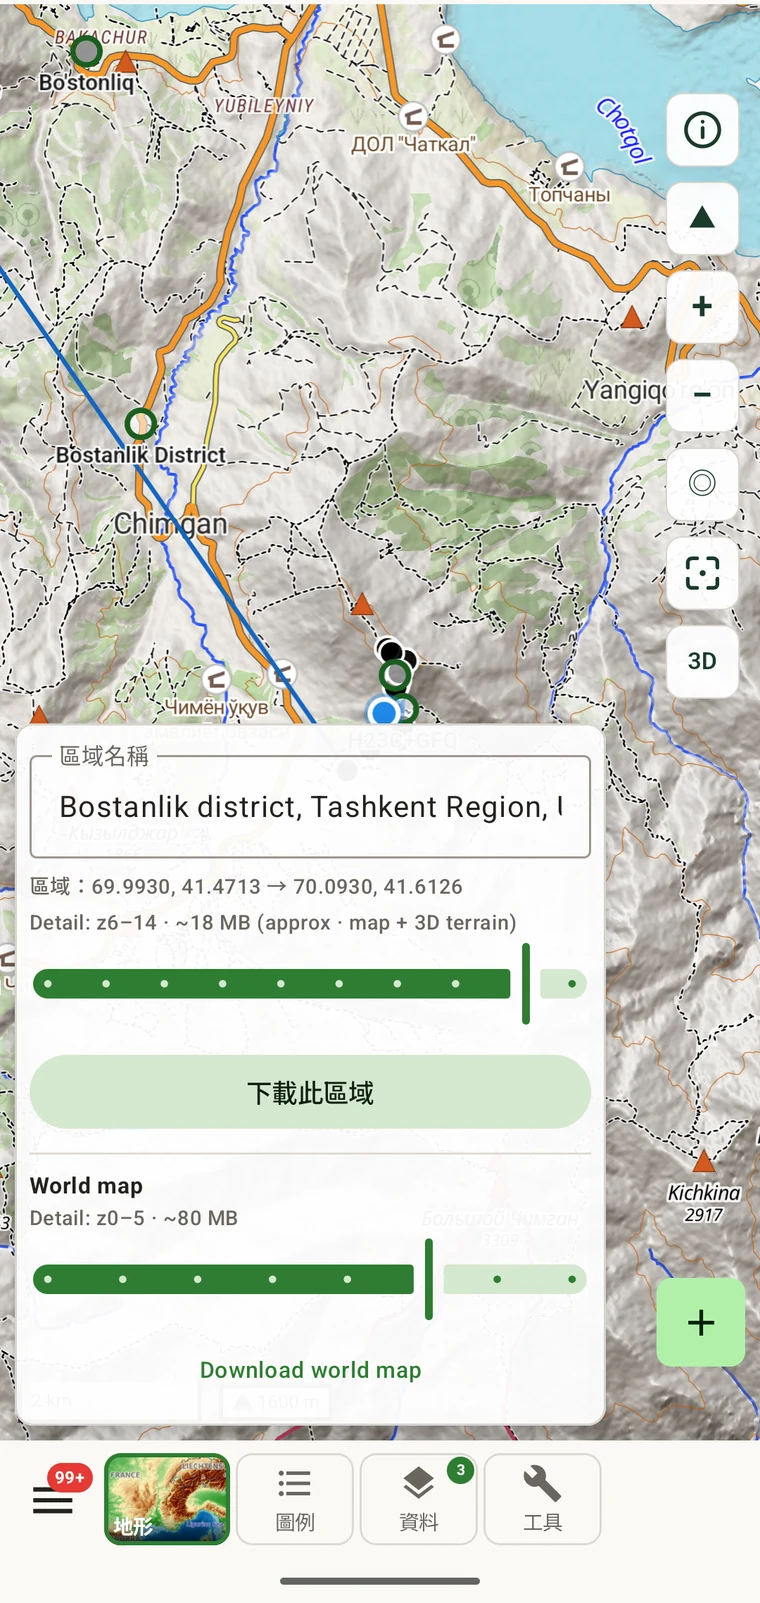
- The panel shows "Download current view". A region name is suggested automatically while you are online — for example, "Bostanlik district, Tashkent Region, Uzbekistan"; otherwise type one.
- Check the coordinates and size estimate. The estimate depends on the area and terrain — the district-sized example in the screenshot is about 11 MB at z6–14 — and includes the map and the 3D terrain model.
- 點選「下載此區域」,並在離開有連線的地方之前等待下載完成。
加上世界概覽
The world overview (z0–5, approximately 80 MB) gives you a rendered basemap at all zoom levels, so the map is never blank when you zoom out beyond your downloaded region. It only needs downloading once.
- In the same Offline panel, scroll down to World map. The detail line reads "Detail: z0–5 · ~80 MB"; the slider lets you change the depth (z0–7).
- 點選「下載世界地圖」。
設定調查方法與表單
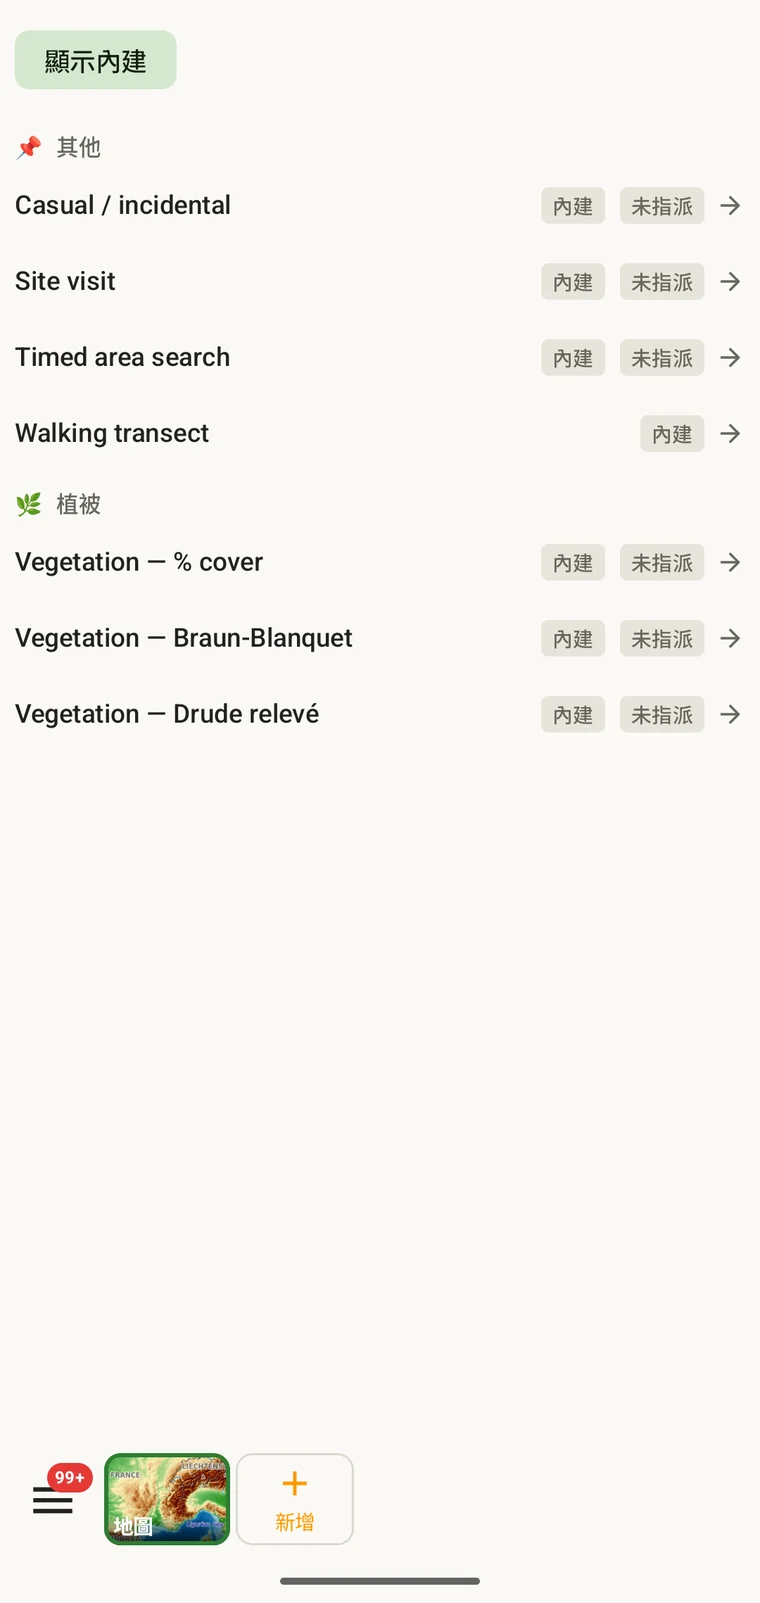
A survey protocol defines the structure of a recording session: what a visit is, which fields appear on the observation form, and how the data is organised for export. Every observation in a project is recorded under the project's active protocol. Seven protocols ship with the app, including Casual / incidental, which is assigned automatically to new projects. You can change the protocol, clone a built-in one to edit it, or write a new one in the Protocols Studio — all on the device.
The Form builder lets you control the field layout for each entity type: show or hide fields, reorder them, group them under headings, and add custom fields. Custom fields defined before the season starts travel with the project, so the whole team's form looks the same from the first day.
- Open Menu → Protocols. The list shows all seven built-in protocols and any you have created.
- Tap a protocol to view it. To assign it, open Menu → Projects, tap your project and under Survey protocol tap Assign a protocol (or Change).
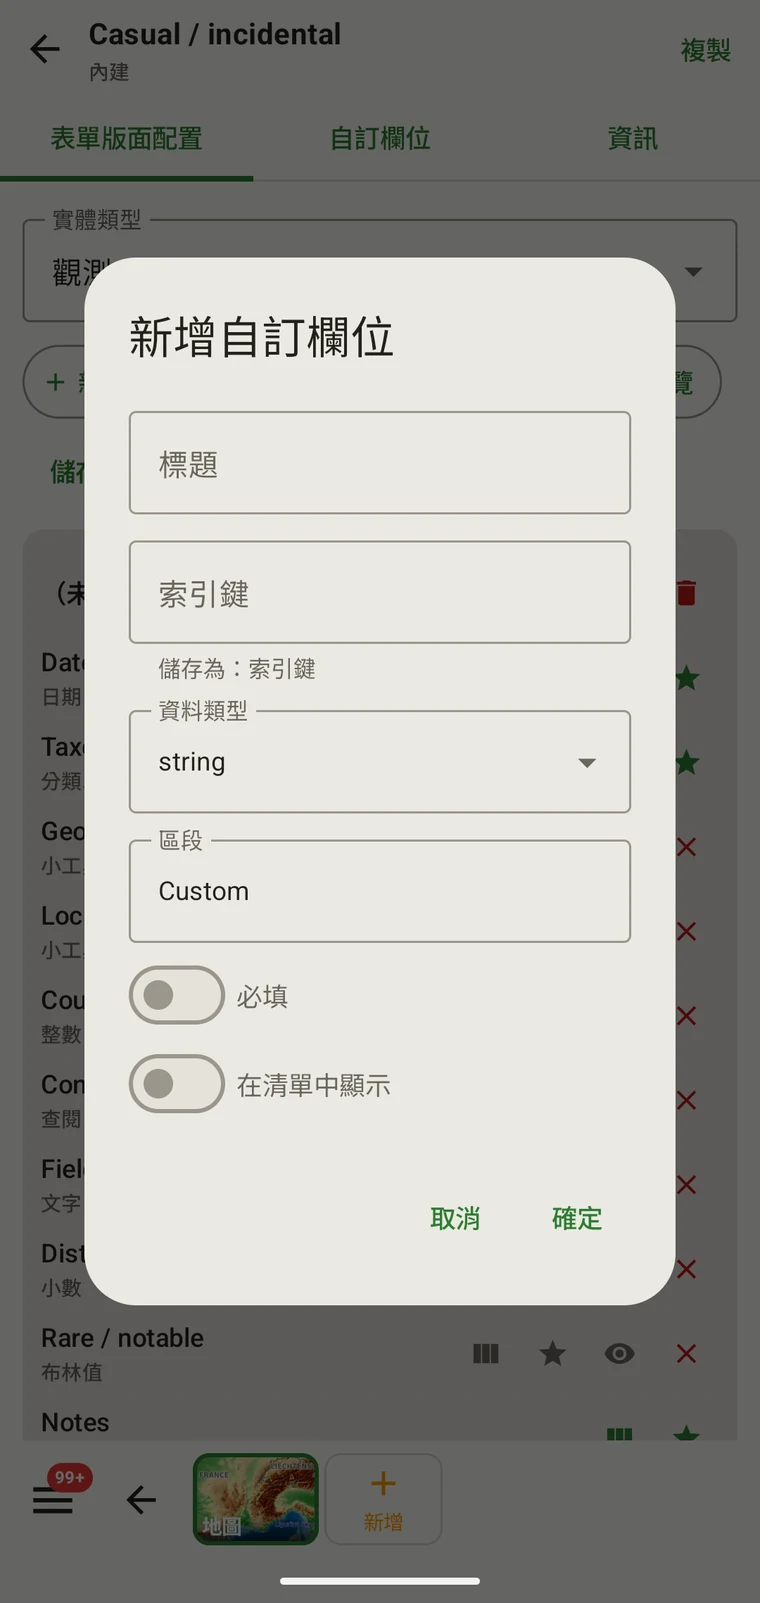
- To add a custom field, open the protocol in Protocols, switch to the Form builder tab, choose the Entity type (for example Observation) and tap Add custom field. Set the caption, key, data type and section, and whether the field is Required and Show in list.
- To share the configuration with colleagues, open the project under Menu → Projects and tap Share; the app writes a
.ecsurveysetup file with the project, protocol, forms, custom fields, sites and vocabulary. Colleagues open the file on their device, or use Import under Menu → Projects. To move the records as well, export a Frictionless Data Package from Menu → Admin → File Import & Export.
在野外記錄
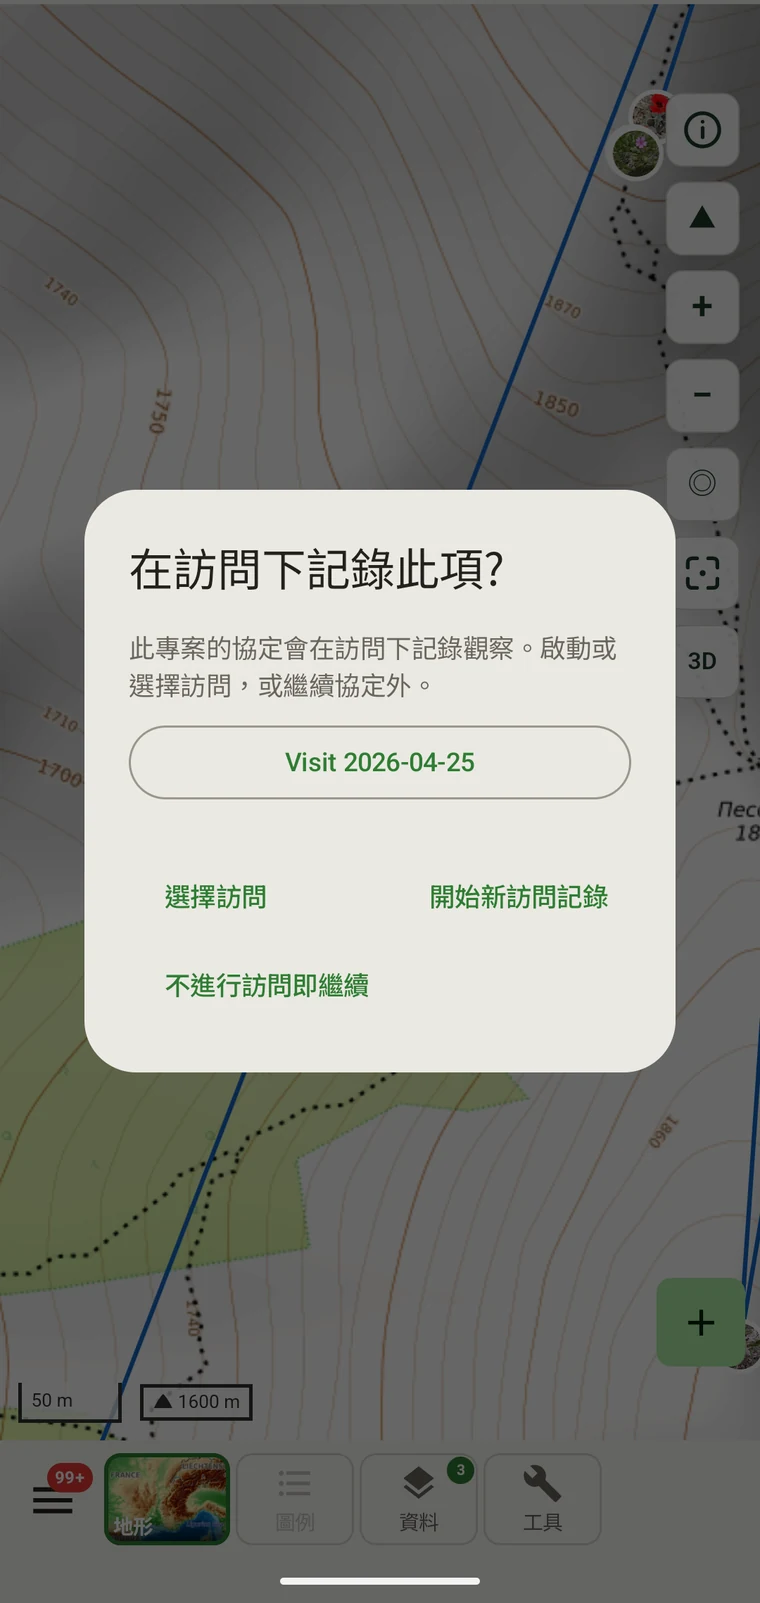
Recording a session means starting a GPS track, which creates a visit for the session, and entering observations as you work through the site. The Recording observations page covers all of this in detail.
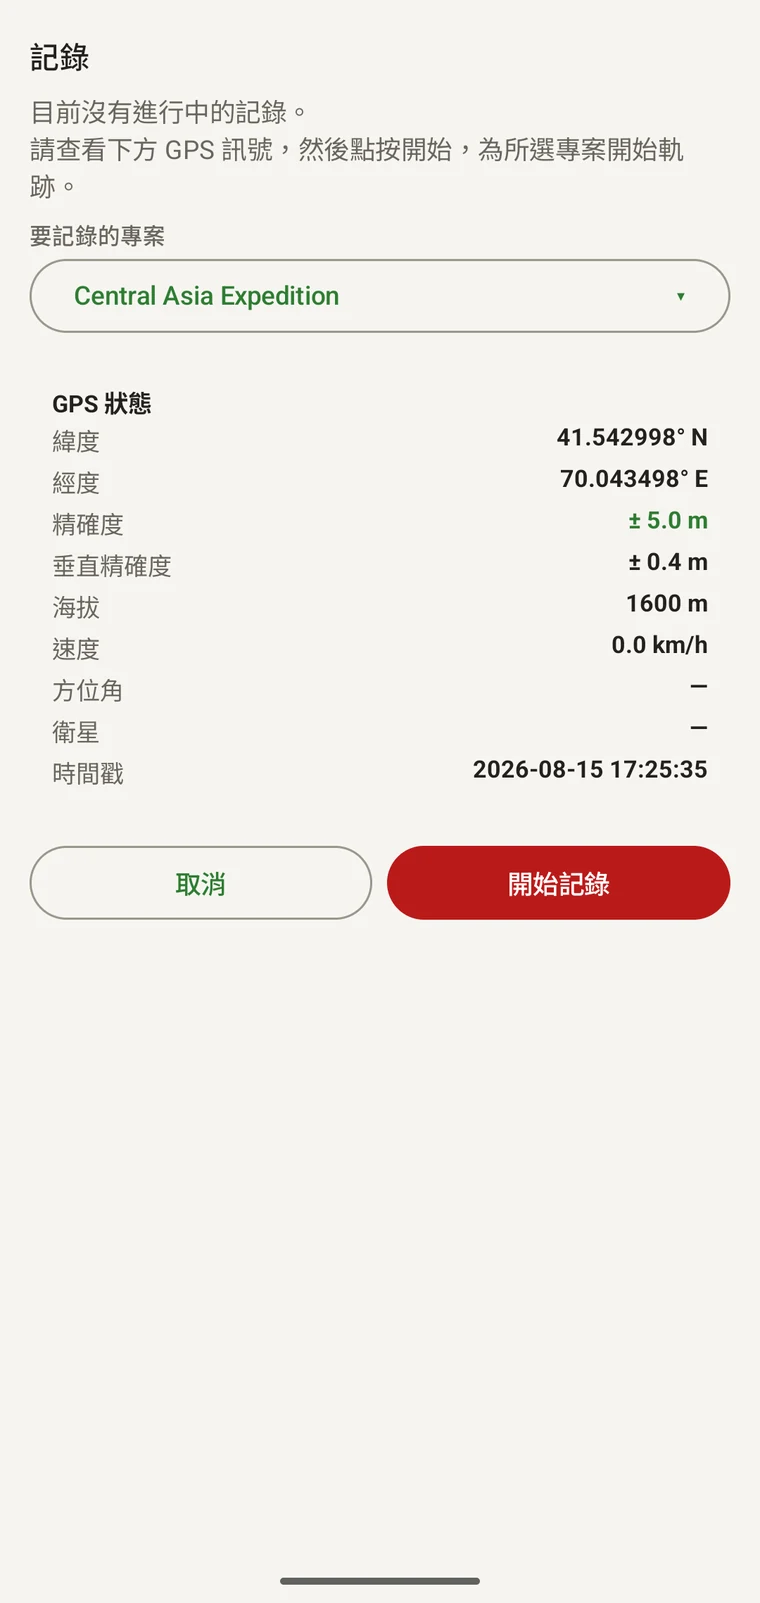
- Open Record from the home screen or the Record tile in the Menu.
- Check the GPS status fields before you start: Latitude, Longitude, Accuracy, V-Accuracy, Altitude, Speed, Bearing, Satellites and Timestamp are all shown. Wait until Accuracy reaches an acceptable value for your work — ±5 m or better is typical in open terrain.
- 畫面會顯示「記錄所屬的專案」與作用中的專案名稱。請確認無誤。
- Tap Start recording. A visit is created for the session automatically, and observations you add while recording are linked to it.
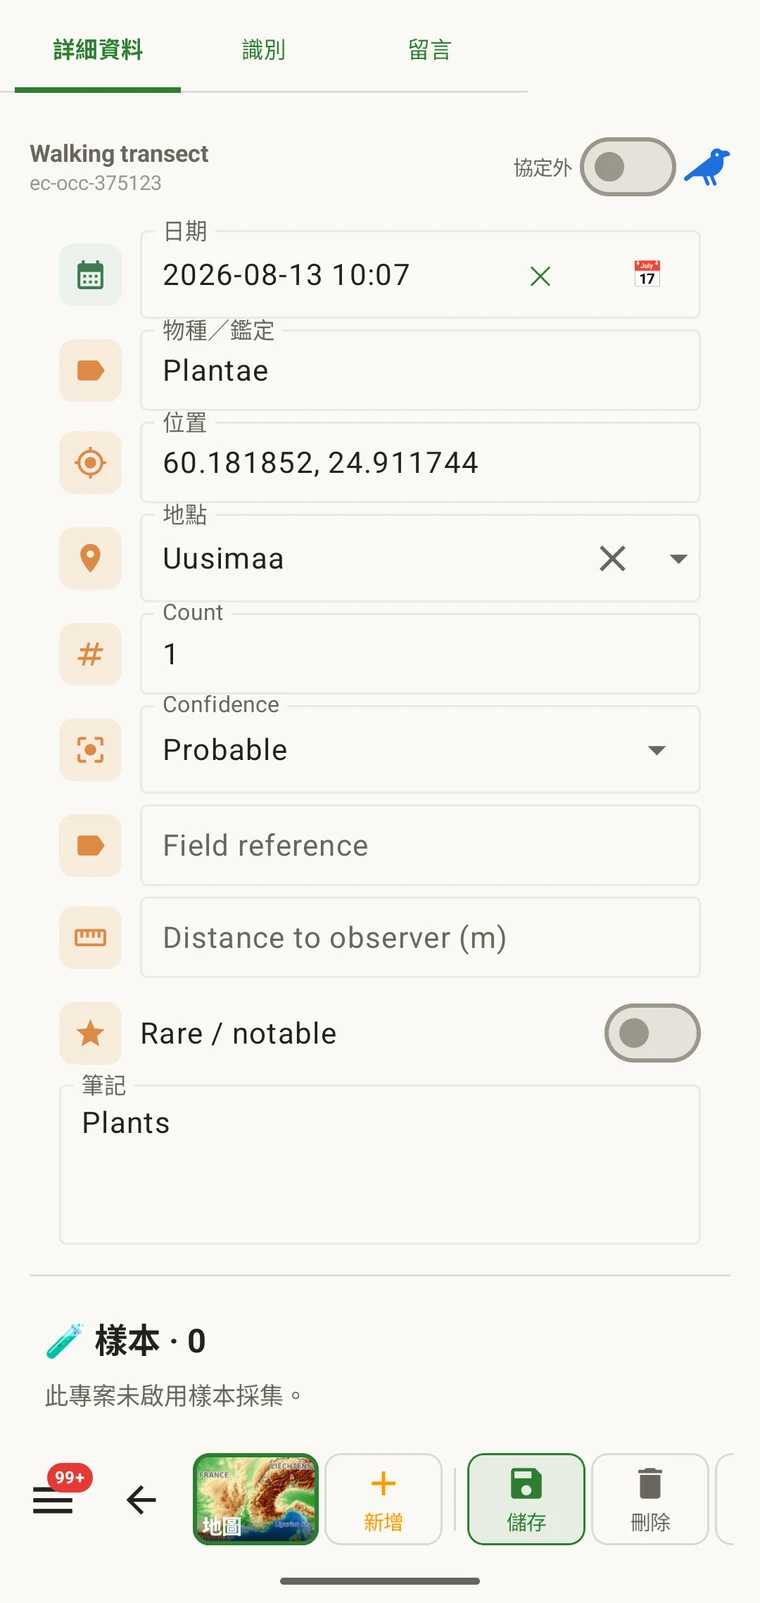
- 在樣區中移動時陸續加入觀察。每一筆觀察都會開啟該調查方法的表單;請填入分類群與各項方法欄位,並視需要附加相片。
- When the session is finished, tap Stop & save. The track and all observations are saved to the on-device database.
檢視收集到的內容
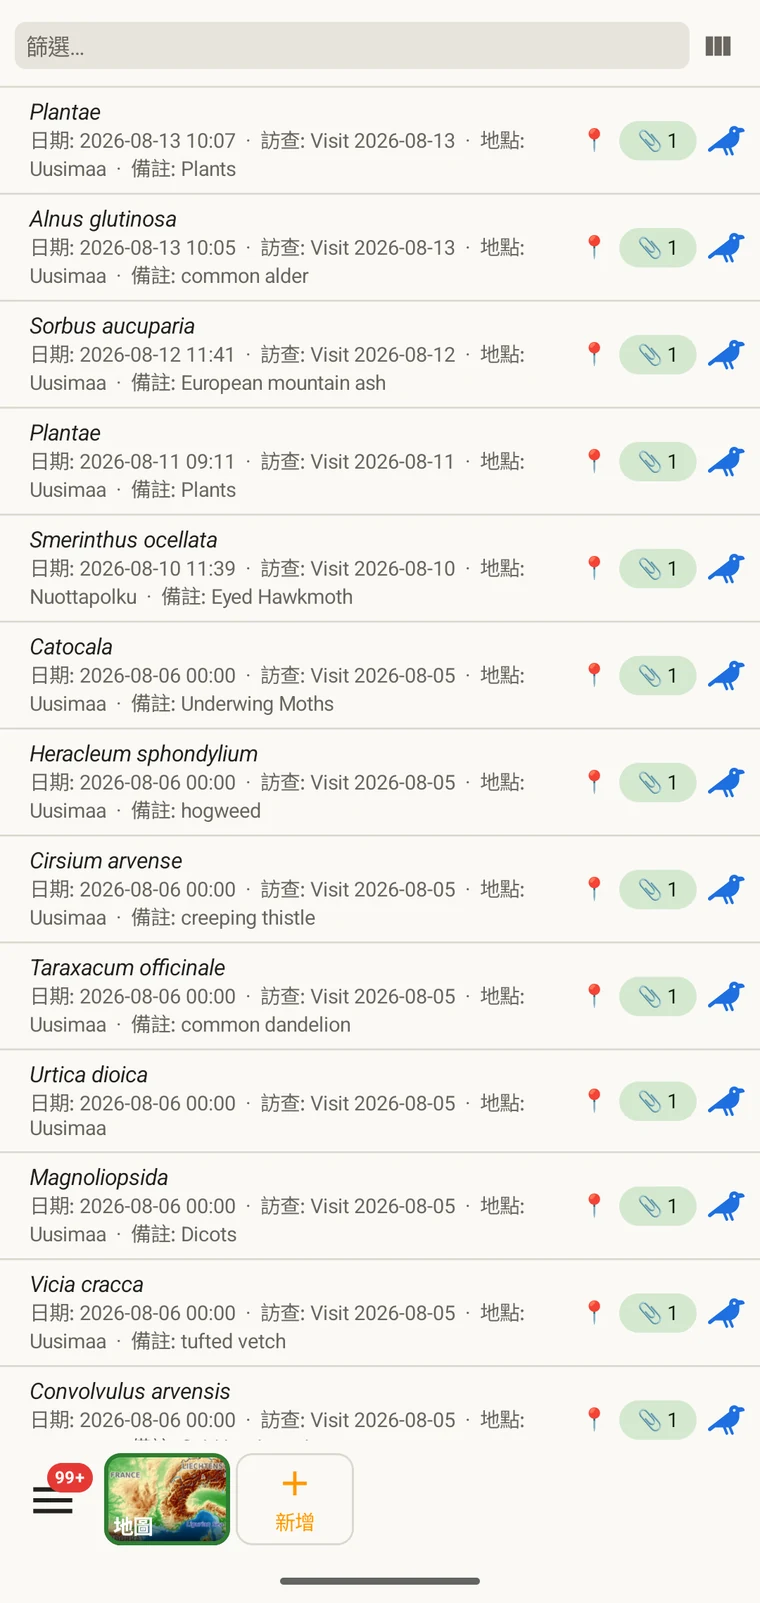
The data lists give you access to every record in the project as a filterable list. After a day in the field, use them to check completeness, find entry errors and open records for correction.
- Open Menu → Observations (or Visits, Localities, Taxa, or Files depending on what you want to review).
- The list opens with the default column set. Tap the columns icon (Choose columns) to add, remove or reorder columns — for example, add Accuracy or Altitude to check GPS quality.
- Type in the Filter… box to narrow the list; it matches text in any shown column. In the wide (tablet) grid each column has its own filter cell, and tapping a column header sorts by it.
- 點選任一列即可開啟完整記錄並加以編輯。
把資料匯出
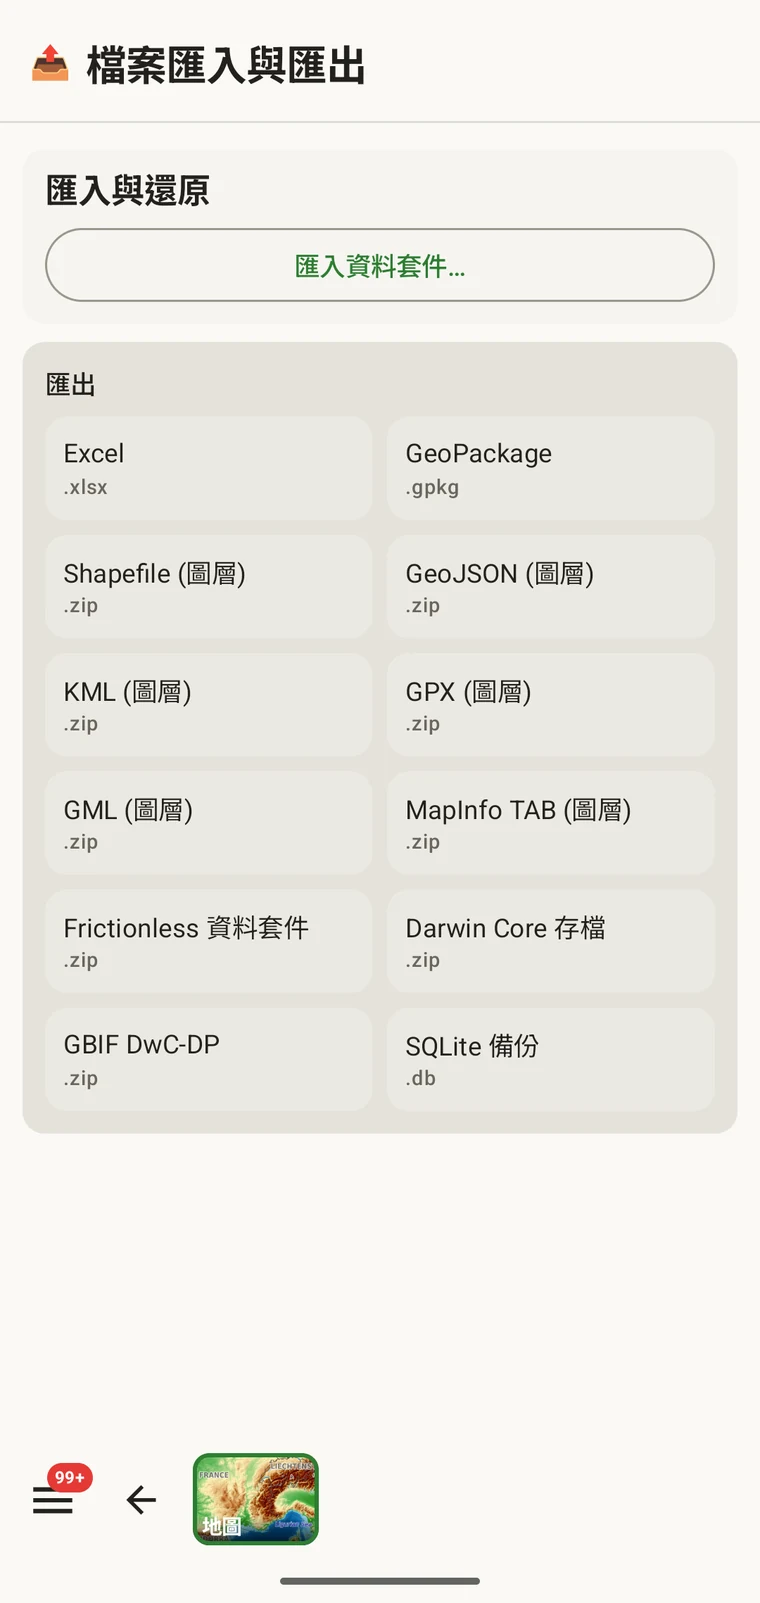
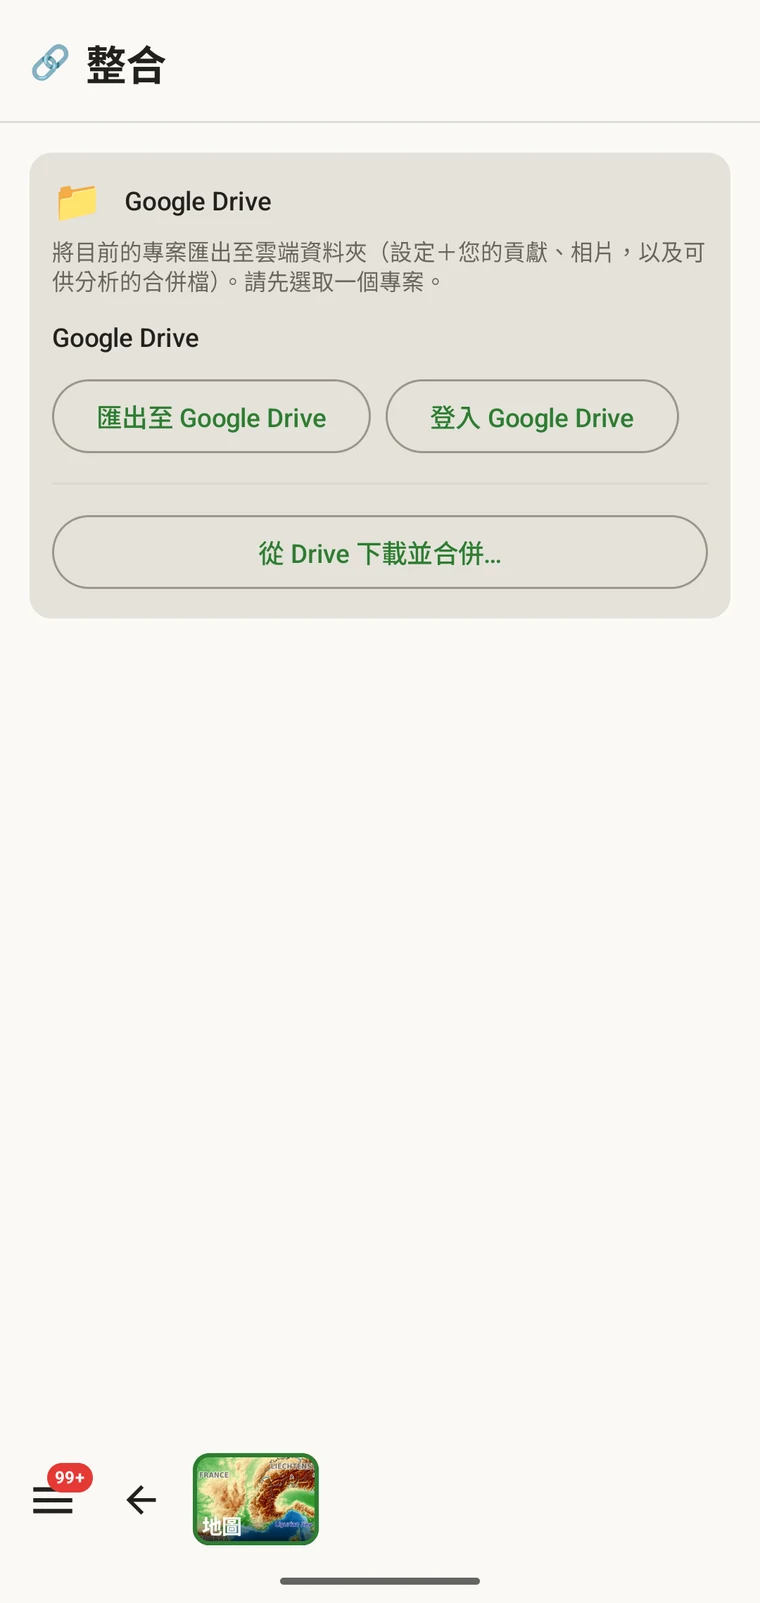
EarthCape exports to twelve formats. The right choice depends on your destination: Darwin Core Archive for a biodiversity repository, GeoPackage for a GIS, Excel for spreadsheet work. If several people are collecting data on the same survey, Google Drive lets you push each person's contribution to a shared folder and merge them — without an EarthCape account or a server (a Google account is needed for Drive). See Export formats and Google Drive collaboration for the full procedure.
- Open Menu → Admin → File Import & Export.
- 選擇符合用途的格式。十二種格式都列在匯出畫面上。
- Tap the format to generate the file. The filename is set automatically from the project name, its id and a timestamp.
- 透過 Android 分享選單分享檔案(Quick Share、Drive、訊息、Bluetooth、Gmail 或任何其他已安裝的目標),或直接送往已設定的雲端目的地。
- Alternatively, open Menu → Admin → Integrations and tap Export to Google Drive to push the current project — setup, your contributions, photos and an analysis-ready merge — to a shared Drive folder.
接下來該讀什麼
本導覽涵蓋的每個主題都有專屬的參考頁面,內容更為完整。
| 如果您想要… | 請前往 |
|---|---|
| 了解底圖如何運作,以及費用如何 | 地圖與圖磚伺服器 |
| 管理離線區域、檢查大小、刪除舊的下載 | 離線地圖 |
| 使用地圖測量、步道貼齊與搜尋 | 地圖工具 |
| 了解完整的記錄流程、訪查與地點 | 記錄觀察 |
| 設定表單版面並新增自訂欄位 | 表單與自訂欄位 |
| 閱讀或撰寫調查方法 | 調查方法 |
| 篩選、排序並檢視裝置上的資料 | 瀏覽您的資料 |
| 為您的用途選擇合適的匯出格式 | 匯出格式 |
| 透過 Google Drive 與同事分享資料 | Google Drive 協作 |