
Bắt đầu
Cuộc khảo sát đầu tiên
Trang này đi qua trọn vòng từ cài đặt đến xuất dữ liệu: mở ứng dụng, tải khu vực bạn sẽ làm việc, chọn giao thức ghi chép, nhập quan sát ngoài thực địa, rà soát những gì đã thu thập, và đưa dữ liệu ra ngoài. Mỗi bước liên kết đến một trang riêng với đầy đủ chi tiết.
No account, no connection required. All data is stored in a single on-device database. Your records leave the device only when you export them or push them to a Drive folder yourself. The optional online features — weather, AI identification, GBIF, iNaturalist, place and taxon search, map tiles — send only what they need to work; see the privacy policy. The app works with the radio off once you have downloaded the map area you need.
Mở ứng dụng lần đầu tiên
When you open EarthCape for the first time, no sign-up is required. The app creates a project for you automatically, named after your device, selects it, and assigns the Casual / incidental protocol. The project is empty — it contains no sample data, no demonstration observations, and no pre-loaded species lists. Use it as it is, or rename it before you begin.
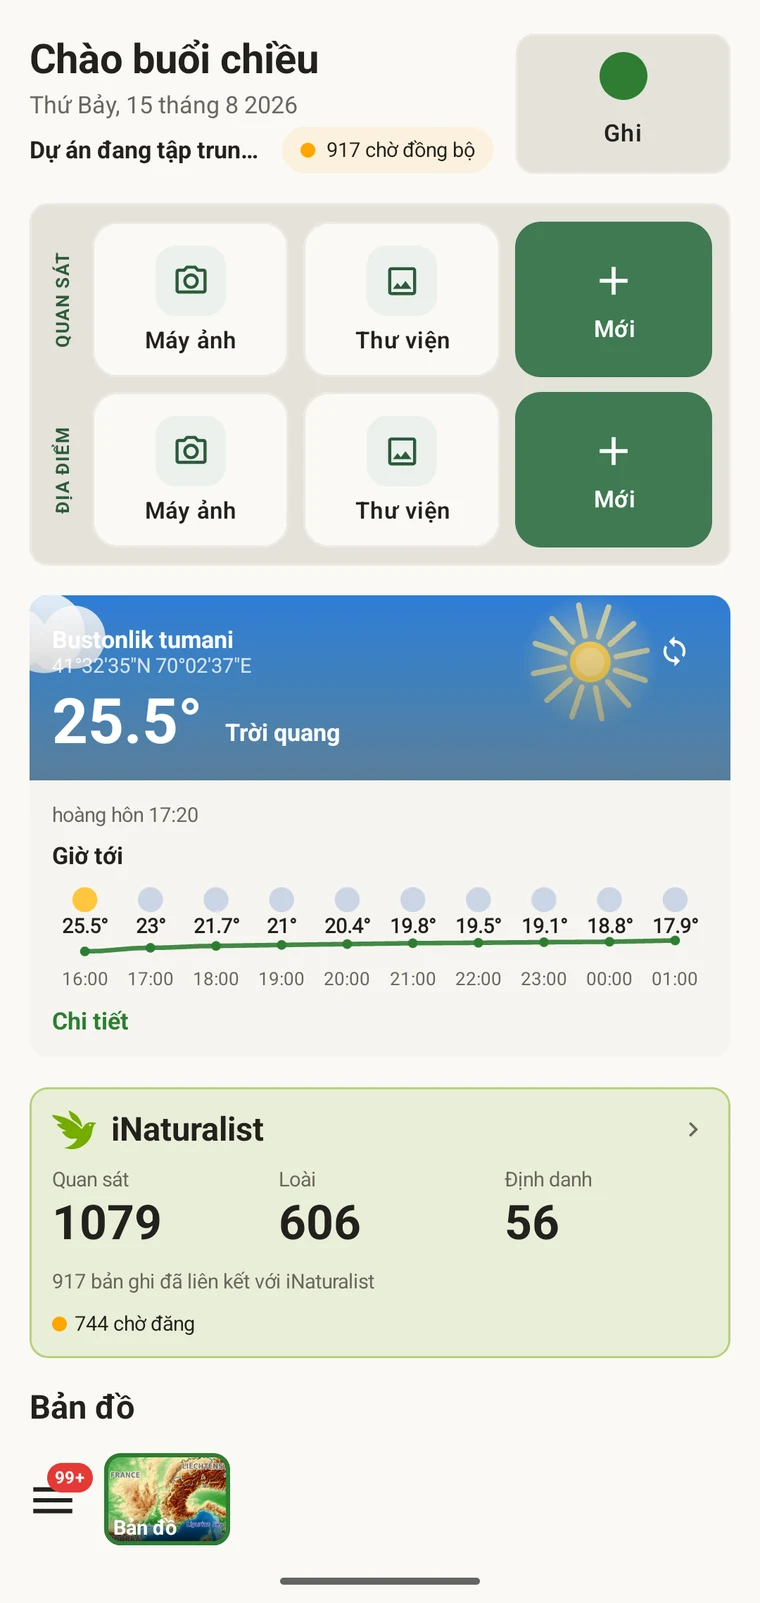
The home screen carries the Record button, quick actions for a new observation or locality (camera, gallery or blank form), and the weather card. Everything else — the map, your data lists, protocols, projects and Admin — is reached from the Menu button at the bottom left.
- Mở ứng dụng. Màn hình chính nạp lên với dự án được tạo tự động đang được chọn.
- If you want to rename it, open Menu → Projects, tap the project and edit its name.
- Take note of the protocol shown — it is Casual / incidental by default. You can change it before you start recording; see Setting the protocol below.
Tải khu vực bản đồ
Bản đồ nền phủ toàn bộ hành tinh qua các ô bản đồ vector phục vụ từ hạ tầng của chúng tôi — không cần khóa API, không có giới hạn sử dụng. Trước khi ra thực địa, hãy tải khu vực sẽ làm việc để bản đồ, địa hình và địa hình nổi 3D đều hoạt động khi tắt sóng. Xem Bản đồ và máy chủ ô bản đồ và Bản đồ ngoại tuyến để biết đầy đủ chi tiết.
Tải một vùng
- Open the map (Menu → Map).
- Di chuyển đến địa điểm thực địa và đưa khu vực cần dùng vào khung nhìn.
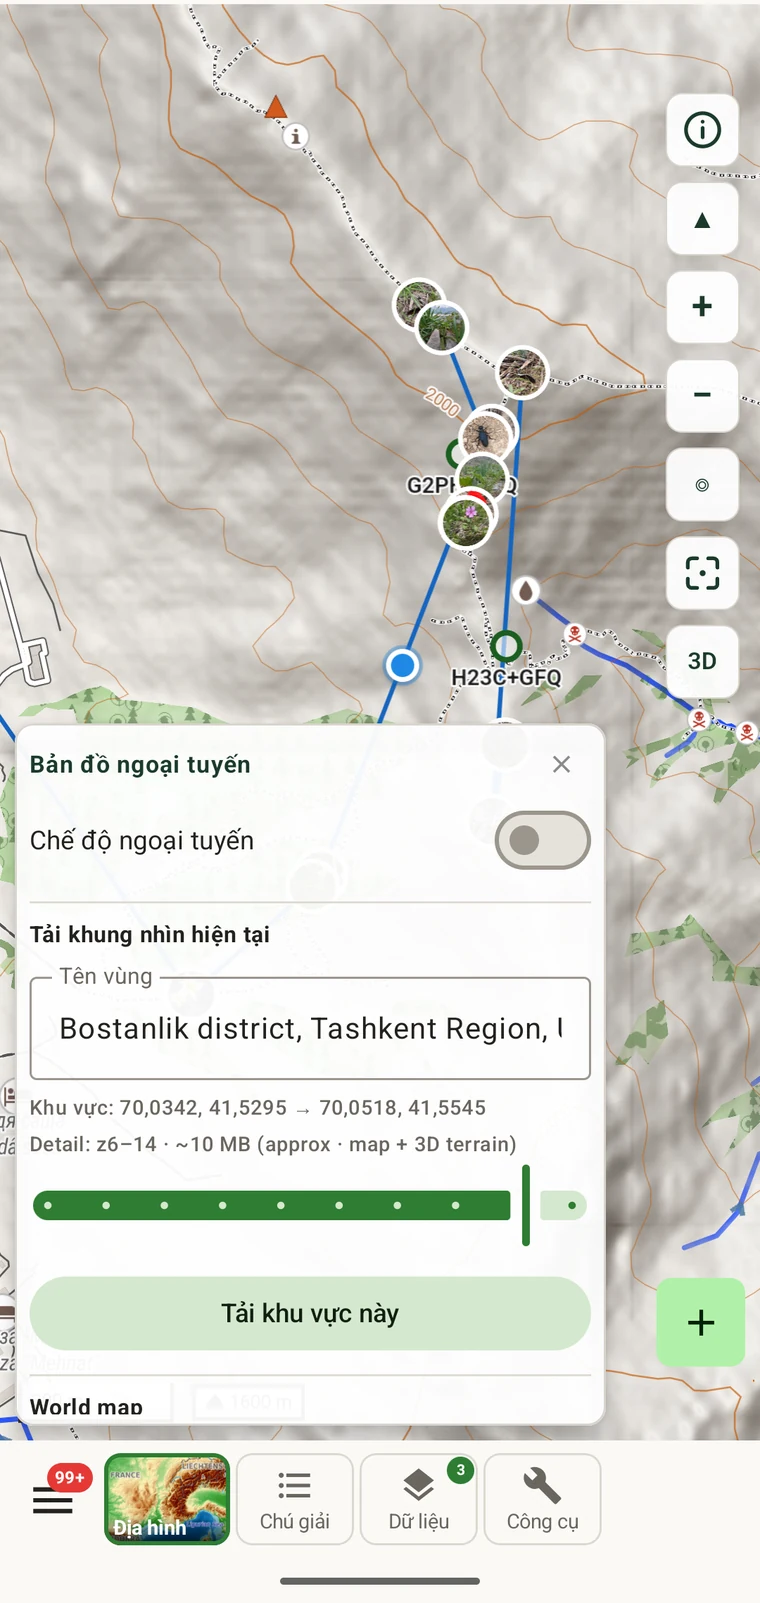
- Tap Tools in the toolbar at the bottom of the map screen, then tap Offline.
- The panel shows "Download current view". A region name is suggested automatically while you are online — for example, "Bostanlik district, Tashkent Region, Uzbekistan"; otherwise type one.
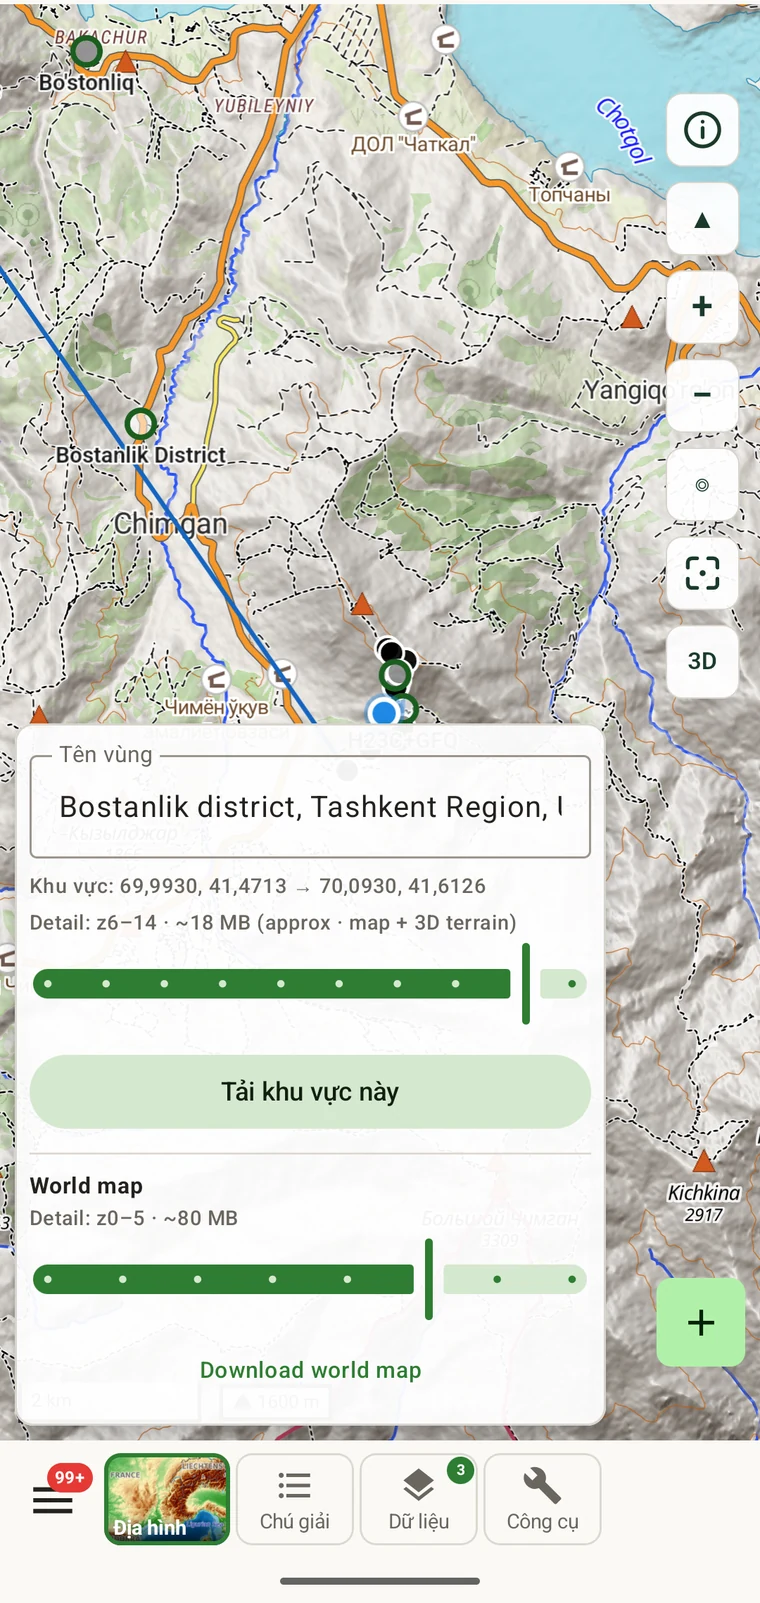
- Check the coordinates and size estimate. The estimate depends on the area and terrain — the district-sized example in the screenshot is about 11 MB at z6–14 — and includes the map and the 3D terrain model.
- Chạm vào "Tải khu vực này" và chờ tải xong trước khi rời khỏi vùng có kết nối.
Thêm bản đồ tổng quan thế giới
The world overview (z0–5, approximately 80 MB) gives you a rendered basemap at all zoom levels, so the map is never blank when you zoom out beyond your downloaded region. It only needs downloading once.
- In the same Offline panel, scroll down to World map. The detail line reads "Detail: z0–5 · ~80 MB"; the slider lets you change the depth (z0–7).
- Chạm vào "Tải bản đồ thế giới".
Đặt giao thức và biểu mẫu
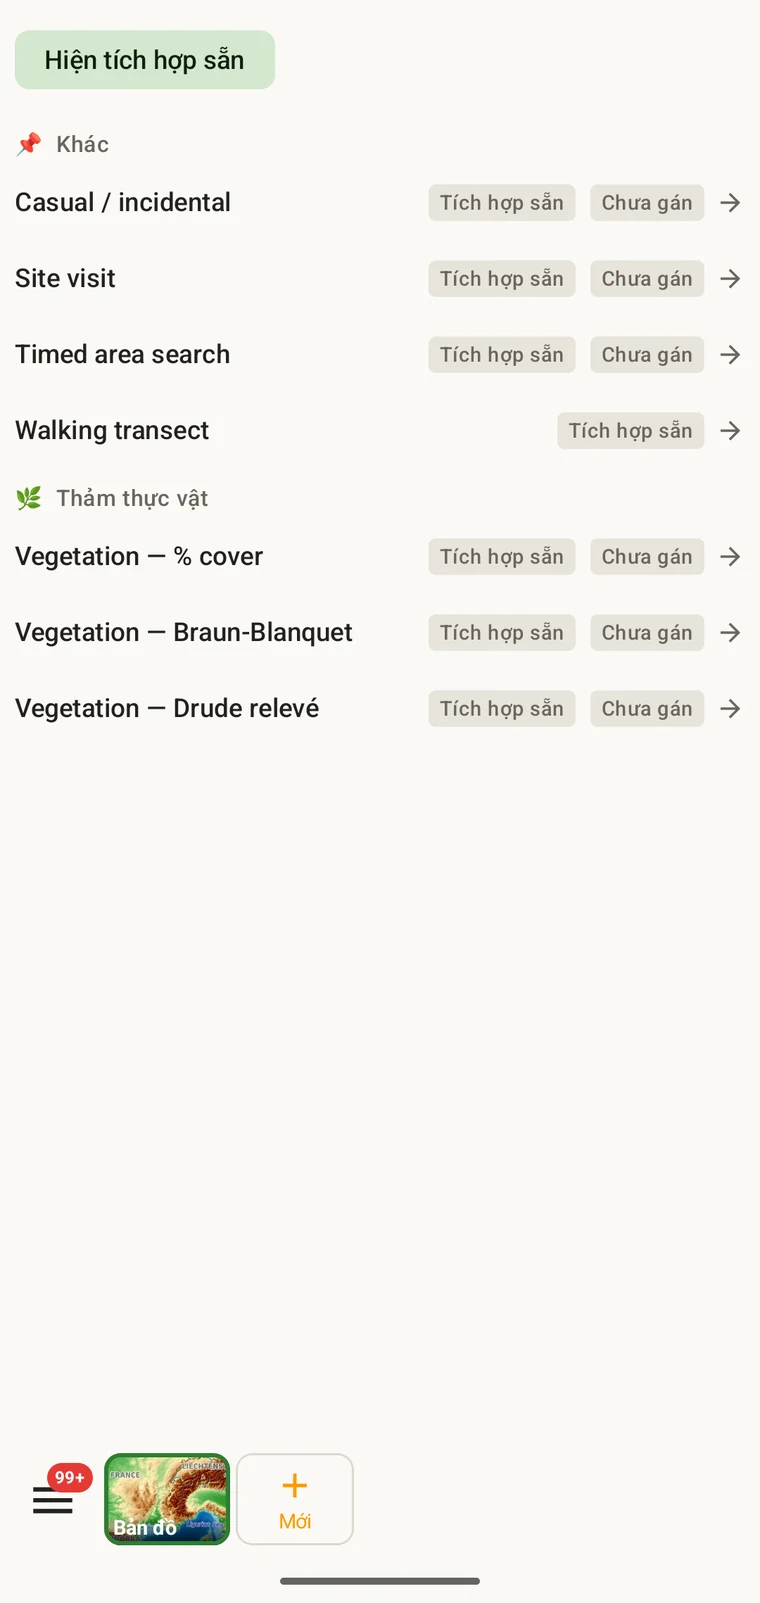
A survey protocol defines the structure of a recording session: what a visit is, which fields appear on the observation form, and how the data is organised for export. Every observation in a project is recorded under the project's active protocol. Seven protocols ship with the app, including Casual / incidental, which is assigned automatically to new projects. You can change the protocol, clone a built-in one to edit it, or write a new one in the Protocols Studio — all on the device.
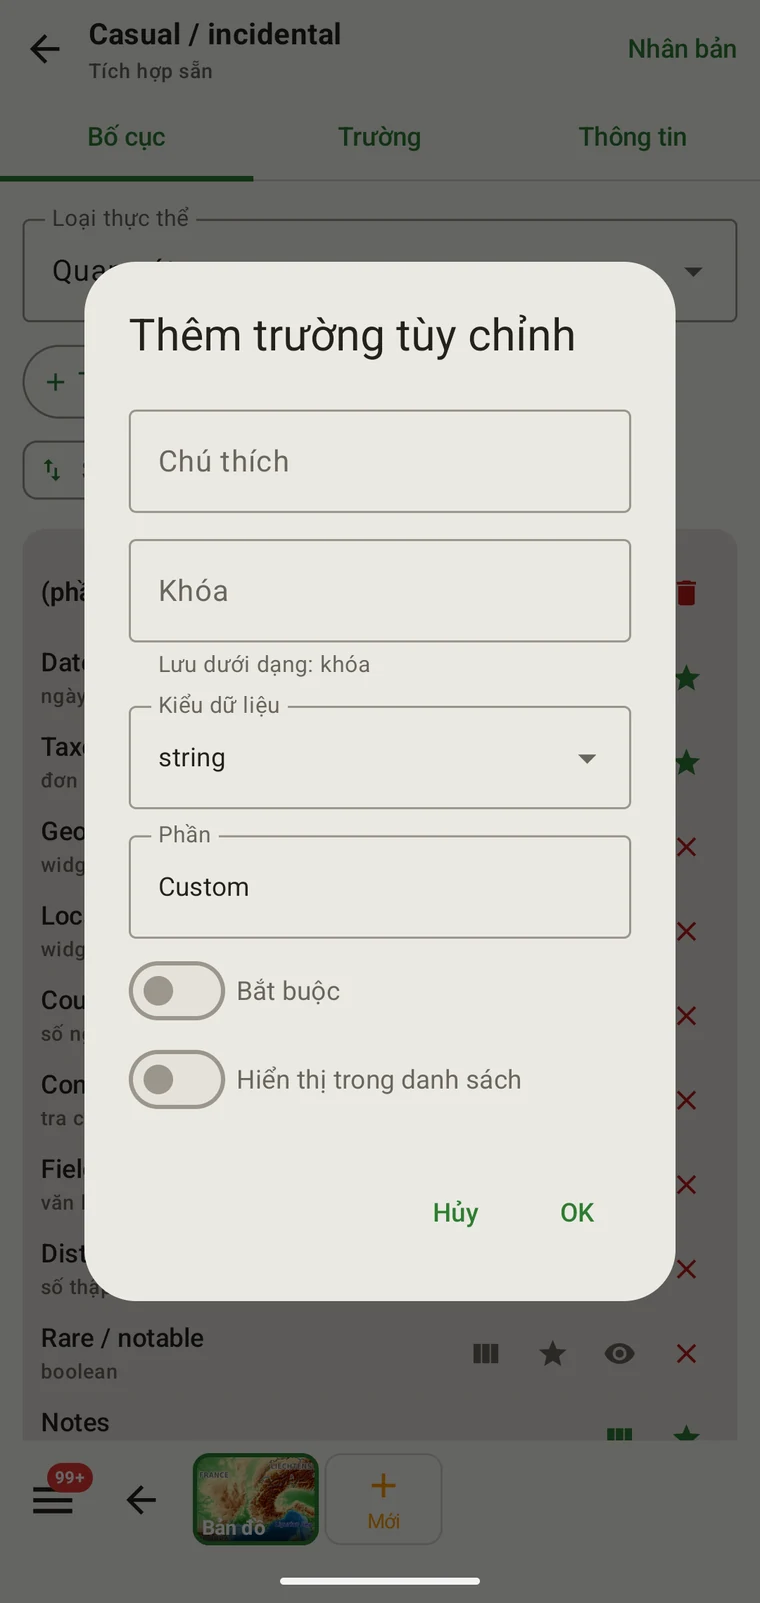
The Form builder lets you control the field layout for each entity type: show or hide fields, reorder them, group them under headings, and add custom fields. Custom fields defined before the season starts travel with the project, so the whole team's form looks the same from the first day.
- Open Menu → Protocols. The list shows all seven built-in protocols and any you have created.
- Tap a protocol to view it. To assign it, open Menu → Projects, tap your project and under Survey protocol tap Assign a protocol (or Change).
- To add a custom field, open the protocol in Protocols, switch to the Form builder tab, choose the Entity type (for example Observation) and tap Add custom field. Set the caption, key, data type and section, and whether the field is Required and Show in list.
- To share the configuration with colleagues, open the project under Menu → Projects and tap Share; the app writes a
.ecsurveysetup file with the project, protocol, forms, custom fields, sites and vocabulary. Colleagues open the file on their device, or use Import under Menu → Projects. To move the records as well, export a Frictionless Data Package from Menu → Admin → File Import & Export.
Ghi chép ngoài thực địa
Recording a session means starting a GPS track, which creates a visit for the session, and entering observations as you work through the site. The Recording observations page covers all of this in detail.
- Open Record from the home screen or the Record tile in the Menu.
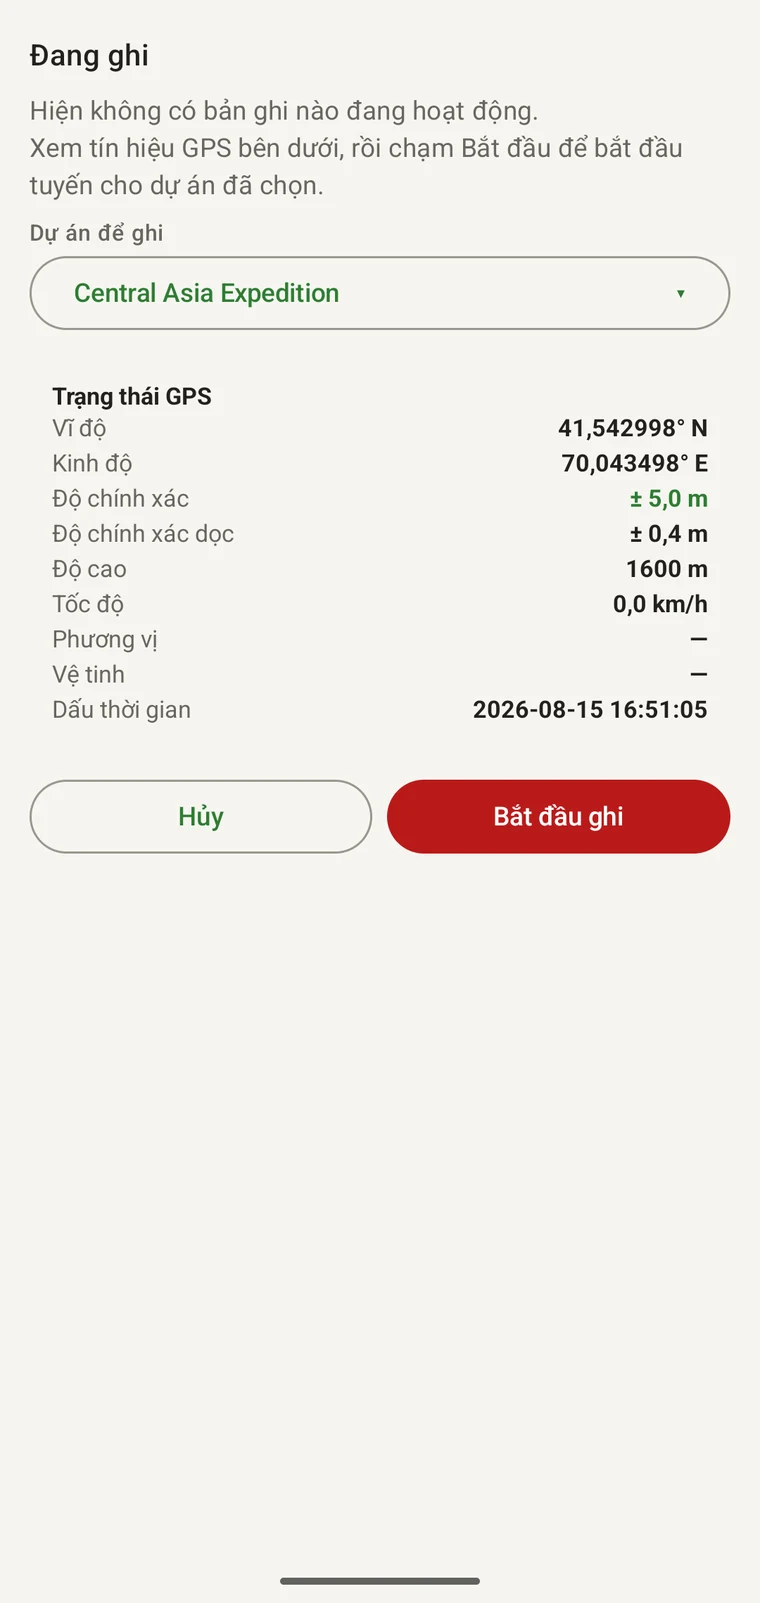
- Check the GPS status fields before you start: Latitude, Longitude, Accuracy, V-Accuracy, Altitude, Speed, Bearing, Satellites and Timestamp are all shown. Wait until Accuracy reaches an acceptable value for your work — ±5 m or better is typical in open terrain.
- Màn hình hiển thị "Dự án để ghi vào" kèm tên dự án đang hoạt động. Hãy xác nhận là đúng.
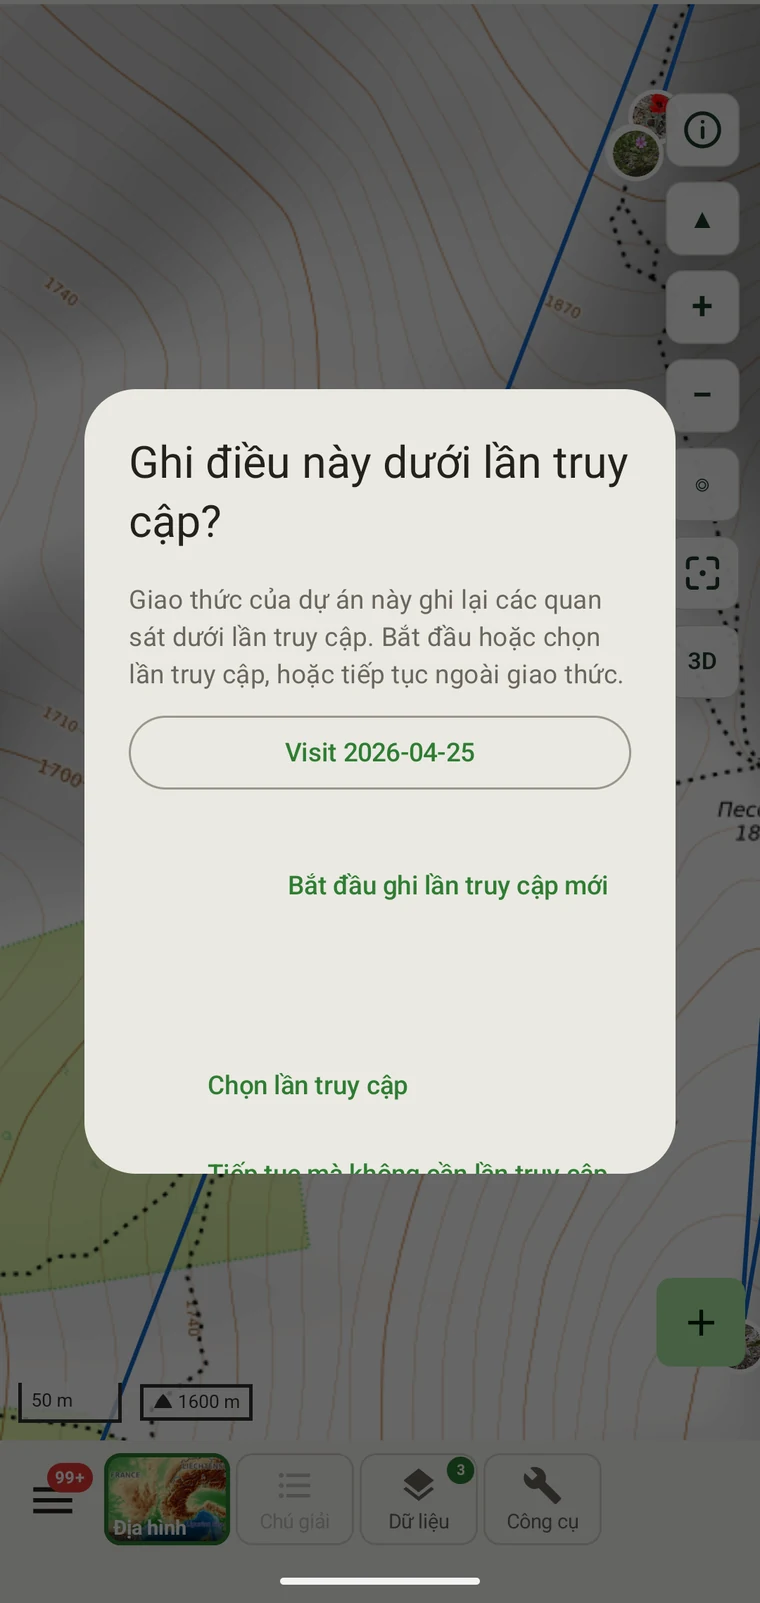
- Tap Start recording. A visit is created for the session automatically, and observations you add while recording are linked to it.
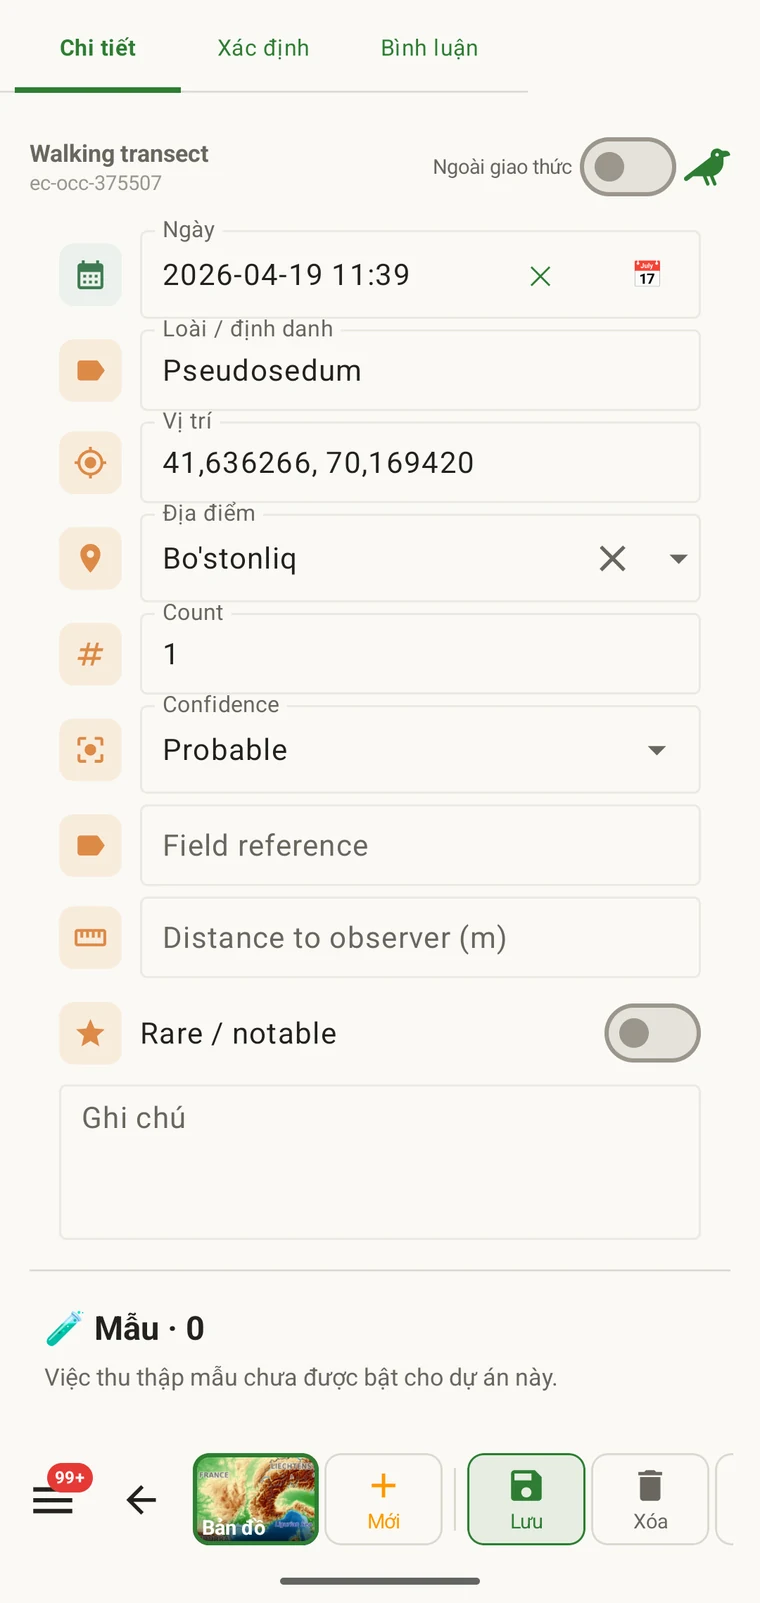
- Thêm quan sát khi di chuyển qua địa điểm. Mỗi quan sát mở biểu mẫu của giao thức; hãy điền đơn vị phân loại, các trường của giao thức và tùy chọn đính kèm ảnh.
- When the session is finished, tap Stop & save. The track and all observations are saved to the on-device database.
Kiểm tra những gì đã thu thập
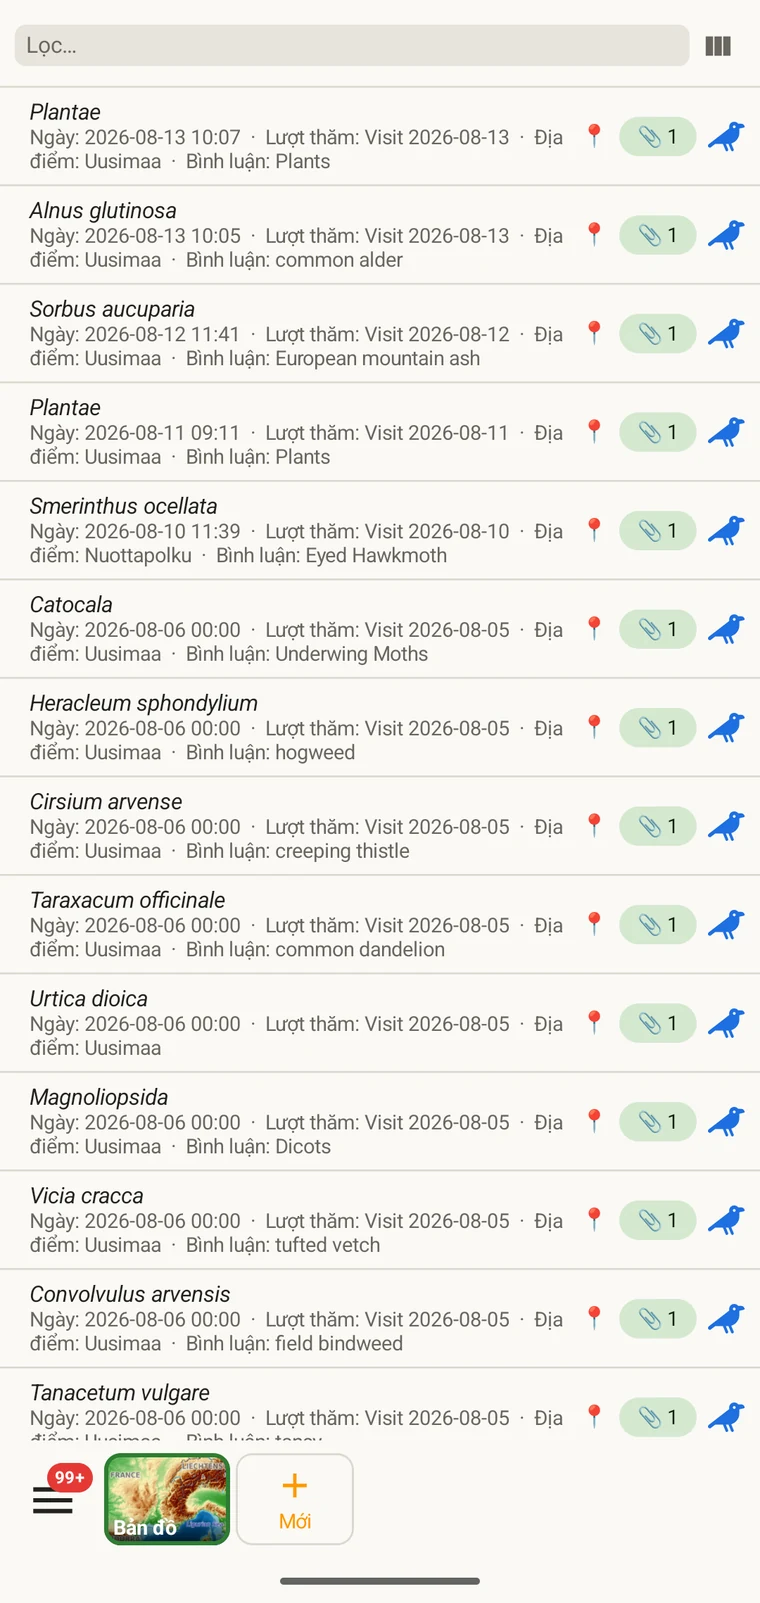
The data lists give you access to every record in the project as a filterable list. After a day in the field, use them to check completeness, find entry errors and open records for correction.
- Open Menu → Observations (or Visits, Localities, Taxa, or Files depending on what you want to review).
- The list opens with the default column set. Tap the columns icon (Choose columns) to add, remove or reorder columns — for example, add Accuracy or Altitude to check GPS quality.
- Type in the Filter… box to narrow the list; it matches text in any shown column. In the wide (tablet) grid each column has its own filter cell, and tapping a column header sorts by it.
- Chạm vào một hàng bất kỳ để mở bản ghi đầy đủ và chỉnh sửa.
Đưa dữ liệu ra ngoài
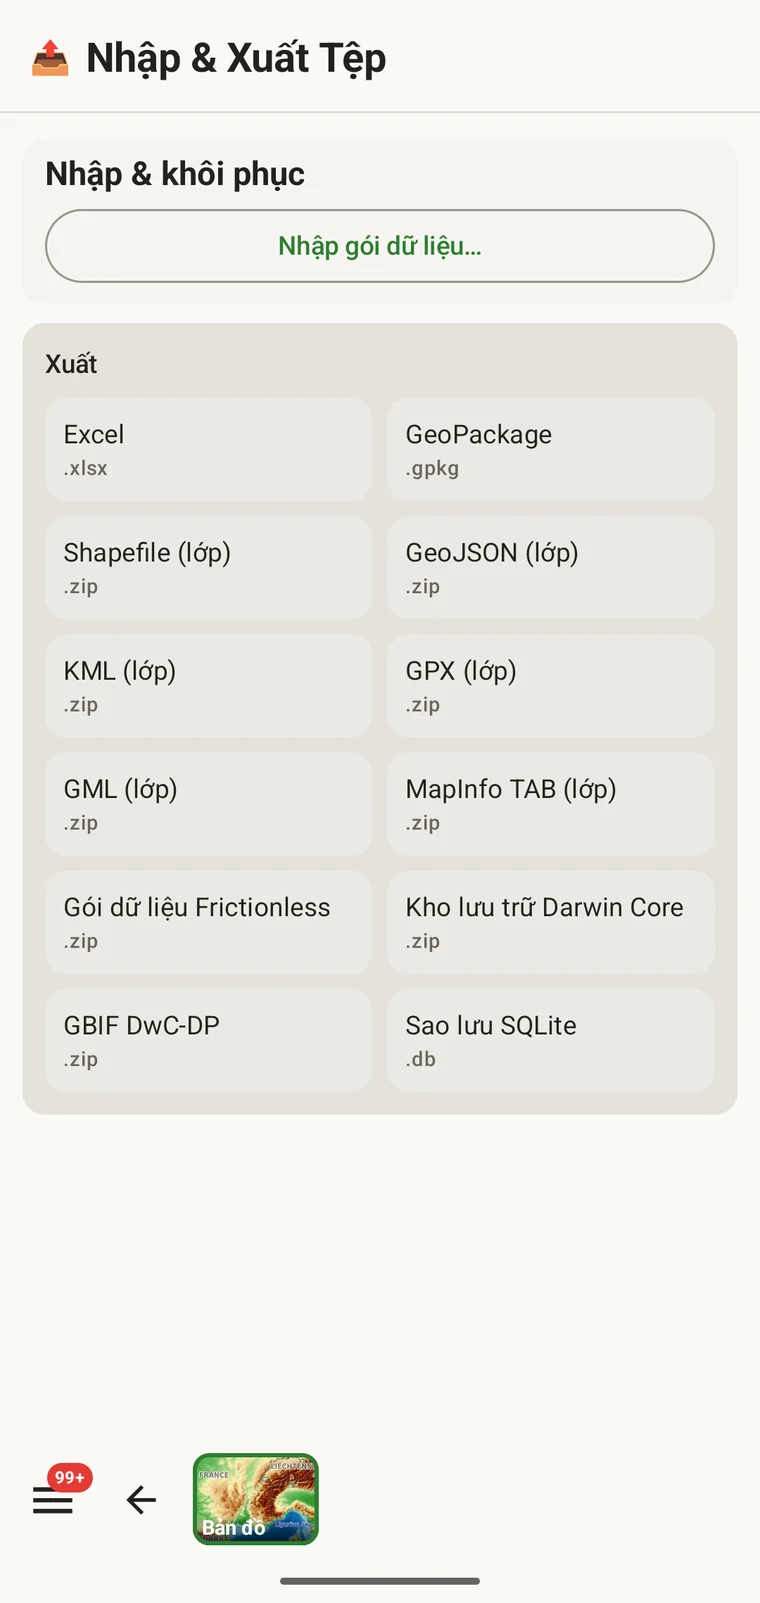
EarthCape exports to twelve formats. The right choice depends on your destination: Darwin Core Archive for a biodiversity repository, GeoPackage for a GIS, Excel for spreadsheet work. If several people are collecting data on the same survey, Google Drive lets you push each person's contribution to a shared folder and merge them — without an EarthCape account or a server (a Google account is needed for Drive). See Export formats and Google Drive collaboration for the full procedure.
- Open Menu → Admin → File Import & Export.
- Chọn định dạng phù hợp với đích đến. Mười hai định dạng được liệt kê trên màn hình xuất dữ liệu.
- Tap the format to generate the file. The filename is set automatically from the project name, its id and a timestamp.
- Chia sẻ tệp qua bảng chia sẻ của Android (Quick Share, Drive, Messages, Bluetooth, Gmail, hoặc bất kỳ đích nào khác đã cài đặt), hoặc gửi trực tiếp đến một đích đến đám mây đã cấu hình.
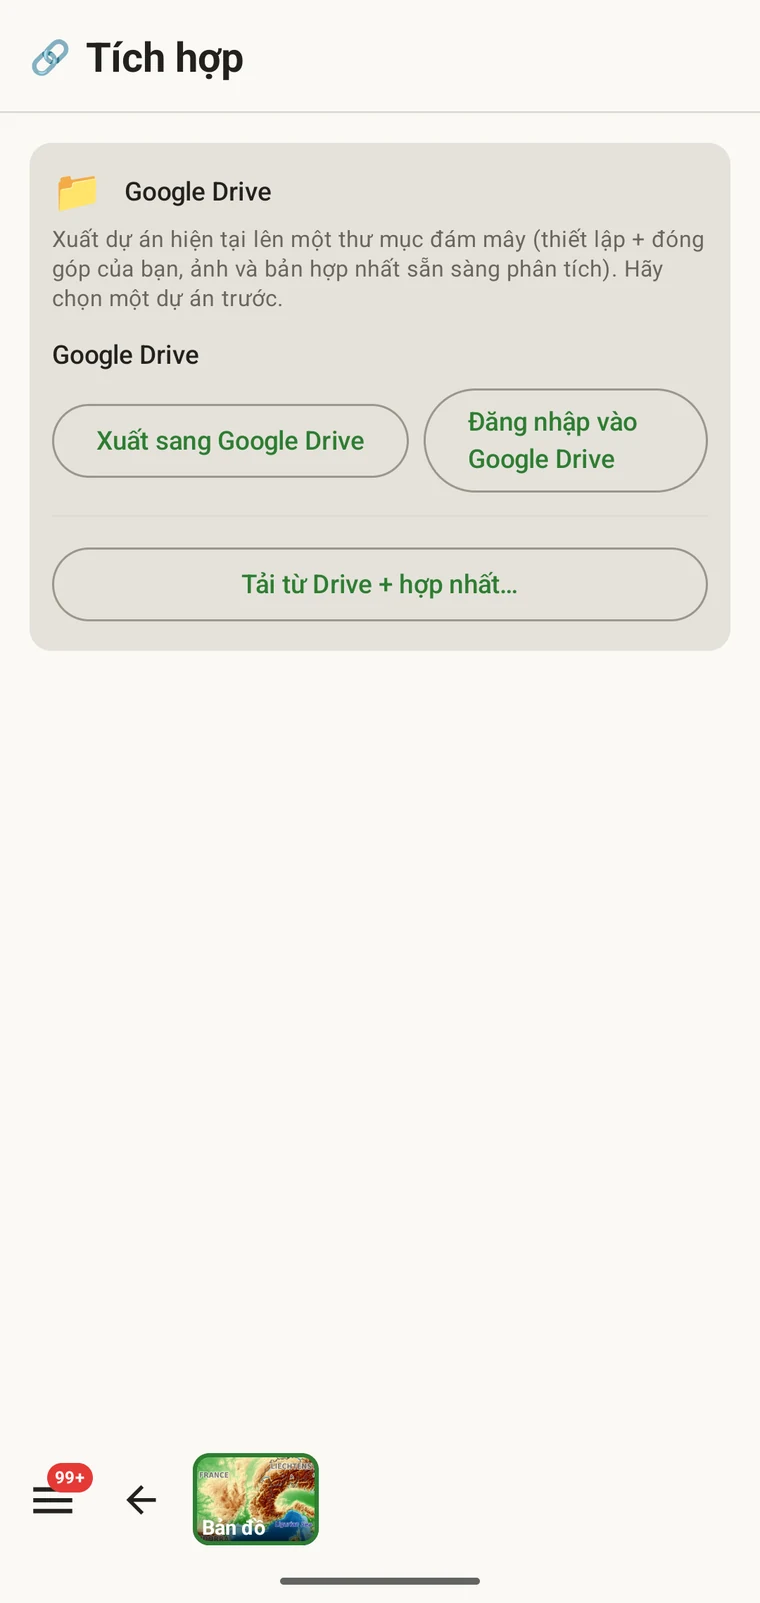
- Alternatively, open Menu → Admin → Integrations and tap Export to Google Drive to push the current project — setup, your contributions, photos and an analysis-ready merge — to a shared Drive folder.
Nên đọc tiếp những gì
Mỗi chủ đề nêu trong hướng dẫn này đều có một trang tham khảo riêng với đầy đủ chi tiết.
| Nếu bạn muốn… | Đi tới |
|---|---|
| Hiểu bản đồ nền hoạt động thế nào và chi phí ra sao | Bản đồ và máy chủ ô bản đồ |
| Quản lý các khu vực ngoại tuyến, kiểm tra dung lượng, xóa các bản tải cũ | Bản đồ ngoại tuyến |
| Dùng đo đạc trên bản đồ, bám theo đường mòn và tìm kiếm | Công cụ bản đồ |
| Tìm hiểu toàn bộ quy trình ghi chép, chuyến khảo sát và địa điểm | Ghi chép quan sát |
| Cấu hình bố cục biểu mẫu và thêm trường tùy chỉnh | Biểu mẫu và trường tùy chỉnh |
| Đọc hoặc viết giao thức khảo sát | Giao thức khảo sát |
| Lọc, sắp xếp và xem lại dữ liệu trên thiết bị | Duyệt dữ liệu của bạn |
| Chọn định dạng xuất phù hợp với đích đến | Định dạng xuất |
| Chia sẻ dữ liệu với đồng nghiệp qua Google Drive | Cộng tác qua Google Drive |